How to Paint Ceiling with Paint Sprayer: Tips and Tricks for a Perfect Finish

Do you ever stare up at your ceiling and think it needs a fresh coat of paint? Painting a ceiling can seem like a daunting task, but using a paint sprayer can make the process much easier and quicker. With its ability to evenly distribute paint, a paint sprayer can leave your ceiling looking like new in no time. Plus, with the right preparation and techniques, you can avoid common issues like drips and streaks.
In this post, we’ll dive into the ins and outs of painting your ceiling with a paint sprayer, from the best types of paint to use to how to properly prep your space. So, grab your paint sprayer and let’s get to work!
Preparing for the Job
Painting a ceiling with a paint sprayer can be a great way to achieve a smooth and even finish. However, it requires a bit of preparation beforehand. First, gather all the necessary equipment such as the paint sprayer itself, paint, drop cloths, a ladder, and safety gear like goggles and masks.
Remove any furniture from the room and cover the remaining surfaces with drop cloths to protect them from paint splatters. Then, clean the ceiling thoroughly to remove any dirt or debris that may interfere with the painting process. Next, tape off any areas that you don’t want to paint, such as light fixtures or walls.
Finally, practice using the paint sprayer on a scrap piece of material to ensure that you have the right technique and flow before starting on the actual ceiling. With these simple steps, you’ll be ready to tackle your ceiling painting project like a pro!
Gather necessary materials
Before getting started on any task, it is important to gather all the necessary materials and tools needed for the job. This requires proper planning and organization. First, take time to create a list of all the required materials and their quantities.
Double-check the list to ensure that you have included everything you need. Once you have your list, head to your local hardware store to acquire the necessary materials, and make sure to choose high-quality tools and equipment to ensure the best results. It’s also important to have a clear understanding of how the tools work and what safety precautions are required while using them.
Once you have gathered all the materials and tools you need, it’s time to get started, but not before ensuring that you have everything you need to complete the job to your satisfaction. By being well-prepared, you can save time, avoid mistakes, and ensure a successful outcome.

Clean and prep the ceiling
Before beginning any ceiling painting job, it’s essential to prepare the surface thoroughly. First things first, you need to clean and prep the ceiling. Start by removing any cobwebs, dust, or debris with a broom or vacuum cleaner.
Next, wipe the ceiling with a damp cloth to eliminate any residual dirt or grime. Suppose there are any stains or marks on the ceiling to conceal. In that case, use an appropriate cleaning solution to remove them entirely, or else they may peek through the paint coating.
Furthermore, any unsightly patches or cracks need to be filled and leveled using spackle or joint compound. You may also need to sand the patched areas gently and wipe them down to attain a seamless finish. These steps are essential because any impurities on the ceiling surface may impact the paint’s ability to adhere and result in a shoddy outcome.
In conclusion, to ensure that your ceiling painting job lasts longer and looks impeccable, preparing the surface in advance is essential. Clean the surface, address any damages, and make sure the ceiling is smooth and free of any dirt or impurities. Doing so will provide a solid foundation for the paint to stick, leaving you with flawless results that will last years to come.
Choosing the right Paint Sprayer
Painting a ceiling can be quite a daunting task, but with the right tools, you can make the job a lot easier. If you’re wondering how to paint a ceiling with a paint sprayer, there are a few things to consider. First, you’ll need to choose the right type of sprayer for the job.
Airless sprayers are typically the best choice for painting ceilings, as they can handle thicker materials and cover large areas quickly. Additionally, make sure you have enough paint to accomplish the job before you begin. You’ll also need to prepare the room by taping off any areas that you don’t want to get painted and covering the floor with drop cloths.
When it’s time to start painting, work in small sections and make sure the sprayer is held at the proper distance from the ceiling to ensure even coverage. With a little patience and practice, you can achieve a smooth, professional-looking finish on your ceiling.
Selecting the appropriate nozzle
Choosing the right paint sprayer can greatly improve the quality and speed of your painting project. One important factor to consider is selecting the appropriate nozzle. Nozzles come in a variety of sizes and shapes, and each one is designed for a specific type of paint and project.
A nozzle with a larger opening is ideal for thicker paint, such as latex, while a smaller one is better suited for thinner materials like stains and varnishes. Likewise, the shape of the nozzle can determine the spray pattern. A fan-shaped nozzle is ideal for painting large surfaces, while a round-shaped nozzle is better for detailed work.
So, before starting your project, take the time to research and choose the right nozzle for your paint sprayer, to ensure a professional finish.
Testing the sprayer on a sample surface
Choosing the right paint sprayer can be a daunting task, especially if you’re not familiar with the different types and features available. One of the most important factors to consider is the type of surface you’ll be painting. For example, if you’re painting a large area like a wall or fence, you’ll want a sprayer with a larger tip size and higher gallon per minute output.
However, if you’re working on intricate details like trim or furniture, a smaller, more precise sprayer would be more suitable. Another important consideration is the type of paint you’re using. Thicker paints like latex or enamel require more pressure and horsepower, so choosing a sprayer with a powerful motor is crucial.
Testing the sprayer on a sample surface is also recommended to ensure that it provides the required coverage and finish. By considering these factors and testing out different sprayers, you’ll be able to choose the right one for your specific project needs.
Painting the Ceiling with a Paint Sprayer
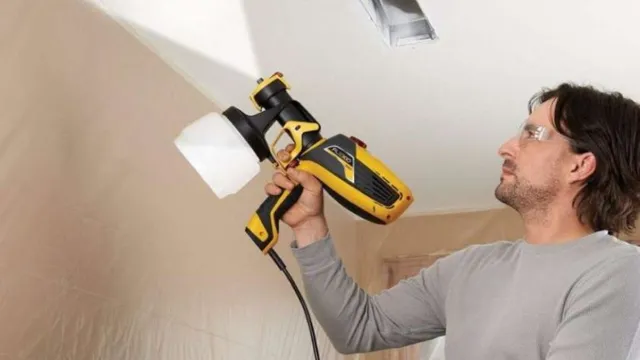
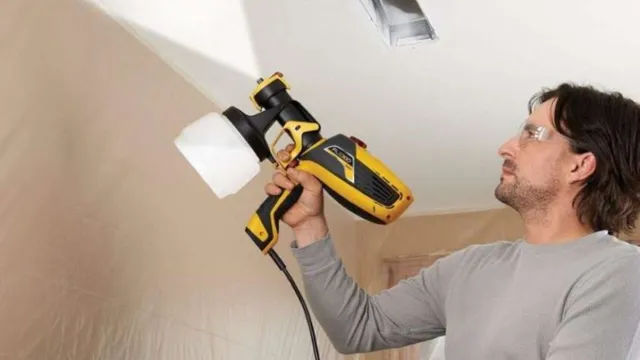
Are you tired of breaking your neck while painting a ceiling with a traditional brush or roller? Painting a ceiling can be a challenging task, but thanks to paint sprayers, it doesn’t have to be. If you’re wondering how to paint a ceiling with a paint sprayer, it’s easier than you might think. First, make sure you have the proper safety gear, like goggles, a mask, and a hat.
Next, prepare your workspace by covering the walls and floors with drop cloths and taping off any areas you don’t want to get spray paint on. Then, fill your paint sprayer with the desired paint, and test it out on a piece of cardboard to make sure the flow and spray pattern are to your liking. Finally, start spraying the ceiling with long, overlapping strokes, being sure to keep the sprayer level and at a consistent distance from the ceiling.
With a little practice, you’ll have a beautifully painted ceiling in no time, without all the hassle of traditional painting methods.
Using even strokes
When using a paint sprayer to paint a ceiling, it’s important to use even strokes. This ensures that the paint is evenly distributed and avoids drips and inconsistencies. Before starting, it’s helpful to practice on a piece of cardboard to get a feel for the sprayer and adjust the nozzle as needed.
Begin by applying the paint in one direction, moving back and forth in overlapping strokes. As you work your way across the ceiling, maintain a consistent distance from the surface to ensure an even coating. If you need to stop in the middle of the project, be sure to release the pressure from the sprayer before setting it down to prevent clogs.
Paint sprayers can make ceiling painting a quick and efficient task, but using even strokes is key to achieving a professional-looking finish.
Working in sections
Painting a ceiling can be a daunting task, especially if you don’t have the right tools for the job. One of the most efficient ways to get the job done quickly is to use a paint sprayer. When using a paint sprayer to paint the ceiling, it’s essential to work in sections.
Start by dividing the ceiling into manageable parts, and then focus on painting one section at a time. This will ensure that you can work carefully and have better control over the sprayer, leading to even coverage and a professional finish. Remember to overlap each section slightly to avoid any missed spots.
By painting in sections, you’ll also avoid getting tired too quickly and maintain your stamina throughout the job. As a result, you’ll complete the painting project more efficiently and effectively than ever before.
Applying multiple coats
When painting a ceiling with a paint sprayer, applying multiple coats is crucial to achieving a smooth and even finish. While a single coat may seem sufficient, it’s important to remember that paint sprayed from a sprayer is often thinner than paint applied with a brush or roller. Therefore, multiple coats are necessary to ensure that the paint adequately covers the surface and achieves the desired opacity.
Additionally, applying multiple coats also helps to reduce the likelihood of drips or uneven application. When applying each coat, make sure to allow adequate drying time in between layers before adding more paint. This will ensure that each coat properly adheres to the ceiling and doesn’t disturb the layer beneath it.
Overall, don’t rush the process and take the time to apply multiple coats for a flawless finish.
Clean Up and Maintenance
Painting a ceiling with a paint sprayer can be a real time-saver and produce professional-looking results. But before you start spraying, make sure to take the necessary precautions and properly prepare the area. Cover your furniture and flooring with plastic sheets, and remove any light fixtures or ceiling fans.
You should also clean the ceiling thoroughly to remove any dirt or debris that could affect the quality of the paint job. Once you are ready to start spraying, begin with a test area to check the consistency of the paint and adjust the nozzle as needed. Apply the paint in even strokes, starting from the corner of the ceiling and working your way out.
With the proper technique, you can achieve a beautiful, smooth finish in no time. After you finish painting, make sure to clean your equipment thoroughly and remove any paint that may have splattered onto surfaces that were not covered. With these tips, you can confidently tackle your ceiling painting project with a paint sprayer.
Cleaning the paint sprayer after use
Cleaning a paint sprayer after use is essential to keep it working properly and extend its lifespan. First, make sure to unplug the machine and release any remaining pressure in the hose before starting the cleaning process. Then, remove the tip and filter, and soak them in a solution of warm water and cleaning solution.
Use a brush to remove any excess paint from the inside of the sprayer, and run water through it until it runs clear. If the machine came with specific cleaning instructions, follow them carefully to avoid damaging any of the parts. After cleaning, reassemble the sprayer and store it in a dry and clean place.
Proper cleaning and maintenance will prevent clogs, improve the performance of your sprayer, and save you time and money in the long run. Don’t skip cleaning your paint sprayer after every use and keep it in tip-top shape.
Storing the paint sprayer correctly
When it comes to storing your paint sprayer, thorough clean up and maintenance are essential. Before storing your sprayer, make sure to clean it thoroughly, following the manufacturer’s instructions. Remove any remaining paint, flush the pump with water or solvent, and clean all the parts completely.
Failure to do so can cause the paint to dry and clog the sprayer’s nozzle, resulting in costly repairs and replacements. After cleaning, dry all the parts and store them in a clean, dry place, away from direct sunlight. Regular maintenance is equally important to ensure your sprayer operates in top condition every time.
Check your sprayer’s filters, hoses, and nozzles for wear or damage regularly. Replace any worn-out parts, and store all parts using the proper storage procedures. Storing your sprayer correctly ensures its longevity, which means fewer replacements and more painting projects.
By following these tips, you’ll be sure to have a smoothly functioning paint sprayer every time you need it.
Conclusion
When it comes to painting a ceiling with a paint sprayer, it may seem daunting at first, but with the right tools and techniques, it can be a breeze. Remember to prep the area properly, wear protective gear, and use a high-quality paint sprayer to ensure even coverage. Don’t forget to start with a small test area to get comfortable with the sprayer, and don’t be afraid to make multiple passes for a flawless finish.
With these tips in mind, you’ll be able to achieve a beautifully painted ceiling that’s sure to impress your guests and make you feel like a DIY pro!”
FAQs
What is a paint sprayer and why should I use it for painting my ceiling?
A paint sprayer is a device that atomizes paint into a fine mist, giving a smooth and even finish on your ceiling. It saves time and effort compared to using a brush or roller.
How do I prepare my ceiling before using a paint sprayer?
Clean the ceiling thoroughly with a degreaser to remove any dirt or grease. Repair any cracks or holes with spackle and sand the surface smooth. Cover the surrounding furniture and flooring and use masking tape on the edges of the ceiling to avoid overspray.
What type of paint should I use with a paint sprayer for my ceiling?
Use latex paint with a thin consistency and add water as needed to achieve the desired viscosity. Avoid using oil-based paint as it may clog the sprayer.
How do I adjust the settings on my paint sprayer for my ceiling?
Adjust the nozzle and spray pattern to achieve a vertical or horizontal direction for your ceiling and adjust the pressure to ensure proper atomization of the paint. Always test spray on a surface before starting on your ceiling.
How do I maintain my paint sprayer after painting my ceiling?
Clean your paint sprayer thoroughly with warm water and soap after each use. Disassemble the components and soak in the cleaning solution, then rinse and dry before storing. Lubricate the moving parts and check for any wear and tear before the next use.
Can I use a paint sprayer to paint textured ceilings?
Yes, you can use a paint sprayer to apply paint on textured ceilings, but you may need to use a different nozzle and spray pattern to ensure proper coverage.
How long does it take to paint a ceiling with a paint sprayer?
The time it takes to paint a ceiling with a paint sprayer depends on the size of the room and the complexity of the ceiling’s design. On average, it takes around 30 minutes to 1 hour to paint one standard-sized room’s ceiling with a paint sprayer.


