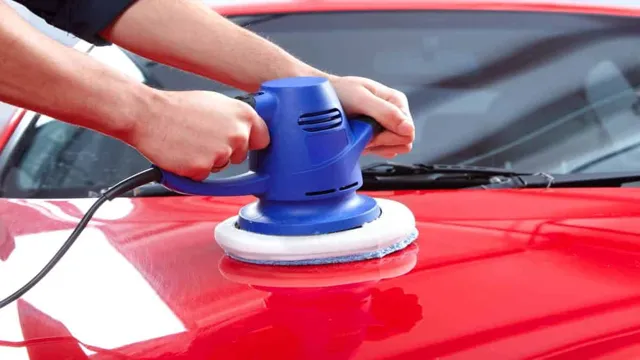
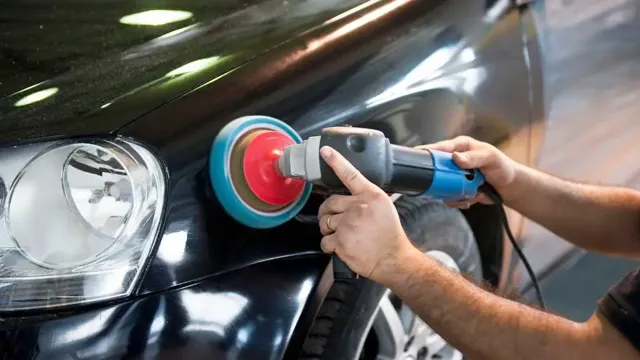
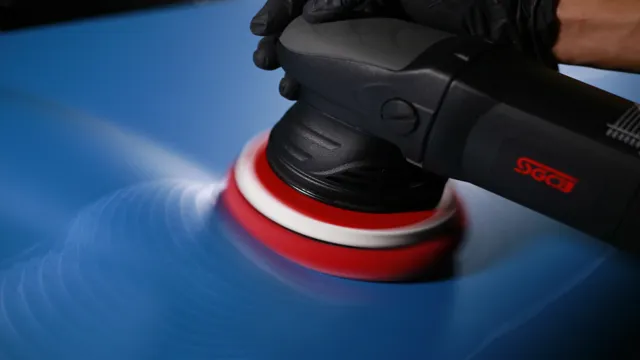
How to Polish Your Car with a Rotary Polisher: Tips and Tricks for a Flawless Finish

Do you want to give your car a showroom shine? Polishing your car with a rotary polisher can be a game-changer. This tool offers a quick and effective way of removing swirls, scratches, and other imperfections from your vehicle’s paint. However, you need to know how to use it properly to avoid damaging the paint.
Polishing your car with a rotary polisher requires some practice, but once you get the hang of it, you can achieve fantastic results. With this machine, you can remove deep scratches and oxidation that cannot be eliminated with a regular hand polish. It saves time and effort, giving your car a glossy finish that will turn heads on the road.
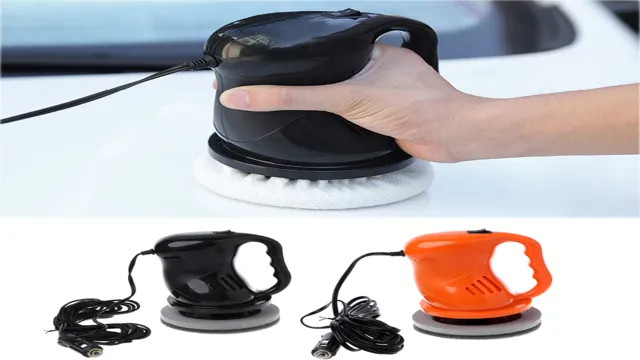
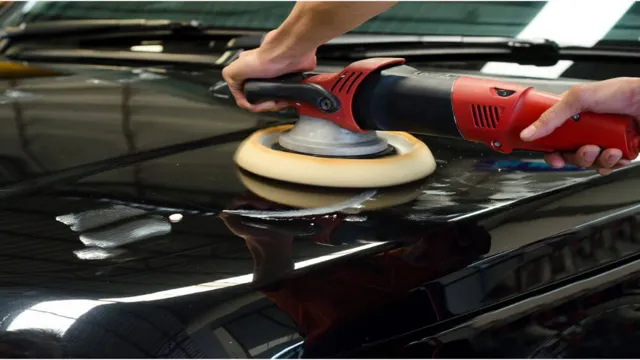
When it comes to choosing a rotary polisher, you need to consider the power of the motor, the weight of the machine, and the size of the pad. These factors determine how much paint correction you can achieve with each pass and how easy it is to maneuver around the vehicle. Additionally, you need to select the right polish for your car’s needs and use the appropriate pad for the job.
Overall, polishing your car with a rotary polisher can be a gratifying experience. It is a cost-effective way of restoring the shine to your paintwork and enhancing your car’s overall appearance. However, it requires patience, technique, and attention to detail.
If you are passionate about maintaining your vehicle’s beauty, this is a skill worth mastering.
Prepare Your Car for Polishing
Preparing your car before polishing is an essential step in the process of achieving a polished finish that’ll have your car looking brand new. Start by examining the condition of your car’s paint, checking for scratches, swirls, or other imperfections. Next, ensure that your car is clean and dry before beginning the polishing process since dirt and debris can cause damage to the paintwork or lead to an uneven finish.
It’s also critical to choose the right polish product since some types are designed for minor polishing while others are better suited for deeper scratches or more significant blemishes. Once you’ve selected your polish, it’s time to choose the best rotary polisher, like a dual-action, for the job. Remember to use a slow speed setting to avoid damaging the paint and apply the polish in small sections, working from one end to the other.
Finally, make sure you clean the polish residue from your car’s surface thoroughly and check for any missed areas. By taking these steps, you’ll be well on your way to a shining, spotless car in no time!
Wash and Dry Your Car
When it comes to preparing your car for polishing, the first step is to wash and dry it thoroughly. This may seem like a simple task, but it’s actually quite important as any dirt, grime or debris on the car’s surface can affect the polishing process and result in an uneven finish. Start by rinsing the car with a hose to remove any loose dirt, then use a car-specific wash soap and a mitt to gently clean the surface.
Be sure to work in sections and rinse each section thoroughly before moving onto the next. Once you’ve finished washing, it’s important to dry the car completely, as excess water can leave water spots or streaks. You can use a microfiber towel or chamois to gently dry the surface, being sure to work in a specific direction to avoid creating swirl marks.
By taking the time to properly wash and dry your car, you’ll be setting the foundation for a smooth and successful polishing process.

Apply Paint Cleaner or Polish Remover
When it comes to polishing your car, it’s important to start with a clean slate. This means removing any old paint or polish residue that may have built up over time. The first step in this process is to apply a paint cleaner or polish remover.
These products work by breaking down the old paint or polish, making it easier to remove with a cloth or sponge. Before applying the cleaner or remover, be sure to read the instructions carefully and follow them closely. It’s important to use the right amount of product and to work in small sections to avoid drying out the surface.
Once you’ve applied the cleaner or remover, simply wipe away the residue with a clean cloth. This will leave your car’s surface clean and ready for polishing. By taking the time to properly prepare your car for polishing, you’ll ensure a smooth and even finish that will last for weeks to come.
So why not give it a try today and see the difference for yourself?
Tape Off Sensitive Areas
Preparing your car for polishing is an important step in achieving the perfect finish. One of the most critical aspects of the preparation process is the careful taping off of sensitive areas. These areas include rubber trim, plastic parts, and delicate chrome pieces that can be easily damaged during the polishing process.
It is imperative to use high-quality painter’s tape to cover up these areas, ensuring that no polishing agents or other chemicals come in contact with them. By taking the time to tape off these sensitive areas, you’ll provide peace of mind and ensure that your car looks as pristine as possible once you’ve finished polishing. So, take the extra time to prepare your car properly by taping off these delicate parts and enjoy the rewards of a perfectly polished car.
Choose the Right Polishing Pad and Compound
If you’re wondering how to polish your car with a rotary polisher, you’ve come to the right place. One key aspect of achieving a flawless finish is using the right polishing pad and compound for your vehicle’s specific needs. First, select a pad that matches the level of correction your car requires.
For severe defects, use a cutting pad. For moderate defects, a polishing pad should suffice. For minor defects or general maintenance, opt for a finishing pad.
Next, choose a compound that complements your pad’s level of aggressiveness. Cutting compounds are designed for cutting pads, while polishing compounds pair well with polishing and finishing pads. Additionally, it’s important to consider the type of paint on your car.
Hard, clear coats require more aggressive pads and compounds, while soft, delicate finishes need a gentler touch. By taking these factors into account and pairing the right pad and compound, you’ll be well on your way to achieving a showroom-worthy shine.
Select a Polishing Pad
When it comes to polishing your car or any other vehicle, it’s essential to choose the right polishing pad and compound. The type of pad you use will depend on the type and level of correction needed for your paint. There are different types of pads, such as foam, wool, and microfiber, which are ideal for different paint conditions.
For instance, foam pads are perfect for mild to moderate paint correction, while wool pads are great for more severe defects. Additionally, microfiber pads are best used for applying finishing polishes. Moreover, it’s crucial to pair the right pad with the correct compound to achieve the desired results.
For example, heavy cutting compounds should be utilized with wool pads, while finishing polishes should be paired with microfiber pads. By selecting the right polishing pad and compound, you are sure to get the optimal results for your vehicle and achieve the perfect finish.
Choose a Polishing Compound
When it comes to polishing your car or other vehicle, selecting the right polishing compound is crucial. The compound is what removes the scratches and imperfections from the surface of your vehicle, giving it a smooth and shiny finish. But how do you choose the right one? Well, it depends on the severity of the scratches and the type of paint your vehicle has.
If you have minor scratches, a light polishing compound should suffice. However, a moderate or heavy compound might be required for deeper scratches. It’s also essential to choose a compound that’s compatible with your car’s paint, as some compounds may damage certain types of finishes.
Along with the compound, you’ll need to select the right pad. A foam pad is ideal for light to medium polishing, while a wool pad is better for heavier polishing. By selecting the right combination of polishing compound and pad, you can achieve that showroom shine for your car or vehicle.
Polish Your Car with the Rotary Polisher
If you’re looking to give your car a professional-level shine, using a rotary polisher can help you achieve just that. It may seem daunting at first, but with a little practice, you can master the technique and transform your vehicle. Start by thoroughly washing and drying your car to ensure there is no debris on the surface.
Next, apply a quarter-sized amount of polish to the pad of the rotary polisher and work it into the paint at a low speed. Gradually increase the speed, working in small sections, until you achieve your desired shine. Be sure to clean the pad frequently throughout the process to remove any buildup and prevent swirling.
And remember to take breaks to avoid overheating the paint. With a little patience and practice, you can polish your car to a high shine and turn heads on the road.
Spread the Compound on the Pad
When it comes to polishing your car with a rotary polisher, it’s crucial to spread the compound on the pad properly. The compound is what gives your car that shiny, clean finish. Start by putting a dime-sized amount of compound onto the pad.
Then, spread it evenly across the pad, making sure to cover the entire surface area. This will ensure that the compound is distributed evenly on your car and will produce a uniform shine. It’s essential to avoid using too much compound as it can lead to swirl marks on the paint, making your car look dull and lifeless.
By spreading the compound evenly on the pad, you’ll also avoid the risk of putting too much pressure on one particular area, which can lead to burning your paint. So remember, spread that compound carefully, and your car will look like new in no time!
Apply the Pad to the Car Surface
When it comes to polishing your car with a rotary polisher, applying the pad to the car surface is crucial. Before beginning, make sure the pad is centered on the polisher’s backing plate, ensuring maximum stability and balance. Once the pad is in position, apply polish to the pad, spreading it evenly across the surface.
Then, place the polisher at a low speed on the car’s surface before turning it on. The first stage of polishing requires you to work the pad in one section at a time, overlapping each pass about 50% for even coverage. As you work your way around the vehicle, be sure to wipe the polished section with a microfiber towel to remove any residue before moving on to the next area.
It’s worth noting that you should always move in a circular motion with your polisher, while applying the right amount of pressure for the best results. Overall, with a bit of technique and patience, you’ll soon be able to achieve that showroom-ready finish on your car’s surface that everyone dreams of.
Start the Rotary Polisher on the Lowest Setting
When it comes to polishing your car with a rotary polisher, one of the most important things to remember is to always start on the lowest setting. This will help you avoid any potential damage to your vehicle’s paintwork, as the rotary polisher can be quite powerful and abrasive if used incorrectly. Once you’ve attached your preferred polishing pad to the polisher, apply a small amount of polishing compound to the pad and then switch on the machine.
From there, gradually increase the speed until you reach a comfortable level that allows you to effectively remove any swirl marks or scratches from your car’s paint. Remember to always keep the pad and the surface you’re working on lubricated, and take breaks if you need to – polishing can be a time-consuming process, but it’s well worth it in the end when you see the final result. Happy polishing!
Work in Small Sections
When using a rotary polisher to polish your car, it’s important to work in small sections. This will ensure that each section is getting the attention it needs and that you’re not missing any spots. One of the biggest mistakes that people make when using a rotary polisher is trying to do too much at once.
Not only does this make the process more difficult, but it can also lead to uneven results. By working in small sections, you’ll be able to focus on each area individually and make sure that it’s getting the proper amount of polish. Plus, this will also help you avoid fatigue and keep your energy levels up throughout the polishing process.
So take your time, work in small sections, and you’ll be amazed at how great your car looks when you’re done!
Finishing Touches
If you want to achieve a high-gloss finish on your car, then polishing with a rotary polisher is a great option. To start, make sure you have the right equipment, including a rotary polisher, polishing pad, and compound. Start with a clean and dry car and apply the compound to the pad.
Turn on the polisher and work in small sections, applying firm pressure and moving in a back-and-forth motion. Keep the pad lubricated with the compound and avoid putting too much pressure or creating too much heat. Once you have finished working on a section, wipe away any excess compound with a microfiber towel.
Repeat this process until you have worked on the entire car. Remember that polishing with a rotary polisher can be a bit challenging, so it is important to work carefully and methodically to prevent any damage to the paint. With some patience and practice, you can achieve a beautiful and glossy finish on your car.
Remove Excess Compound Residue
When it comes to the final touches of polishing a surface with a compound, removing excess residue is crucial to achieving a flawless finish. Leaving compound residue behind not only creates a messy appearance but it can also attract dust and dirt, ruining your hard work. To remove excess compound residue, use a soft, clean microfiber towel and gently wipe the surface in a circular motion.
Be sure to pay extra attention to any crevices or corners where residue may have settled. Once you have removed all excess residue, step back and admire your perfectly polished surface. This simple step will make all the difference in achieving a professional-quality finish.
Wax Your Car for Added Shine and Protection
Waxing your car is one of the best ways to achieve that ultimate shine and protection that every car enthusiast desires. Not only does it make your vehicle look great, but it also helps to protect your car’s paint from damage caused by dirt, grime, and weather conditions. Using wax on your car provides a barrier that keeps harmful elements from penetrating the paint and causing permanent damage.
It’s crucial to select the right wax for your car based on the type of paint, age of the vehicle, and the amount of time and effort you are willing to put in. Regular waxing will help maintain your car’s finish, making it easier to clean and presenting a more luxurious appearance. Investing in a good-quality waxing product that contains natural ingredients will ensure that your car retains its shine for longer, and the protective layer will give you peace of mind that your car’s paint is well looked after.
So, don’t hesitate to add this finishing touch to your car’ s detailing routine, and enjoy the compliments that will come your way!
Final Thoughts
In conclusion, polishing your car with a rotary polisher can be a daunting task, but with the right tools and techniques, it can be done easily and effectively. Always start with a clean surface and be sure to choose the right polishing compound for your needs. It’s important to work in sections and always use a consistent speed and pressure while working with the polisher.
Make sure to take breaks to check your progress and adjust your technique as needed. With practice and patience, you can achieve a high level of shine and gloss on your car’s surface. Don’t be afraid to experiment with different products and tools to find what works best for you.
Overall, polishing your car with a rotary polisher can be a rewarding experience that leaves your vehicle looking its best. So, grab your polisher and get started on giving your car the shine it deserves!
Conclusion
In conclusion, polishing your car with a rotary polisher is like giving it a spa day. Just like how a massage can leave you feeling refreshed and rejuvenated, using a rotary polisher can leave your car’s paint looking shiny and new. With patience, practice, and a little bit of elbow grease, you too can achieve a mirror-like finish on your beloved ride.
So go ahead and give your car the ultimate pampering session – it deserves it!”
FAQs
What is a rotary polisher?
A rotary polisher is a power tool used for polishing, buffing, and sanding surfaces.
Can a rotary polisher damage car paint?
Yes, if not used properly, a rotary polisher can burn through paint, leaving permanent damage.
How do I prepare my car before using a rotary polisher?
You should wash and dry your car thoroughly before using a rotary polisher. It’s also recommended to use a clay bar to remove any impurities and contaminants from the paint surface.
What kind of polishing pads should I use with a rotary polisher?
It depends on the level of correction needed. For heavy correction, use a cutting pad. For lighter correction, use a polishing pad. For final polishing, use a finishing pad.
How do I avoid swirl marks when using a rotary polisher?
Use a clean polishing pad, work on a small section at a time, and do not exert too much pressure on the polisher.
How often should I maintain my rotary polisher?
Regularly clean the pads and the polisher itself after use. Check for any damage and replace any worn or broken parts.
Can I use a rotary polisher on a new car?
Yes, but it’s recommended to wait until after the car’s first paint correction detail, which typically happens after a year of owning the car. Using a rotary polisher on new paint can cause damage and void the car’s warranty.

