How to Put a Chain on a Pole Saw: A Step-by-Step Guide for Beginners
Have you recently purchased a pole saw, but don’t know how to put the chain on it? Don’t worry, you’re not alone! Putting a chain on a pole saw can seem like a daunting task, but with a little bit of guidance, it can be done quickly and easily. In this blog post, we’ll guide you through the step-by-step process of putting a chain on a pole saw. First, it’s important to make sure you have the right size chain for your pole saw.
Check the user manual or the manufacturer’s website to find out the recommended chain size for your specific model. Once you’ve confirmed the correct size, it’s time to get started. Next, you’ll want to position your pole saw in a secure and stable location, ideally on a flat surface.
This will make the process much easier and safer. Then, locate the chain tension adjustment screw and loosen it. This will allow you to easily fit the chain onto the bar of the pole saw.
Now it’s time to place the chain onto the bar. Start by positioning the chain around the bar and aligning the teeth with the sprocket. Make sure the teeth are facing in the correct direction.
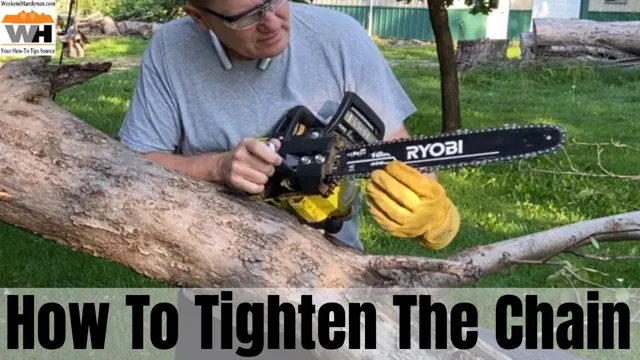
Once the chain is in place, use your fingers to carefully pull it along the bar until it’s properly seated. Now, you’ll need to adjust the chain tension by tightening the adjustment screw. Be careful not to over-tighten the chain, as this can cause damage to the bar and chain.
A good rule of thumb is to make sure the chain is snug against the bar but can still be pulled along it with some resistance. Finally, it’s a good idea to oil your chain before using the pole saw. This will help to ensure smooth operation and prevent excess wear and tear.
Safety First
Putting a chain on a pole saw might seem daunting at first, but with the right steps, it can be done safely and easily. First and foremost, never attempt to replace the chain while the saw is still plugged in or running. Always make sure the saw is powered off and unplugged before proceeding.
Next, evaluate the condition of the old chain and any related components. If the chain is severely worn, rusty, or damaged in any way, it’s important to replace it with a new one that’s the correct size and style for your specific saw model. Using the correct tools, carefully remove the old chain and replace it with the new one, ensuring it’s threaded through the correct points and properly tightened.
It’s important to follow the instructions for your specific saw model as well as any safety warnings or precautions listed in the manual. Once the new chain is securely in place, it’s a good idea to inspect the saw for any other potential issues or necessary maintenance. This can include checking the bar for wear and making sure the chain tension is set correctly.
Overall, putting a chain on a pole saw requires attention to detail and a commitment to safety. By following the proper steps and taking the time to inspect and evaluate each component, you can ensure your saw is in top condition and ready for use.
Inspect Your Saw
When it comes to using power tools like saws, it’s crucial to put safety first. Before using any saw, take the time to inspect it thoroughly. Check for any loose or damaged parts, as well as any signs of wear and tear.
Make sure the blade is sharp and secure. Wear appropriate protective gear, such as safety glasses and gloves, and make sure the saw is placed on a stable surface. Don’t rush the job, and always keep your hands away from the blade.
Remember, accidents can happen in the blink of an eye, so don’t take any chances with your safety or the safety of others. By following these simple precautions and paying attention to detail, you can minimize the risk of injury and enjoy using your saw with peace of mind.

Prepare Your Work Area
When it comes to preparing your work area, safety should always be your top priority. Before beginning any task, it’s important to take the necessary precautions to ensure that you and those around you will not be at risk of injury or harm. For instance, if you’re using power tools or machinery, it’s essential that you wear appropriate personal protective equipment, such as gloves, safety glasses, and earplugs.
Additionally, you should always make sure that your work area is well-lit and free of clutter or obstructions that could cause a tripping hazard. Remember, accidents can happen even to the most experienced worker, so always take the necessary steps to protect yourself and others. By doing so, you’ll be able to work efficiently and effectively without having to worry about any unnecessary mishaps.
Remove the Old Chain
Putting a new chain on your pole saw can be a bit tricky if you don’t know what you are doing. The first step is to remove the old chain. To do this, you will need to loosen the tension screw that is located on the side of the saw blade.
Once the tension is released, the chain should remove easily. Take a few moments to inspect the chain for any damage or wear. If you notice any signs of wear, it is best to replace it with a new chain.
Once you have removed the old chain, set it aside and prepare to install the new one. Remember to work carefully and slowly to ensure that you don’t damage the saw blade or yourself while working on the saw. Using these tips, you will be able to safely remove the old chain and get ready to put the new one on your pole saw.
Loosen the Chain Tension
When it’s time to adjust your motorcycle chain tension, you need to start by removing the old chain. Loosening the chain and removing it is necessary before you can install a new one. Begin by finding the master link, which usually has a clip or a pin that holds it in place.
Remove the clip or pin, and then pull the master link apart to separate the chain. Make sure to store the old chain carefully, as it can still be useful for future repairs. Removing the old chain may seem like a straightforward task, but it’s crucial to do it properly to avoid damage and ensure the new chain fits correctly.
With the old chain out, it’s time to move onto the next step in adjusting your motorcycle chain tension.
Remove the Chain
Removing the old chain from your bike can be a daunting task, but with a little bit of patience and know-how, it can be a breeze. First, you’ll need the appropriate tools, such as a chain tool, pliers, and a chain whip. Begin by shifting your bike into the smallest chainring and rear cassette cog to relieve tension on the chain.
Use the chain tool to remove the link that connects the old chain to your bike. Next, insert the new chain into the derailleur and thread it through the cassette and chainring. Finally, use the chain tool to connect the new chain to your bike.
It’s essential to make sure the chain is the correct length before connecting it to your bike. You can achieve this by counting the links on the old chain and matching them to the new one. Removing an old chain is just one step in maintaining a well-functioning bike that will give you many enjoyable rides.
Don’t forget to regularly check and replace your bike’s chain to ensure maximum performance, longevity, and safety.
Get the Right Replacement Chain
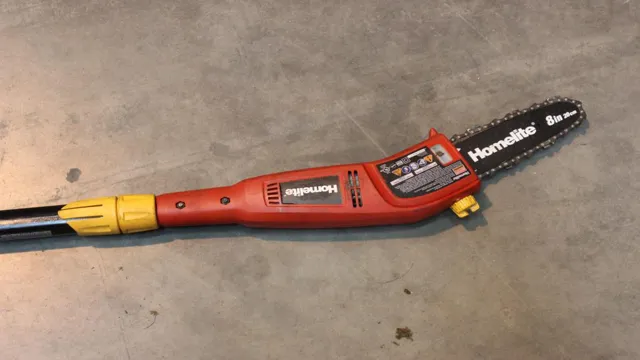
Putting a new chain on a pole saw can seem like a daunting task, but with the right steps, it can be done easily and quickly. The first thing you need to do is get the right replacement chain for your specific pole saw. The chain should match the length, pitch, and gauge of the original chain, which can usually be found in the saw’s manual or on the old chain itself.
Once you have the correct replacement chain, you’ll need to remove the old chain by loosening the tensioner and removing the bar cover. Then, slip the new chain over the bar and align the teeth in the right direction. Finally, reattach the bar cover and adjust the tension until the chain is snug on the bar but not too tight.
With these few simple steps, you can easily put a new chain on your pole saw and get back to tackling those yard work projects.
Install the Chain
If you need to change the chain on your pole saw, don’t worry! It’s actually a pretty simple process. First, make sure your saw is turned off and unplugged. Then, locate the nut that holds the bar and chain in place.
Loosen the nut and remove the old chain. Make sure to inspect the bar for any damages and clean it thoroughly before you put the new chain on. Once you’re ready, place the new chain onto the bar, making sure the teeth are facing the right direction.
Align the chainsaw’s drive sprocket with the chain and then thread the chain around the bar. Once the chain is properly in place, tighten the nut to hold the bar and chain securely in place. Finally, test your saw to make sure the chain is running correctly.
With these simple steps, you’ll be able to put a new chain on your pole saw and get back to work in no time!
Put the Chain on the Bar
Installing the chain on your bar can seem like a daunting task, but it is a necessary step in getting your chainsaw up and running. First, make sure your chainsaw is turned off and the chain brake is engaged. Then, carefully place the chain on the bar, ensuring that the teeth on the chain are facing towards the front of the chainsaw.
Next, adjust the tension on the chain by loosening the nuts on the side of the bar and pulling the bar down to tighten the chain. Once the tension is correct, tighten the nuts back up and release the chain brake. Now your chainsaw is ready to go! Remember to regularly check the chain tension and sharpen the chain as needed to ensure optimal performance.
With these steps, you can confidently put the chain on the bar and get to work.
Adjust Chain Tension
Installing the chain is a crucial part of adjusting the chain tension on your bike. To begin, you’ll want to ensure the rear wheel is properly aligned and centered within the dropout. Next, thread your chain onto the rear cassette and through the derailleur.
It’s important to ensure the chain is oriented properly, with the outer plates facing out and the pins facing inwards. Once the chain is in place, place the wheel into the dropout and pull the wheel back to create tension on the chain. Finally, tighten the wheel nuts or quick release skewer to secure the wheel in place.
With the chain properly installed and tensioned, you’ll be ready to ride with optimal power transfer and smooth shifting.
Maintenance Tips
If you own a pole saw, it’s important to know how to properly maintain it so that you can get the best performance possible. One key aspect of maintenance is replacing the saw’s chain when it becomes dull or damaged. Learning how to put a chain on a pole saw can seem daunting at first, but with the right approach, it’s actually fairly simple.
First, make sure you have the right size and type of chain for your saw. Then, loosen the tensioning screw on the guide bar and remove the old chain. Next, place the new chain onto the bar, making sure the teeth are facing in the right direction.
Finally, tighten the tensioning screw until the chain is snug against the bar, but not too tight. With these steps, you can keep your pole saw running smoothly and cutting efficiently for years to come.
Regular Checkups
Regular checkups are crucial for the maintenance of any machine, and the same goes for your body. Just like your car needs regular servicing to continue running smoothly, your body needs regular checkups to ensure that it’s functioning properly. Regular checkups involve a physical examination, blood tests, and other screenings that can detect any potential health problems before they become serious.
By getting regular checkups, you can stay on top of your health and take preventive measures to avoid larger problems down the road. Plus, having a regular doctor who knows your medical history and can track changes in your health over time is incredibly valuable. So, make sure to schedule those regular checkups and prioritize your health.
Your body will thank you for it.
Chain Oil Maintenance
One of the most crucial steps to ensuring a longer lifespan for your chainsaw is regular chain oil maintenance. Over time, the oil can become dirty or develop debris, which can reduce its effectiveness in lubricating the chain. This can result in friction and wear, which can cause damage to the chain, sprocket, and even engine.
To avoid this, it’s recommended that you check your chain oil levels before every use and top up as needed. When pouring in new oil, be sure to use a high-quality product that is suited for chainsaws and follow the manufacturer’s instructions. Additionally, make sure to clean the oil tank and replace the filter periodically to prevent clogs and contamination.
By taking care of your chainsaw’s chain oil maintenance, you’ll not only extend the life of your tool, but ensure its optimal performance and safety.
Conclusion
Putting a chain on a pole saw is a lot like getting dressed in the morning – it may seem daunting at first, but with a little bit of practice and patience, you’ll be a pro in no time. Just remember to always wear protective gear, follow the manufacturer’s instructions, and take breaks when needed (just like getting dressed sometimes requires a coffee break). And who knows, maybe one day you’ll be able to put on a chain blindfolded – now that’s a skill worth boasting about at the next family gathering!”
FAQs
What tools do I need to put a chain on a pole saw?
To put a chain on a pole saw, you will need the following tools:
– A wrench or socket set
– A flat file
– A round file
– A chain breaker tool
How often should I replace the chain on my pole saw?
It is recommended to replace the chain on your pole saw every 2-3 years or when it becomes dull or damaged.
How do I know if my pole saw chain is too loose?
To determine if your pole saw chain is too loose, lift the chain off the guide bar at the middle of the bar. If the space between the chain and guide bar is greater than 1/4 inch, the chain is too loose.
How do I adjust the tension on my pole saw chain?
To adjust the tension on your pole saw chain, use a wrench or socket set to loosen the nuts on the bar cover. Then use a screwdriver to turn the tensioning screw clockwise to tighten the chain or counterclockwise to loosen the chain.
Can I use any type of chain on my pole saw?
It is important to use the correct type of chain for your specific pole saw model. Refer to your owner’s manual or contact the manufacturer for the recommended chain type.
How do I sharpen the chain on my pole saw?
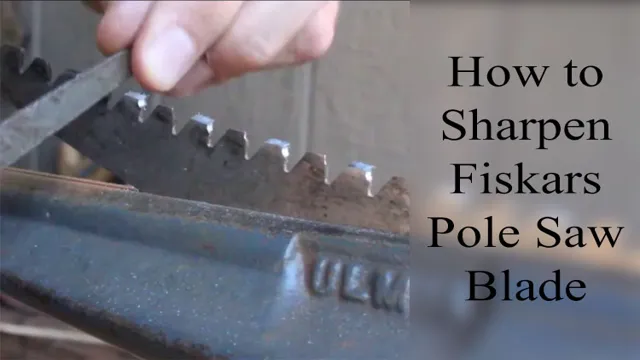
Use a flat file to file the tops of the cutters to a 90-degree angle with the guide bar. Then use a round file to file the side plates at a 30-degree angle. Repeat on each cutter until they are sharp.
What should I do if my pole saw chain keeps coming off?
If your pole saw chain keeps coming off, check that it is properly tightened and that the guide bar is straight. If the problem persists, there may be damage to the chain or other components and it should be inspected by a professional.

