How to Remove Paint from Cabinets with Heat Gun: A Comprehensive Guide

Are you tired of the old, chipped paint on your cabinets but dreading the thought of scrubbing it off for hours on end? Fear not, because there is an easier solution – a heat gun. This nifty tool is a game-changer when it comes to removing paint, and it’s particularly effective when it comes to kitchen cabinets. Imagine holding a magical wand that can melt years of paint away within minutes.
That’s what using a heat gun feels like. It’s a quick and efficient method that saves time and prevents unnecessary damage to the cabinet’s surface. Plus, it’s cheap and doesn’t require any harsh chemicals or solvents.
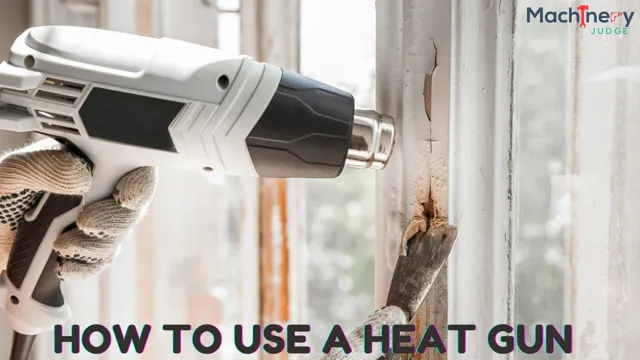
The heat gun works by increasing the temperature of the painted surface to a point where it softens and loosens the paint. Once the paint starts to bubble, it’s easy to scrape it off with a putty knife. It’s important to note that safety precautions should be taken when using a heat gun, such as wearing protective gear and ensuring sufficient ventilation.
Using a heat gun to remove paint from cabinets is ideal for DIY enthusiasts who want to give their kitchen a fresh new look without breaking the bank. Not only does it save time and money, but it’s also a fantastic way to put your creativity to the test. With a clean slate, you can paint your cabinets any color or design that you desire.
In conclusion, if you’re looking for an effective and effortless way to remove paint from your cabinets, a heat gun is the answer. It’s a simple yet powerful tool that can transform your kitchen in no time. So why not give it a try and see the difference it makes?
What You’ll Need
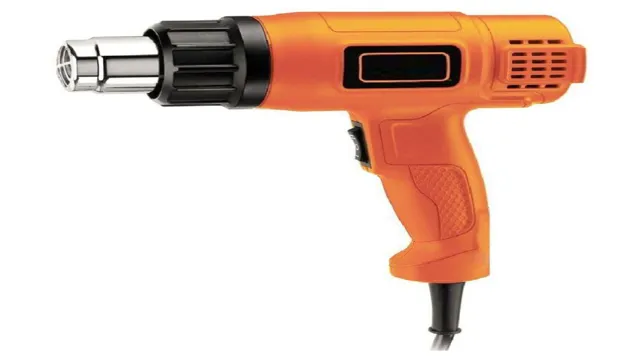
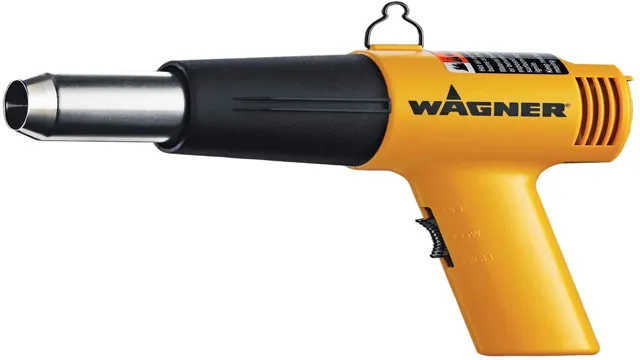
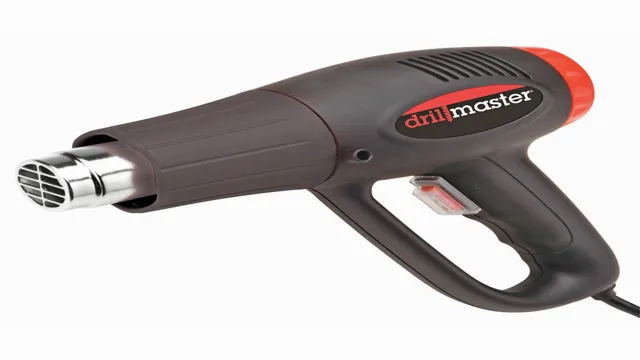
If you’re looking to give your cabinets a fresh new coat of paint, the first step is to strip away the old one. Using a heat gun can be an efficient way to remove paint from cabinets. But what do you need to get started, and how do you do it safely? First, you’ll need a heat gun, which you can find at your local hardware store.
You’ll also need protective gear, such as gloves, safety glasses, and a respirator mask, to protect yourself from fumes and hot paint particles. Once you have your gear, you can begin by warming up the surface of the cabinet with the heat gun. As the paint softens and bubbles, use a scraper to gently remove it.
Be cautious not to apply too much heat, as this could damage the wood or cause the paint to catch fire. As you work, make sure to ventilate the area and take breaks to avoid overheating the gun. With some patience and careful attention, you can soon have your cabinets looking fresh and ready for a new coat of paint.
Heat Gun
If you want to effectively strip paint, bend plastic, or thaw pipes, a heat gun can be your best friend. However, before you start using your heat gun, you’ll need to ensure you have all the necessary items. Firstly, you will need the heat gun itself.
Look for a model with various temperature options so you can adjust the heat to your needs. It’s also important to consider size and handle grip, especially if you plan on using it for extended periods. Secondly, you will need to make sure you have the correct safety gear.
This may include gloves to protect your hands, safety glasses to protect your eyes from flying debris, and a mask to avoid inhaling fumes. Lastly, you’ll need to have any additional materials, such as a scraper tool or wire brush, to aid in your project. Once you have all of these items, you’ll be ready to use your heat gun and tackle your project with confidence.

Scraper
If you’re planning on web scraping, there are a few things you’ll need to get started. Firstly, you’ll need a scraper tool. There are a variety of free and paid scraper tools available online, such as Beautiful Soup or Scrapy.
Secondly, you’ll need a target website to scrape from. It’s important to ensure you have permission to scrape from the website, as scraping without permission can be illegal. You can usually find a website’s permissions in their terms and conditions.
Once you have those two things, you’ll need to determine the data you want to extract. This could be anything from product prices to website content. Finally, you’ll need to have some basic coding knowledge, as most scraper tools require you to write or customize code to extract the data you want.
With these tools and knowledge in hand, you’ll be ready to start scraping.
Protective Gear
When it comes to staying safe while playing sports or engaging in physical activities, protective gear is a must-have. The gear you need will depend on the specific sport or activity you’ll be participating in, but as a general rule, it’s essential to have a helmet to protect your head, knee and elbow pads to protect your joints, and sturdy shoes with good grip to prevent slips and falls. Other gear that may be necessary includes mouthguards, goggles, gloves, and even compression garments to help prevent injury and reduce recovery time.
It’s important to invest in quality gear that fits properly and is appropriate for the activity at hand. By taking the time to protect yourself, you can enjoy your sport or activity while minimizing the risk of injury and staying safe.
Preparation
If you’re looking to give your kitchen cabinets a new look, but you don’t want to replace them entirely, removing the old paint is a great place to start. One effective method for paint removal is using a heat gun. But before you jump right in, it’s essential to take adequate preparation measures.
First, make sure you have the right tools, including a heat gun with multiple temperature settings, a scraper, and sandpaper. Secondly, protect your work area and yourself by wearing goggles and gloves and covering any nearby furniture or appliances with plastic drop cloths. Lastly, test the heat gun’s temperature on a small, inconspicuous area of the cabinet to avoid damage.
Once you’ve taken these steps, you can confidently move on to the paint removal process using your heat gun. With a little patience and practice, you’ll have your cabinets looking brand new in no time.
Ventilation
When it comes to ensuring proper ventilation, preparation is key. Before even beginning any ventilation project, it’s important to assess the space in question and identify any potential obstacles or ventilation needs. This might include checking the existing ventilation systems, measuring air flow rates, and assessing the types of pollutants that might be present.
Once these factors have been taken into consideration, it’s time to start planning the specifics of your ventilation project. This might include researching different ventilation options and technologies, consulting with professionals or experts in the field, and considering the potential costs and benefits of any DIY projects. By taking the time to properly prepare for your ventilation project, you can ensure that you choose the right system for your needs and minimize the risk of potential complications or issues down the line.
Ultimately, ensuring proper ventilation can have a significant impact on your health and well-being, so it’s important to make this a priority in any space where air quality may be a concern.
Cleaning the Cabinets
Preparing to clean your cabinets is essential to ensuring a successful cleaning process. Start by removing any items from your cabinets and clear off the surrounding countertops. This will provide ample space for you to clean your cabinets without any obstacles getting in the way.
Next, equip yourself with the necessary tools such as a bucket, warm water, cleaning solution, and a washcloth. Consider using all-purpose cleaner, dish soap or white vinegar when creating your cleaning solution. Once you have your cleaning solution prepared, start wiping the cabinets one by one.
It’s important to scrub gently, especially if your cabinets are made of wood, to avoid any damage. For hard-to-reach areas, use a toothbrush or an old toothbrush to clean these areas effectively. With patience and diligence in your preparation and approach, you’ll have sparkling clean cabinets that shine like new.
Using the Heat Gun
When it comes to removing paint from cabinets, using a heat gun can be a lifesaver. The process is quite simple and involves directing the heat gun over the painted surface, which will soften and blister the paint. Once the paint starts to blister, you can use a scraper to remove it.
Be sure to wear protective gear, especially gloves and safety glasses, to avoid burns and inhalation of fumes. The heat gun method is effective for removing paint from cabinets because it does not involve the use of chemicals and does not damage the wood underneath. So, if you’re looking for an efficient and environmentally friendly way to remove paint from your cabinets, give the heat gun method a try.
By following these steps and using a little perseverance, your cabinets will look brand new in no time!
Setting the Heat Gun
When it comes to using a heat gun, setting the temperature correctly is crucial to ensure a good result. It may seem intimidating at first, but it’s actually quite easy once you get the hang of it. Most heat guns come with adjustable temperature settings, typically ranging between 100°C to 600°C.
In general, lower temperatures are used for delicate materials like plastic or leather, while higher temperatures are used for tougher materials like metal or wood. You should always start with a lower temperature setting and gradually increase until you reach the desired heat. It’s important to note that holding the heat gun too close to the surface or at one spot for too long can cause damage or create a burn.
By using proper technique and setting the heat gun to the appropriate temperature, you can complete your project with ease and precision.
Working in Sections
If you want to work on a specific section of your project, using a heat gun can be extremely helpful. It’s an excellent tool for removing paint, shaping plastic, or softening adhesives so you can remove them easily. When using a heat gun, it’s important to keep safety in mind at all times.
Make sure you wear protective gear such as heavy-duty gloves and safety glasses. Start by setting the temperature to low so you can get a feel for the heat output. Move the gun around the surface gradually so the heat is distributed evenly.
Avoid staying in one spot for too long as it can burn the material. Remember, a heat gun can be a versatile and handy tool to have in your arsenal.
Removing the Loose Paint
Removing loose paint from cabinets can be a time-consuming and frustrating task, but using a heat gun can make the process much simpler and more efficient. First, it’s important to ensure that the area is well-ventilated and that you’re wearing gloves and eye protection. Then, use the heat gun to soften the paint by heating it up until it begins to bubble and peel away from the surface.
Use a scraper to gently remove the loose paint, being careful not to gouge or damage the wood underneath. With a little patience and persistence, you can remove all of the old paint from your cabinets and prepare them for a fresh coat of paint or stain. Remember to work in small sections and take breaks as needed to avoid overheating the surface or burning yourself.
With the right tools and techniques, you can easily transform your cabinets and give them a brand new look. So, go ahead and try using a heat gun to remove paint from your cabinets – your kitchen will thank you for it!
Using the Scraper
If you’re looking to give your home a fresh coat of paint, the first step is to remove the loose paint from the surface. This will ensure that the new paint adheres properly and will help to prevent any future peeling or flaking. One of the best tools for this job is a scraper.
A scraper is a simple but effective tool that can quickly remove even the most stubborn patches of loose paint. Simply hold the scraper at a slight angle to the surface and apply pressure as you move it back and forth over the affected area. The loose paint should come away easily, leaving a smooth, clean surface ready for painting.
Just remember to be careful not to scrape too hard or you could damage the underlying surface. With a little practice, you’ll soon be a pro at using a scraper to remove loose paint.
Residual Stains
When it comes to removing residual stains from your walls, the first step is to get rid of any loose paint. This can be done by using a scraper or sandpaper to gently remove any peeling or flaking paint. Be sure to wear protective gear, such as gloves and a mask, to avoid any inhalation or skin irritation from the paint particles.
Once you’ve removed the loose paint, you can move on to treating the residual stain itself. There are many different methods for cleaning walls, depending on the type of stain and the type of wall surface. A mixture of warm water and mild dish soap is a good place to start for most stains.
Be sure to test the solution in a small, inconspicuous area before applying it to the entire stain. If the stain is more stubborn, you may need to use a commercial cleaner or a professional cleaning service to get the job done. With a little patience and effort, you can restore your walls to their original cleanliness and beauty.
Post-Removal Care
Removing old paint from cabinets can be a daunting task, but using a heat gun can make it much easier. However, after removing the paint, it’s essential to take care of the cabinets to ensure they are left in good condition. To start with, you should allow the cabinets adequate time to cool down.
This will prevent the existing paint from sticking to your hands and fingers when you touch it. Additionally, you need to clean the cabinets thoroughly to remove any paint residue left over. Use a scraper and sandpaper to remove any stubborn paint remaining.
After that, wipe the cabinets with a damp cloth and let them dry. Once the cabinets are dry, sand them lightly to roughen the surface, making it easier for the new paint to stick. Finally, apply a primer to the cabinets before painting them with new paint to ensure long-lasting coverage.
Using a heat gun to remove paint is effective, but proper post-removal care is vital to keep your cabinets in tip-top shape and durable for many years to come.
Sanding the Cabinets
Sanding the cabinets is an essential part of post-removal care after you’ve removed the old paint or stain from your kitchen or bathroom cabinets. Sanding helps to smoothen the surface of the cabinets, removing rough spots and ensuring that the new paint or stain adheres well to the wood. You’ll need to start with a low-grit sandpaper and work your way up to a higher grit to achieve a nice, smooth surface.
It’s important to take your time and sand carefully, paying attention to any rough spots or blemishes on the surface of the wood. Make sure to wipe away any dust or debris with a damp cloth after sanding is complete, as tiny particles can be difficult to spot but will show up under your new coating. With careful sanding, your cabinets will be ready for a fresh coat of paint or stain in no time!
Sealing the Cabinets
Sealing the Cabinets for Post-Removal Care of your kitchen will help ensure longevity and preserve their appearance. After removing all the grime and accumulated dirt from your cabinets, it’s essential to follow up with a good sealant. In that manner, the wood’s pores will be filled up, creating a protective layer that will hold up against scratches, scuffs, and stains.
Moreover, a well-sealed surface will prevent moisture from penetrating the wood, reducing the chances of rotting as well as potential mold issues. By taking this step, you’ll also create a high gloss finish that will boost the aesthetics of your cookhouse. Sealing your kitchen cabinets is an excellent investment that will save you from costly renovating projects in the future.
It’s best to do this during the dry season when the moisture levels in the house are relatively low to allow the sealant to settle correctly. With proper sealing, your kitchen cabinets will continue to look as good as new for many years to come.
Conclusion
In conclusion, if you’re looking to give your cabinets a fresh start, using a heat gun is a savvy option. Best of all, you’ll avoid the hassle and chemical odors associated with traditional paint removal methods, making it a win-win for both you and your cabinets. So get ready to break out some heat and see your cabinets shine like never before!”
FAQs
What is a heat gun and how does it work in removing paint from cabinets?
A heat gun is a tool that uses hot air to soften and loosen the paint on the cabinet surface. Once the paint is soft, it can be scraped off using a putty knife or scraper.
Can a heat gun damage cabinets while removing paint?
Yes, a heat gun can damage cabinets if not used properly. It is important to use a low heat setting and keep the heat gun moving constantly to avoid scorching or burning the cabinets.
Is it safe to use a heat gun for paint removal on cabinets?
Yes, it is safe to use a heat gun for paint removal on cabinets as long as proper precautions are taken, such as wearing protective gloves and eyewear, keeping the heat gun away from flammable materials, and using it in a well-ventilated area.
What temperature should be used on a heat gun for removing paint from cabinets?
The temperature on a heat gun should be set at a low to medium heat setting, generally between 500-1000 degrees Fahrenheit, depending on the type of paint and thickness on the cabinets.
Can a heat gun be used to remove paint from cabinets with intricate designs or carvings?
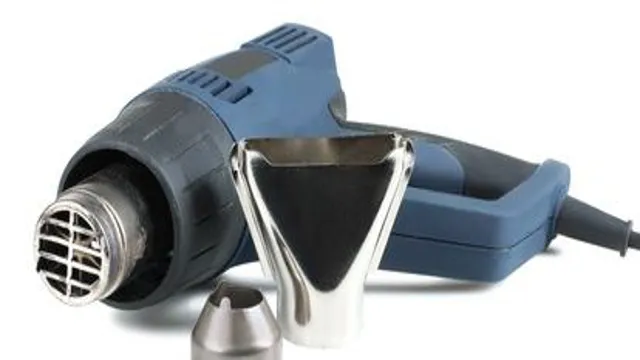
Yes, a heat gun can be used to remove paint from cabinets with intricate designs or carvings, but it requires more care and precision. A smaller nozzle can be used to target the specific areas that need to be softened before scraping with a putty knife.
Are there any alternatives to using a heat gun for paint removal on cabinets?
Yes, alternatives to using a heat gun include chemical paint strippers, sanding, and power washing. Each method has its own advantages and disadvantages and should be chosen depending on the type of paint and cabinet material.
What are some tips for ensuring successful paint removal with a heat gun on cabinets?
Some tips include practicing on a small area first, wearing proper safety gear, working in a well-ventilated area, using a low heat setting, keeping the heat gun moving constantly, and using a scraper or putty knife with a sharp edge.

