How to Repair Dewalt Impact Driver: Step-by-Step Guide for Beginners
Have you ever been in the middle of a project, and your trusty Dewalt impact driver suddenly stopped working? It can be frustrating and disappointing, especially when you have deadlines to meet. But don’t worry, repairing your Dewalt impact driver is not rocket science. Dewalt impact drivers are remarkable tools that can handle tough jobs with ease.
Thanks to their robust motors, they deliver powerful performance. However, like any other tool, they can experience wear and tear over time. But that doesn’t mean you have to replace your impact driver every time it breaks down.
In this blog, we’ll walk you through the basics of repairing your Dewalt impact driver. We’ll cover common issues that arise with these tools, from jammed chucks to broken switches. You’ll also learn how to troubleshoot and fix these problems quickly and easily, so you can get back to your project in no time.
So, if you’re ready to take charge of your Dewalt impact driver and give it the TLC it deserves, then keep reading. We’re confident that with our tips and tricks, you’ll be able to repair your Dewalt impact driver like a pro.
Identify the Issue with Your Driver
If you’re having trouble with your DeWalt impact driver, there are a few things you can do to identify the issue and repair it. The first step is to check the battery and charger. Make sure the battery is fully charged and the charger is functioning properly.
The next step is to check the motor and gears. If you notice any rust, dirt, or debris, clean them out carefully with a soft brush. You should also inspect the brushes and replace them if necessary.
If the issue persists, you may need to replace the motor or gearbox. Finally, if none of these steps work, the problem may be with the electronics or wiring, and it’s best to take it to a professional for repair. By identifying and addressing these issues, you can get your DeWalt impact driver running smoothly again and avoid costly replacements.
Common problems with Dewalt impact drivers
Dewalt impact drivers are known for their power and durability, but like any tool, they can experience issues over time. One common issue is the driver bit slipping or falling out of the chuck. This can be caused by a worn-out or damaged chuck, or simply from using the wrong size or type of bit.
Another issue could be a loose or damaged collet, which holds the bit in place. Additionally, if the driver is making strange noises or struggling to work properly, it could be a sign of a worn-out motor or gearbox. It’s important to identify the issue with your driver and address it promptly to avoid further damage and ensure optimal performance.
Symptoms of a damaged driver
If you find yourself experiencing sudden crashes or glitches on your computer, chances are there could be an issue with your driver. One of the most common symptoms of a damaged driver is constant error messages or notifications popping up on your screen. You may also notice that certain peripheral devices such as printers or scanners are no longer functioning properly.
Another sign of a damaged driver is slow performance, especially during processes that require a lot of memory such as gaming or video editing. It’s important to identify and address any issues with drivers as soon as possible in order to prevent further damage to your computer. By updating or reinstalling the necessary drivers, you can ensure that your computer runs smoothly and efficiently.
So if you’re experiencing any of these symptoms, don’t hesitate to take action and get your computer back in good shape.
Gather Necessary Tools
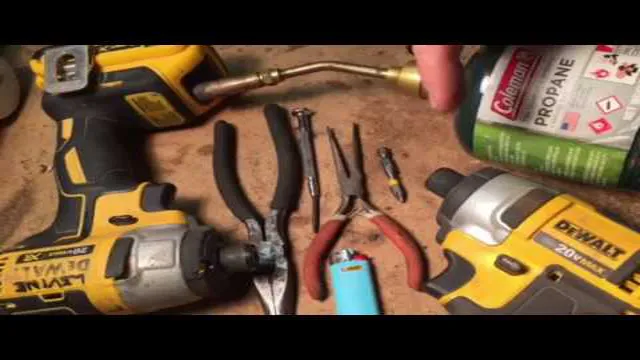
If you want to repair your Dewalt impact driver, the first step is to gather all the necessary tools. You’ll need a set of screwdrivers, pliers, a hammer, a wrench, and a multimeter to test electrical components. Make sure the tools are of good quality and the right size for the job at hand.
Additionally, it’s important to have replacement parts on hand, such as screws, nuts, wires, and brushes. You can order these parts directly from the manufacturer or from third-party retailers. Once you have all the tools and replacement parts you need, you’ll be ready to start troubleshooting and fixing your impact driver.
Keep in mind that repairing an impact driver can be complex and time-consuming, so it’s important to be patient and take the necessary safety precautions while you work. With the right tools and a bit of know-how, you can get your Dewalt impact driver working like new again.
List of essential tools for repair
When it comes to repairing things at home, having the right tools can make all the difference. A well-stocked toolbox is a must-have for every household, whether you’re a DIY enthusiast or just someone who wants to be prepared for unexpected repairs. So, what are the essential tools you need? A screwdriver set is a must-have, as it can be used for a variety of repair jobs.
You’ll also need a hammer for driving in nails and a pair of pliers for gripping and cutting. A set of wrenches in different sizes is necessary for tightening and loosening bolts and nuts, while a level will help you ensure that things are straight and even. You may also need a power drill for drilling into hard materials and a saw for cutting through wood and other materials.
Other useful tools include a measuring tape, a utility knife, and a flashlight. With these essential tools in your toolbox, you’ll be ready to tackle anything that comes your way.
Safety precautions before starting the repair
Before starting the repair on any electronic device or appliance, it’s essential to gather the necessary tools. This step is crucial because it helps to avoid any potential injuries or damages to the device or yourself. The required tools vary depending on the type of repair you’ll perform, but some basic ones include a screwdriver of the appropriate size, pliers, wire cutters, and a multimeter.
The screwdriver is necessary for opening the device’s cover, while pliers and wire cutters come in handy for holding or cutting wires. The multimeter is useful for testing voltage and current. These tools are readily available at most hardware stores and come in different sizes and shapes.
It’s important to ensure that all tools are clean before using them, as dirt and dust can cause malfunctions. When conducting repairs, it’s best to have all tools within reach to avoid searching for any missing items, which can waste time and distract from the task. By gathering the necessary tools, you can ensure that the repair process is smooth and successful.
Disassemble the Driver
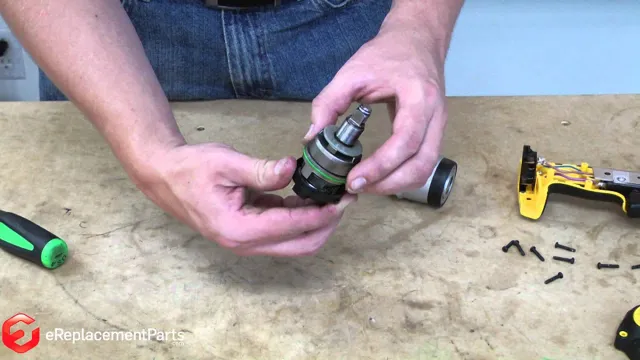
If you’re wondering how to repair Dewalt impact driver, the first step is to disassemble the driver. Remember to place the driver on a flat surface and then carefully remove the screws using the appropriate screwdrivers. It is best to keep the screws well organized, either by categorizing them by size or by putting them in individual bags.
Next, remove the outer casing, revealing the inner components of the tool. You’ll need to carefully inspect each component, looking for any visible damage, wear, or breakages. Check the gears, the motor, the brushes, and any other parts to determine which need to be replaced.
Once you’ve identified the problem components, be sure to order the correct replacement parts from the manufacturer to ensure your tool functions as it should. With careful attention, patience, and the appropriate tools and replacement parts, you can disassemble and repair your Dewalt impact driver with ease.
Removing the battery and chuck
When it comes to disassembling your driver, one of the first steps you’ll need to take is to remove the battery and chuck. This may seem like a daunting task, but it’s actually quite simple if you follow a few basic steps. First, locate the release button on your driver and press it down to release the chuck.
Once the chuck is released, you can remove it from the driver. Next, locate the battery release button and slide it to the side to remove the battery from the driver. With the battery and chuck removed, you should have easy access to the inside of your driver, allowing you to perform any necessary maintenance or repairs.
Just remember to take your time and to always refer to your owner’s manual for guidance.
Opening the driver’s casing
Opening the driver’s casing is a crucial step in disassembling the driver for repair or replacement of faulty parts. It is essential to be careful and precise during this procedure to avoid damaging the internal components. Firstly, unplug all power sources and remove any screws or bolts holding the casing together.
Next, use a plastic opening tool or a flat-head screwdriver to gently pry open the casing. It is important to avoid using a metal tool, as this can cause scratches or damage to the assembly. Once the casing is open, take care to note the position of the internal components to facilitate reassembly later.
It is best to work on a clean surface to avoid losing any parts or rubbing any dirt or debris onto the components. Remember to move steadily and patiently during this process to avoid damaging any sensitive parts. By following these steps, opening the driver’s casing will be an easy and straightforward process, allowing you to access and repair the driver with confidence.
Repair the Driver
If you’re experiencing issues with your Dewalt impact driver, there are a few simple steps you can take to try and repair it. First, check the battery to make sure it’s fully charged and functioning properly. If the battery is the issue, try recharging it or replacing it with a new one.
Another potential issue could be with the motor or gears, which could be causing the driver to seize up or make strange noises. In this case, it’s best to disassemble the driver and inspect the motor and gears for any damage or wear. If you find any issues, you may need to replace the damaged parts or take the driver to a professional repair shop.
Additionally, make sure to regularly clean and lubricate the driver to ensure it continues to function properly. With a little bit of maintenance and careful inspection, you can keep your Dewalt impact driver working smoothly for years to come.
Possible repairs and solutions for different issues
If you’re experiencing issues with your audio, the problem may lie with your driver. The driver controls the communication between your operating system and hardware, and when it becomes corrupted, outdated, or missing, it can result in audio malfunctions. The good news is that repairing or updating your driver is relatively simple.
You can start by checking for updates in your device manager, or downloading the latest driver directly from the manufacturer’s website. If that doesn’t work, you may need to uninstall and then reinstall the driver. In either case, be sure to restart your computer to ensure that the changes take effect.
As always, make sure to scan your system for viruses and malware before making any changes to your drivers. By taking these steps, you can resolve many common audio issues and get back to enjoying your music, videos, and games in no time.
What to do if the issue cannot be resolved
If you’ve tried troubleshooting your driver issue to no avail, it may be time to consider repairing the driver. Drivers are essential software that allow your hardware to communicate with your computer’s operating system, and if they’re outdated or corrupt, your system won’t function optimally. Luckily, repairing a driver isn’t as complicated as it may seem.
Start by identifying the problematic driver and downloading the appropriate driver from the manufacturer’s website. Then, uninstall the old driver and install the newly downloaded driver. This process will ensure that you have the latest version of the driver and that it’s installed correctly.
Bear in mind that if the issue persists, there may be an underlying hardware issue causing the problem, so don’t hesitate to seek professional help. By repairing your driver, you may be able to resolve the issue and get your system back to working as it should.
Reassemble the Driver
Now that you have successfully replaced the faulty part in your DeWalt impact driver, it’s time to reassemble it. First, make sure you have all the parts and tools needed for the job. Carefully slide the brushed motor back into place, making sure the wires are correctly aligned and connected securely.
Then, fit the switch assembly cover back onto the tool and attach the screws in the opposite order in which they were removed. Take your time throughout this process to ensure that every part is in its proper place and fastened securely. Finally, insert the battery and give the tool a test run to ensure that it is functioning correctly.
It may be helpful to refer back to the manual for guidance during this process, especially if you are new to repairing power tools. Congratulations on successfully repairing your DeWalt impact driver!
Putting the driver back together
Now that we’ve taken the driver apart, it’s time to put it back together. Before moving forward, it’s important to remember that precision is key, and it’s crucial not to rush the process. Begin by inserting the cone into the spider, ensuring that it sits in place securely.
Next, attach the voice coil to the cone, being careful not to damage it in any way. Then, carefully insert the voice coil into the magnetic structure, taking care not to scratch the magnet. Make sure that everything is properly aligned before proceeding.
Finally, reattach the spider to the frame, ensuring that it’s securely in place. This part of the process is all about being patient and methodical, taking the time to do things right. By doing so, you’ll ensure that your driver is reassembled correctly and ready to provide great sound once again.
Test and troubleshoot the repaired driver
Now that you’ve repaired the driver, it’s time to reassemble it and test it to make sure it’s working properly. First, gather all the parts and tools you used during the repair process. Next, refer back to any notes or diagrams you may have made during disassembly to ensure you’re putting everything back together correctly.
Take your time and be gentle with the delicate components to avoid causing any further damage. Once you’ve reassembled the driver, power it up and listen closely for any strange noises or vibrations. If everything sounds and feels good, you can confidently conclude that your repair was successful.
However, if you notice any issues, it’s best to troubleshoot and address them promptly to avoid any further damage or risks to your equipment. Remember, conducting regular maintenance checks and repairs will extend the lifespan of your equipment and save you money in the long run.
Conclusion
In conclusion, repairing a Dewalt impact driver is no easy feat, but with the right tools, patience, and a bit of know-how, you can get it back up and running in no time. Remember to always double check the source of the problem, whether it’s a faulty battery or a worn-out gear. And don’t forget, if all else fails, you can always rely on duct tape to temporarily fix the issue.
Just be sure to upgrade to a new driver as soon as possible, because let’s face it, having a reliable tool is always better than a quick fix. Keep calm and carry on fixing, my friend!”
FAQs
What are some common issues with Dewalt impact drivers?
Some common issues with Dewalt impact drivers include battery problems, motor issues, and jammed bits.
How can I troubleshoot a battery problem with my Dewalt impact driver?
To troubleshoot a battery problem with your Dewalt impact driver, try charging the battery fully and making sure it is properly inserted into the tool. If the problem persists, you may need to replace the battery or the charger.
What should I do if my Dewalt impact driver overheats or starts smoking?
If your Dewalt impact driver overheats or starts smoking, stop using it immediately and allow it to cool down. This could be a sign of a serious problem with the motor or other components, and may require professional repair.
How often should I clean and maintain my Dewalt impact driver?
It is generally recommended to clean and maintain your Dewalt impact driver after each use, or at least every few uses. This may include wiping down the exterior, checking for loose or damaged parts, and oiling any moving components.
Can I use my Dewalt impact driver with other brand’s drill bits or accessories?
While Dewalt impact drivers are designed to be used with Dewalt accessories, many other brands of drill bits and accessories may also be compatible. However, it is important to check for compatibility and quality to ensure safe and effective use.
How can I prevent damage to my Dewalt impact driver during use?
To prevent damage to your Dewalt impact driver during use, be sure to use the tool according to the manufacturer’s recommendations, avoid using the tool for tasks it is not designed to handle, and store the tool properly when not in use.
What is the warranty coverage for Dewalt impact drivers?
The warranty coverage for Dewalt impact drivers may vary depending on the model and where it was purchased. Generally, however, Dewalt offers a limited warranty for defects in materials and workmanship for a period of one to three years from the date of purchase.

