How to Set Pinion Bearing Preload Without Torque Wrench: Complete Guide
Setting pinion bearing preload is an essential step in the process of installing a new differential or rebuilding the old one. It’s crucial to maintain the right amount of preload for the bearing to work correctly and avoid costly damage to the differential. While using a torque wrench is the recommended method for setting pinion bearing preload, many DIYers and mechanics often wonder if it’s possible to do it without one.
The answer is yes, and in this post, we’ll provide a step-by-step guide on how to set pinion bearing preload without a torque wrench. So, if you’re looking for alternative ways to achieve the same result without investing in a torque wrench, keep on reading.
Why is Setting Pinion Bearing Preload Important?
When it comes to setting pinion bearing preload, it’s crucial to get it right to ensure the longevity and performance of your vehicle. The pinion bearing is responsible for transferring the power from the driveshaft to the differential gears, so if it’s not set up properly, it could result in premature wear and even failure. While using a torque wrench is the most accurate way to set the preload, not everyone has access to this tool.
Thankfully, it’s still possible to set the pinion bearing preload without a torque wrench. One method involves using a dial indicator and measuring the rotational drag of the pinion gear, while another method involves using shims to adjust the play between the bearing and the pinion. Whichever method you choose, just remember that a properly set pinion bearing preload is crucial for the health and performance of your vehicle’s drivetrain.
Increasing Reliability and Longevity of the Differential
When it comes to increasing the reliability and longevity of your vehicle’s differential, one important factor to consider is setting the pinion bearing preload correctly. Pinion bearing preload refers to the amount of force needed to turn the pinion gear in the differential. This force is controlled by adjusting the position of the pinion nut, which compresses the bearings.
Incorrect pinion bearing preload can cause excessive wear and damage to the pinion bearings, leading to costly repairs. Moreover, it can also result in noise, vibration, and reduced fuel economy. By setting the pinion bearing preload to the manufacturer’s specifications, you can ensure that the differential operates efficiently and lasts for years to come.
So, the next time you’re working on the differential, make sure to pay attention to the pinion bearing preload to prevent premature wear and tear.
Reducing Noise, Vibration, and Harshness
Setting pinion bearing preload is crucial to reducing noise, vibration, and harshness in a vehicle. Without proper preload, the bearings can become loose and shift under load, causing excessive noise and vibration. Additionally, inadequate preload can lead to premature wear and failure of the bearings, resulting in costly repairs.
By setting the proper amount of preload, the bearings are secured in place and can spin smoothly without any excess play. It’s like fitting a puzzle piece perfectly into its designated spot – everything is snug and secure. Setting pinion bearing preload requires specific tools and knowledge, making it a job best left to professionals.
But the peace of mind and improved ride quality are well worth it in the end. Thus, it is essential to ensure proper pinion bearing preload to enjoy a comfortable driving experience.
Tools Needed to Set Pinion Bearing Preload
If you want to set pinion bearing preload but don’t have access to a torque wrench, don’t worry! There are still tools you can use to get the job done. One important tool is a dial indicator. This tool will help you measure the amount of pressure you are putting on the bearings.
You will also need a spanner wrench and a torque meter. A spanner wrench is essential for tightening and loosening the pinion nut, and a torque meter will help you measure how much pressure you are applying. It’s important to keep your tools clean and properly calibrated so that you can get accurate measurements.
Without a torque wrench, it may take a little longer to set the preload correctly, but with the right tools and a steady hand, you can do it! Just remember to follow the manufacturer’s instructions carefully and take your time. By using the right tools and techniques, you can make sure your pinion bearings are properly set and ready to go.
Dial Indicator
Dial Indicator When it comes to setting pinion bearing preload, you’ll need a few tools to ensure that the job gets done right. One essential tool you’ll need is a dial indicator. This tool will help you accurately measure the amount of play in the pinion bearings, allowing you to set the proper preload.
The dial indicator consists of a gauge with a needle that measures the distance between two points. By using the dial indicator to measure the amount of play in the bearings, you can adjust the pinion nut until you achieve the right amount of preload. This will ensure that the bearings are properly seated, and that the pinion gear is securely held in place.
Of course, a dial indicator is just one of the tools you’ll need to get the job done, but it’s an essential one that no mechanic should be without.
Plastigage or Feeler Gauge
Pinion Bearing Preload One of the critical steps in setting up a rear axle is to ensure proper pinion bearing preload. To achieve this, you will need either Plastigage or a Feeler Gauge. Plastigage is a thin strip of plastic that gets crushed when loaded, indicating the thickness of the gap in which it’s placed.
On the other hand, Feeler gauges come in a set of fine metal strips, each marked with its thickness. When squeezed between two objects, they measure the gap between them. Both tools work well, and the choice between them mainly depends on preference.
Suppose you’re new to this process or want to be precise. In that case, it is advisable to use a Feeler Gauge, as it provides more accurate measurements than plastigage. Pinion bearing preload is a crucial factor in the longevity of your vehicle.
By taking the time to set it correctly, you can ensure optimal performance and limit the chances of detrimental failures.
Breaker Bar and Socket
If you’re planning on setting the pinion bearing preload on your vehicle, there are several tools that you’ll need to get the job done right. One of the most important tools is a breaker bar and socket. This is essential for tightening the pinion nut to the appropriate torque specification.
When selecting a breaker bar, it’s important to choose one that is long enough to provide the necessary leverage to properly torque the nut. In addition to a breaker bar, you’ll also need a socket that fits the size of the pinion nut. Without these tools, you won’t be able to properly set the pinion bearing preload and could end up causing damage to your vehicle.
So, make sure you have these tools on hand before beginning the process of setting the pinion bearing preload.
Step-by-Step Process for Setting Pinion Bearing Preload Without a Torque Wrench
Setting pinion bearing preload without a torque wrench may seem like a daunting task, but it can be done with just a few simple steps. First, make sure the pinion nut and the bearing race are clean and free of debris. Then, tighten the pinion nut to 10-15 foot-pounds with a wrench and mark the position of the nut and yoke with a punch.
Next, tighten the nut until the bearing is snug and there is no play in the yoke. Use your hands to check for any movement in the yoke. Once there is no play, add shims until the correct preload is achieved.
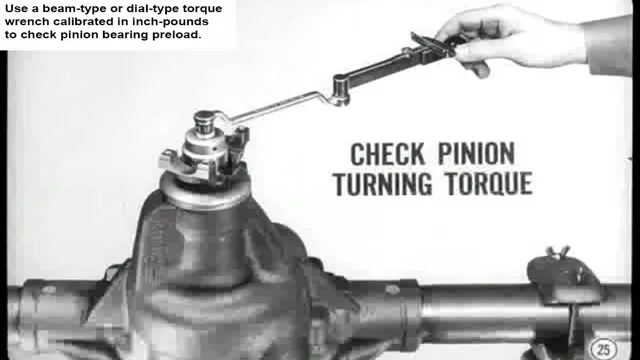
This can be done by measuring the rotational torque with a beam-type inch-pound torque wrench and adjusting the shims accordingly. It’s important to note that the correct preload for your specific vehicle can be found in the manufacturer’s specifications. With these steps, you can set your pinion bearing preload without a torque wrench.
Remove Differential Cover and Drain Fluid
When it comes to setting pinion bearing preload without a torque wrench, the process can seem daunting. However, with the right steps and a bit of patience, it can easily be done. First, you’ll need to remove the differential cover and drain the fluid.
Next, remove the pinion nut and carefully measure the shims. Then, add or remove shims as needed to achieve the desired preload. It’s important to keep track of the shims and not mix them up, as this can drastically affect the preload.
Once you’ve achieved the desired preload, reassemble everything and test for any unusual noises or vibrations. It’s important to remember that this process may require multiple attempts to get it just right, but with persistence and attention to detail, you’ll have your pinion bearing preload set for optimal performance. So go ahead and give it a try!
Remove Pinion Nut and Washer
Setting Pinion Bearing Preload Without a Torque Wrench The process of removing the pinion nut and washer may sound simple, but it’s an essential step towards setting pinion bearing preload without a torque wrench. First, ensure your car is at a stable angle and well supported. Then, use a breaker bar and an appropriate socket to remove the pinion nut and washer.
Once removed, you should be able to pull out the flange and seal with ease. It’s important to note that this step should be done carefully to avoid any damage to the pinion or bearing. However, with the right tools and precautions, you can complete this step without any issues.
Once the nut and washer are removed, you can proceed to the next step in the process, setting the pinion bearing preload. Overall, removing the pinion nut and washer is a crucial step in setting the pinion bearing preload, and it should be done with care. With patience and attention to detail, you can complete this step without a torque wrench and get one step closer to properly setting your car’s pinion bearing preload.
Check Preload with Dial Indicator and Adjust Shims if Necessary
Pinion Bearing Preload If you’re looking to set your pinion bearing preload but don’t have a torque wrench, fear not! With a dial indicator and some adjustment shims, you can still achieve the appropriate preload. Here’s how to do it. First, remove the pinion nut and washer and install the dial indicator onto the pinion gear.
Turn the pinion gear from side to side and take note of the highest and lowest readings on the dial indicator. Calculate the difference between the two readings, which will give you the total backlash in the system. Next, remove the dial indicator and install the pinion nut, tightening it to the manufacturer’s recommended torque.
Reinstall the dial indicator, turn the pinion gear, and take note of the highest and lowest readings once again. This time, however, the readings should be slightly higher due to the preload from the tightened nut. Subtract the original backlash reading from the new reading to get the amount of preload.
Compare this to the manufacturer’s recommended preload specification. If the preload is too low, install a thicker shim; if it is too high, install a thinner shim. Repeat this process until the preload falls within the recommended specification.
Remember, setting pinion bearing preload is important for proper differential operation and longevity, so it’s worth taking the time to get it right. With this step-by-step process, you can achieve the right preload even without a torque wrench.
Check Pinion Bearing Preload with Plastigage or Feeler Gauge
Pinion Bearing Preload If you want to set pinion bearing preload without a torque wrench, you can use plastigage or a feeler gauge to determine the proper preload amount. This simple process requires only a few tools and some precision, making it a DIY-friendly option for those who don’t have access to specialized equipment. Begin by removing the pinion nut and washer and then the yoke from the pinion shaft.
You can then clean the pinion shaft threads and inspect the bearings and races for damage or wear. Next, use a suitable gear marking compound to mark the surface of the ring gear teeth. Reinstall the yoke and torque the pinion nut to the specified torque value.
Now comes the critical step of determining the pinion bearing preload. To do this, remove the pinion nut and washer again, and check the rotating torque of the pinion by turning it with your hand. Use a feeler gauge or plastigage to measure the distance between the pinion head and the pinion gear face.
The preload range should be between 10-25 in-lbs, and you can adjust it by swapping shims up or down. Reinstall the pinion nut and washer, torque them to the specified amount, and re-check the rotating torque of the pinion once more. Repeat this process until the desired preload is achieved, and then take the vehicle out for a test drive to ensure quiet operation.
In summary, setting pinion bearing preload without a torque wrench is possible with the use of plastigage or a feeler gauge. This process requires some patience and precision, but it can be done with a few basic tools and careful measurements. Always refer to the manufacturer’s specifications for torque values and preload ranges, and double-check your work to ensure a safe and reliable drivetrain.
Reinstall Pinion Nut and Washer and Check Preload with Dial Indicator
Setting Pinion Bearing Preload If you’re trying to set pinion bearing preload and don’t have a torque wrench, you can still do it with a dial indicator. Once you’ve removed the old pinion nut and washer, clean the threads and apply some thread locker. Install the new pinion nut and washer, and tighten it until the bearings bind.
Then, back off the nut just enough to allow the pinion to turn smoothly, but with slight resistance. The dial indicator will help you keep track of the pinion position and the amount of preload being applied to the bearings. You can then adjust the preload by adding or removing shims until you arrive at the desired number.
Once the correct amount of preload is set, you can firmly tighten the pinion nut and washer to the manufacturer’s specifications and double-check for any loose parts. This process will help you ensure that your pinion bearings are set to the factory standards and running smoothly.
Reinstall Differential Cover and Refill with Fluid
If you’re a DIY mechanic, you know how important it is to have your pinion bearing preload set correctly when installing a differential cover. But what if you don’t have a torque wrench handy? Don’t worry! It’s still possible to get the job done with some simple tools and a bit of know-how. Firstly, you’ll need to remove the differential cover, being careful not to damage the gasket.
Next, clean the old gasket material off the cover and housing. Now, set your pinion gear back into place, and insert your bearing cups with a bearing race driver. Pack the pinion bearings with grease, and then install the pinion nut.
Tighten it down until there’s a slight preload, but not so much that it won’t spin freely. Finally, reinstall the differential cover using a new gasket, and refill with the recommended fluid. Double-check your work, and you’re good to go.
With a bit of patience and careful attention, you can install your differential cover and set your pinion bearing preload without a torque wrench. It’s all about taking your time and being meticulous, so don’t rush it!
Conclusion
In conclusion, setting pinion bearing preload without a torque wrench is not an impossible feat. It requires a delicate balance of finesse and experience to get just the right amount of resistance in the bearing. Think of it like finding the perfect balance in a game of Jenga – too loose and everything falls apart, too tight and you’ll cause damage.
So, roll up your sleeves and get ready to embrace your inner mechanic as you master the art of setting pinion bearing preload with nothing but your intuition and a trusty pry bar. Happy wrenching!”
FAQs
1. What are the signs of a bad pinion bearing preload? A: Some signs of a bad pinion bearing preload include excessive noise from the rear end, vibration during acceleration or deceleration, and gear failure. 2. Can you set pinion bearing preload without a torque wrench? A: Yes, you can set pinion bearing preload without a torque wrench by using a crush sleeve eliminator or a solid spacer. 3. How do you adjust pinion bearing preload with a crush sleeve? A: To adjust pinion bearing preload with a crush sleeve, you need to tighten the pinion nut until the bearing preload is at the right measurement, which can be checked with a dial indicator. 4. Is it necessary to use a dial indicator to set pinion bearing preload? A: While it is not necessary, using a dial indicator is recommended for accurate pinion bearing preload adjustment. 5. What happens if pinion bearing preload is set incorrectly? A: If pinion bearing preload is set incorrectly, it can lead to premature wear and failure of the differential gears, as well as noise and vibration while driving. 6. Can a DIY mechanic set pinion bearing preload or is it a job for a professional? A: A DIY mechanic with the proper tools and knowledge can set pinion bearing preload, but if you are not confident in your abilities, it is recommended to take your vehicle to a professional mechanic. 7. What tools are needed to set pinion bearing preload? A: To set pinion bearing preload, you will need a dial indicator, a torque wrench (optional), a pinion nut socket, and either a crush sleeve eliminator or a solid spacer, depending on your vehicle’s setup.

