How to Set up Angle Grinder in 6 Easy Steps for Accurate Cutting

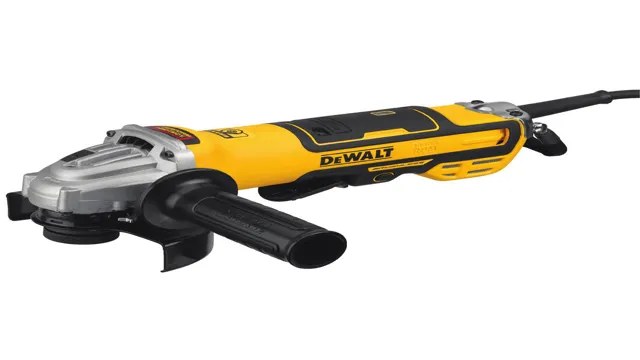
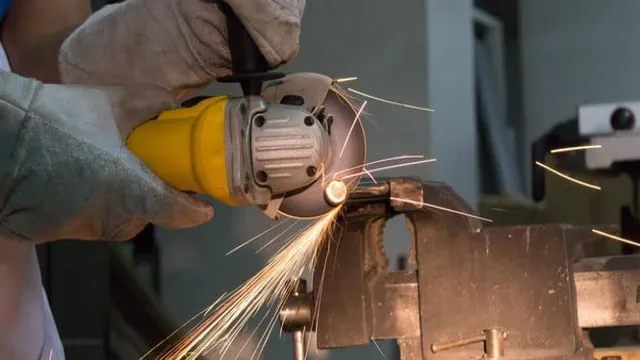
Do you have an angle grinder lying around but don’t know where to start? Don’t worry, you’re not alone. Setting up your angle grinder can seem intimidating, but with a few simple steps, you can begin to use it effectively and efficiently. An angle grinder is a versatile tool that can be used for a range of tasks, including cutting, grinding, and polishing.
However, before you begin, you must learn how to set it up properly. In this blog post, we’ll guide you through the setup process for your angle grinder, so you can start tackling your projects with ease. Let’s get started!
Safety Precautions
When it comes to using an angle grinder, setting it up properly is crucial for both getting the job done right and staying safe. Begin by selecting the correct disk size and type for the task at hand. Then, adjust the guard to ensure that it covers the top and sides of the disk.
Make sure that the disk is securely tightened and that the power cord is in good condition. Before turning on the grinder, put on protective gear such as safety goggles and gloves. Finally, never remove the guard or use the tool with one hand.
Remember, an angle grinder is a powerful tool that should always be used with caution and proper safety precautions.
Wear proper safety gear
When it comes to staying safe while engaging in potentially dangerous activities, wearing proper safety gear is an absolute must. Whether you’re working at a construction site or hitting the slopes, protective gear like helmets, gloves, and safety glasses can make all the difference in preventing serious injuries. Sure, it can be tempting to skip out on that bulky helmet or those uncomfortable knee pads, but the consequences of doing so can be severe.
So, why take the risk? By investing in high-quality safety gear and wearing it every time you engage in risky activities, you can help ensure that you stay safe and avoid unnecessary accidents. Remember, safety always comes first – no matter how cool or confident you may feel without protective gear.
Inspect tool for damage
When it comes to inspecting tools for damage, there are a few important safety precautions you should follow to ensure that you stay safe. First and foremost, always wear appropriate protective gear, including gloves and eye protection, when inspecting tools. You should also be sure to inspect the tool thoroughly before using it to see if there are any visible signs of damage, such as cracks, chips, or rust.
Additionally, it’s a good idea to test the tool before using it to ensure that it is still working properly. If you notice any issues with the tool or it doesn’t seem to work correctly, don’t use it until it has been repaired or replaced. Remember, taking the time to inspect your tools for damage can help prevent accidents and injuries while you work.
Secure workpiece
When it comes to working with power tools and machinery, safety precautions are of utmost importance. One vital aspect of safety is ensuring that the workpiece is securely fastened in place before beginning any cuts or operations. This ensures that the piece does not move or shift unexpectedly, potentially causing harm to the operator or others nearby.
There are several methods for securing workpieces, depending on the type of machinery being used and the specific piece of material. Clamping the workpiece to the table or bed of the machinery is a common method, using clamps or vices to hold it securely in place. Another option is using vacuum suction cups to hold the piece in position.
Whatever method is used, the key is to ensure that the workpiece is firmly and safely secured before beginning any work. Failure to do so can lead to accidents and injuries that could have been easily prevented. Always prioritize safety when working with power tools and machinery.
Understand the tool
When working with any tool, safety should always be a top priority. The same goes for understanding the tool itself. Before using any tool, it’s critical to familiarize yourself with its parts, operations, and any other relevant information.
First, ensure that you’re using the correct tool for the job. Each tool has specific instructions and guidelines for proper use, so it’s essential to read and follow those guidelines. When using tools, it’s common to experience hazardous situations.
Whether it’s a saw or hammer, having knowledge of the risks and how to avoid them is key to staying safe. Ensuring your workspace is free of hazards is also essential to your overall safety. Before using any tool, keep in mind that safety should be a top priority.
Stay alert, focused, and properly informed to keep yourself and those around you safe. Remember, a little safety goes a long way, so take the time to understand the tool and its potential hazards. Safe tool usage should always be your top priority to reduce the risk of accidents and injuries.
Assembly
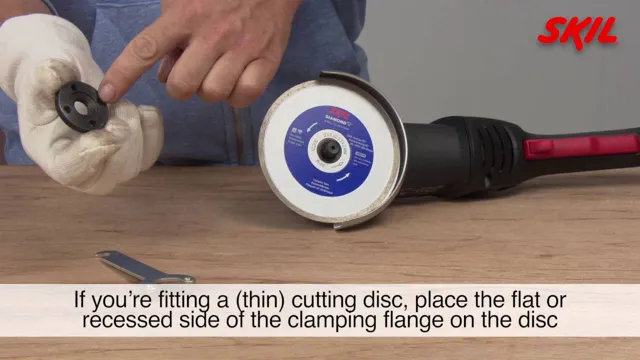
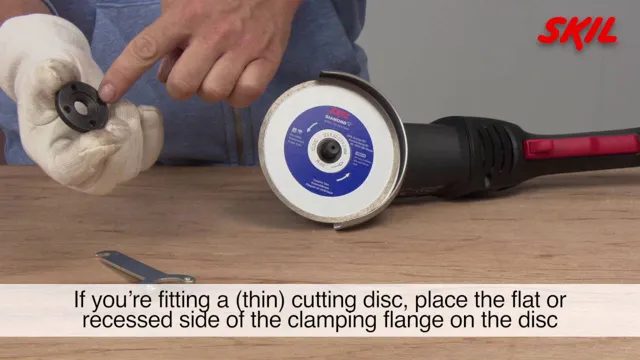
If you’re looking to set up an angle grinder for use in your DIY projects or workshop, there are a few things you should consider first. Firstly, select the right grinder disc for your project, making sure it’s compatible with your grinder’s size and power output. Then, ensure your grinder is unplugged before you start attaching the disc, making sure to use the correct method and tool for your specific model.
Once you’ve attached the disc securely, plug in your grinder and take the time to adjust the guard and handle to your preferred positions for comfort and safety. Remember, operating an angle grinder can be dangerous, so always wear protective gear like eye and ear protection and follow all manufacturer’s safety recommendations. By ensuring you set up your angle grinder correctly, you’ll be ready to tackle your next project with confidence and ease.
Attach the handle
If you’re in the process of assembling something that requires a handle, it’s important to make sure you attach it securely. The first step is to locate the screw holes where the handle will be attached. Make sure to align the handle properly so that it faces in the correct direction.
Once you have aligned the handle, use a screwdriver to insert the screws through the holes and into the designated holes on the handle. Tighten the screws slowly, making sure to keep the handle straight as you do so. Continue tightening until the screws are flush with the handle.
Double-check to ensure that the handle is secure before using the object. By following these simple steps, you can easily attach a handle to your project and avoid any unnecessary mishaps.
Install the disc
To begin the installation of the disc, the first step is assembling the necessary components. Ensure that you have the disc and any accompanying materials such as a manual or warranty information. Next, check for any required drivers or software that may need to be installed prior to inserting the disc.
This can usually be found on the manufacturer’s website. Once all necessary components are gathered, carefully insert the disc into the disc drive. Be sure to follow any prompts or instructions that appear on the screen.
Keep in mind that some discs may take longer to install than others, depending on the size of the software or application. After installation is complete, double-check to make sure that everything is functioning properly. Congratulations, you have successfully installed the disc!
Adjusting the Settings
If you’re wondering how to set up an angle grinder, the first thing you need to understand is that it’s not as complicated as it seems. After assembling the necessary components, the next step is to adjust the settings of your angle grinder. The depth of cut, the wheel guard, and the speed are the three most important things you need to consider when setting up your angle grinder.
The depth of cut determines how much of the material you’re cutting will be removed by the wheel. The wheel guard is a protective shield that prevents the wheel from flying off and causing injury. The speed refers to the rotations per minute (RPM) of the wheel.
Different materials require different speeds, so it’s essential to adjust the RPM accordingly. Once you’ve got these basic settings in place, you’re ready to start using your angle grinder. Remember to always wear protective gear such as safety glasses, gloves, and a dust mask to avoid injury and exposure to dust.
Adjust the guard
Adjusting the guard settings is a crucial aspect of using power tools safely. The guard is a protective cover on the tool that prevents debris and sparks from flying out and causing harm. Before using any power tool, always check the guard and make sure it’s in the correct position.
Adjust the guard to suit the specific task you’re performing. For instance, when using a circular saw, adjust the guard to the depth of the cut, ensuring the blade is completely covered. Failure to adjust the guard can lead to accidents that can cause severe injuries.
Keep in mind that different tools have different types of guards and adjusting mechanisms. Always consult the user manual or ask for professional help if you’re not sure how to adjust the guard. By adjusting the guard correctly, you’ll reduce the risks of accidents, and enjoy a safer, hassle-free work experience.
Adjust the disc position
When it comes to adjusting the settings on your disc player, it’s essential to know how to adjust the disc position. Sometimes, a disc might not play correctly, or it may skip or stutter during playback. By adjusting the position of the disc, you can often fix these issues and get your media playing smoothly again.
To do this, look for the disc position adjuster on your player. This button or lever will allow you to move the disc up or down or side to side, depending on the model. Make small adjustments and test the disc after each one until you find the best position for playback.
By taking the time to adjust the disc position, you can improve the listening or viewing experience and avoid frustrating interruptions.
Testing Your Angle Grinder
Setting up your angle grinder can be a daunting task, but it’s important to test it out before getting to work. First, make sure your safety gear is in place, including goggles and gloves. Then, choose the right disc for your project, whether it be for cutting, grinding, or sanding.
Next, adjust the guard to the correct angle for your task and tighten it securely. Double-check that the disc is properly installed and centered. Now it’s time to turn on the grinder and let it run for a few minutes to ensure everything is running smoothly.
Listen for any unusual noises or vibrations, and check that the disc is spinning freely. Once you’ve completed these steps, you’re ready to start your project with confidence knowing that your angle grinder is ready for the job. Remember to always prioritize safety and ensure that you’ve set up your equipment properly before use.
Practice on scrap material
Angle Grinder If you’re a DIY enthusiast, a mechanic, or a metalworker, you know the importance of having a reliable angle grinder. Not only can it aid you in cutting and grinding through various materials, it can also significantly speed up your work and ensure precision in your cutting or grinding tasks. However, before using an angle grinder, it’s important to test it out on scrap material.
This allows you to ensure that the machine is performing correctly and that it can handle the task you have at hand. It’s also crucial to examine the blade, ensuring that it’s not cracked, bent or dull, as this could result in a dangerous incident. Remember to wear protective gear, including gloves, goggles and a face shield, and ensure that the material you’re working on is secured before turning the grinder on.
By performing these checks and taking precautions, you can be confident in using your angle grinder for whatever project you have in mind.
Ensure proper disc rotation and stability
One of the most important aspects of using an angle grinder is ensuring proper disc rotation and stability. A wobbly or improperly rotating disc can cause serious injury or damage to your workpiece. Before using your angle grinder, it’s important to test the disc for any defects or damage, as well as make sure it is installed properly.
This can be done by turning on the grinder without any materials in contact with the disc and observing its rotation. If there is any visible vibration or wobbling, immediately turn off the grinder and make sure the disc is properly tightened and secured. It’s also important to always use the proper guard and handle attachments for added stability and control.
By taking the time to test and ensure proper disc rotation and stability, you can avoid needless accidents and achieve optimal results for your project.
Maintenance and Cleaning
If you’re looking to set up an angle grinder, it’s important to follow a few key steps to ensure safe and efficient use. First, make sure you have all the necessary equipment, including the angle grinder itself, appropriate safety gear like gloves and eye protection, and the correct type of grinding wheel for the task at hand. Next, carefully read the manufacturer’s instructions and safety guidelines to familiarize yourself with the tool and potential hazards.
Once you’re ready to start, secure your workpiece and adjust the angle grinder’s settings, making sure you’re using the appropriate speed and rotation direction. Lastly, double-check your safety gear and make sure you’re in a stable, safe position before starting the tool. Remember to always prioritize safety when using an angle grinder to avoid injury or damage to your workpiece.
Remove and inspect the disc
If you’re having issues with your disc drive or game console, the first step you can take is to remove and inspect the disc itself. Sometimes, simply cleaning the disc can fix any problems you’re experiencing. Dust, fingerprints, and scratches can all contribute to errors and malfunctions, so it’s essential to clean the disc carefully.
Start by using a soft, lint-free cloth to wipe any visible debris away from the surface of the disc. Avoid using any harsh chemicals or abrasive materials that might scratch the surface of the disc. If you’re still experiencing issues with the disc, it might be time to consider additional maintenance or repairs.
Regularly cleaning your game console and discs can help reduce wear and tear and prolong the life of your equipment. So, next time you encounter issues with a game or disc, try removing and inspecting the disc first to see if a simple cleaning is all it needs to get back to working properly.
Clean the tool after each use
When it comes to maintaining your tools, one important aspect to keep in mind is proper cleaning after each use. Not only does this prevent the buildup of grime and debris, but it can also extend the lifespan of your tools and keep them working efficiently. After all, a dirty tool can lead to poor performance and even damage over time.
So, how can you ensure proper cleaning? Start by removing any excess debris or residue from the tool using a brush or cloth. Then, use a cleaning solution that is appropriate for the material of your tool, being sure to follow any instructions to avoid damage. Finally, make sure to dry your tool completely before storing it in a safe, dry place.
With a little attention and care, your tools will be able to serve you well for years to come.
Store the tool properly
Proper tool maintenance and cleaning are critical if you want your tools to last for years. Before storing them, it is important to clean them thoroughly to avoid rust, dirt buildup, and other damage. Different tools require different cleaning methods, so make sure that you research the proper way to clean each tool in your collection.
Once your tools are cleaned, store them in a cool, dry place where they won’t get damaged or knocked around. Avoid stacking them on top of each other, as this can cause damage, especially with sharp tools. Invest in proper storage solutions like a tool chest or drawer organizer to help keep your tools in good shape.
By taking the time to care for your tools properly, you’ll save money and keep them working for all of your future projects.
Conclusion
And there you have it! Setting up an angle grinder isn’t as daunting as it may seem. With a few simple steps, you’ll be grinding and cutting with ease. Just remember to always read the manual, equip yourself with proper safety gear, and don’t be afraid to ask for help if needed.
With these tips in mind, you’ll be a master of the angle grinder in no time. Now, go forth and grind with confidence!”
FAQs
What safety precautions should I take when setting up an angle grinder?
Always wear eye and ear protection, gloves, and a face mask. Make sure there is no flammable material nearby, and keep a fire extinguisher nearby.
How do I assemble an angle grinder?
Follow the manufacturer’s instructions and attach the appropriate disc for the task at hand. Install any necessary attachments or accessories.
How do I adjust the cutting depth on an angle grinder?
Most angle grinders have a wheel guard that can be adjusted to change the cutting depth. Refer to the manufacturer’s instructions for the specific model.
Can I use an angle grinder to cut metal?
Yes, angle grinders are commonly used for cutting metal. You should use a cutting disc designed specifically for metal.
How often should I change the disc on my angle grinder?
Discs should be changed when they become worn, chipped, cracked, or damaged. It is important to regularly inspect the disc before and after use.
What is the difference between a wired and a cordless angle grinder?
Wired angle grinders are plugged into an electrical outlet and have a continuous power supply. Cordless angle grinders use rechargeable batteries and are more portable but have a limited battery life.
How do I maintain my angle grinder?
Keep the tool clean and free of debris, store it in a dry place, and regularly lubricate moving parts. Check the disc and attachments before and after use.

