How to Sharpen Carving Chisels: Expert Tips and Techniques for a Razor-Sharp Edge

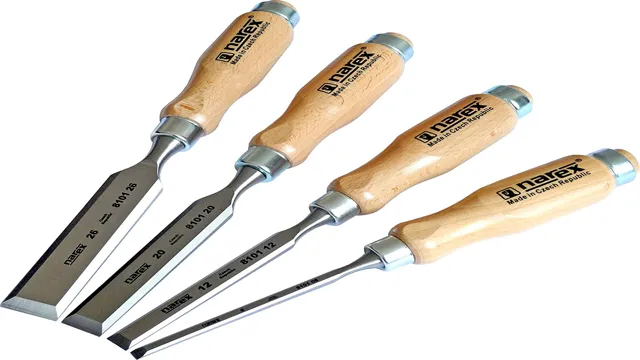
Carving chisels are a valuable tool for artisans, woodworkers, and hobbyists, but they require maintenance to remain sharp. Dull chisels can not only damage the wood but also be incredibly frustrating to work with. You may have tried a few methods to sharpen your carving chisels but haven’t found one that works effectively.
Don’t worry, in this blog, we’ll go over everything you need to know to sharpen your carving chisels like a pro. From the tools and equipment to the step-by-step process, we will cover it all. So, grab your chisels and let’s get started.
Gather Your Materials
If you want to learn how to sharpen carving chisels, you first need to gather your materials. The essential items you’ll require are a sharpening stone, honing compound, safety glasses, and a leather strop. The sharpening stone comes in various grades of coarseness, and you’ll need to determine the correct level of coarseness for your chisels.
For beginners, a fine-grit stone is a safe choice as it won’t damage your chisels. Honing compound is a paste used on the leather strop to polish the chisels and create a razor-sharp edge. Safety glasses are necessary to protect your eyes from stray chisel debris.
A leather strop is a piece of leather with honing compound rubbed onto it. The leather strop polishes the chisels after they’ve been sharpened on the sharpening stone. Collecting these materials is the first step in sharpening your carving chisels.
Sharpening Stones (Coarse, Medium, Fine)
When it comes to sharpening knives or any other tools, having the right set of tools is essential. One of the most important tools for sharpening is a set of sharpening stones. Sharpening stones come in different grits (coarse, medium, and fine) and materials (such as diamond or ceramic).
To gather your materials for sharpening, you’ll need to first select the right type of sharpening stone for your needs. For example, a coarse stone is best for repairing chips or damaged edges, while a fine stone will give a razor-sharp edge. Once you’ve chosen your stones, you’ll need a lubricant such as oil or water to keep the stones from clogging and to prevent metal shavings from contaminating your workspace.
Don’t forget to also have a sharpening guide or angle guide to help maintain the correct angle when sharpening. With the right materials, you’ll be on your way to sharpening your knives and tools like a pro.

Lubricant (Water or Oil)
When it comes to the lubrication of machinery, the choice between water and oil lubricants can be a bit confusing. It’s important to first gather the necessary materials before making a decision. For water lubrication, you’ll need distilled water, a dispersant, and a corrosion inhibitor.
On the other hand, oil lubrication requires mineral oil or synthetic oil, an additive package, and a corrosion inhibitor. It’s important to consider the operating conditions and environmental factors when choosing between the two. If the machinery operates at high temperatures or in a dusty environment, oil lubrication may be the better choice as it provides better protection and has higher temperature limits.
Water lubrication is suitable for machinery that operates at lower temperatures and has better environmental benefits. Ultimately, the choice of lubricant will depend on the specific needs of your machinery and the conditions in which it operates. By gathering the necessary materials and considering the operating conditions, you’ll be able to make an informed decision on the best lubricant for your machinery.
Strop or Honing Compound
When it comes to sharpening your blades, whether it be your kitchen knives, garden tools or woodworking chisels, you’ll need either a strop or honing compound. A strop is a leather or felt pad used to hone the blade’s razor edge by polishing it. Honing compound, on the other hand, is an abrasive paste that is applied to a strop to further refine the blade’s edge.
Before you begin, you’ll need to gather a few materials. Firstly, you’ll need a sharpening stone or a sharpening system, depending on what you’re sharpening. You’ll also need a strop made from either leather or felt.
If you don’t already have one, you can purchase strops that come pre-loaded with honing compound. Finally, you’ll need to choose which honing compound to use as there are various grits available. Coarse grits are used for repairing nicks and chips in your blades while finer grits are used for refining and polishing the edges.
Once you have all these materials handy, you’re ready to strop or apply honing compound to your strop.
Angle Guide (Optional)
Before you start sharpening your knives with an angle guide, make sure you have all the necessary materials to begin. The first item on your list should be your knife, followed by an angle guide if you choose to use one. You’ll also need a sharpening stone or a sharpening system to complete the sharpening process.
If you’re using a sharpening stone, be sure to have a honing oil or water nearby to lubricate the stone and ensure a smooth sharpening experience. When choosing your angle guide, make sure it’s the right fit for your knife to achieve the desired angle. With all of these materials gathered, you’ll be on your way to sharpening your knife like a pro.
Preparing the Chisel
If you’re getting ready to start your carving project, the first step is to prepare your chisels. Sharpening your carving chisels is essential in ensuring that they are ready for the task ahead. The simplest way to sharpen your chisels is to use a sharpening stone.
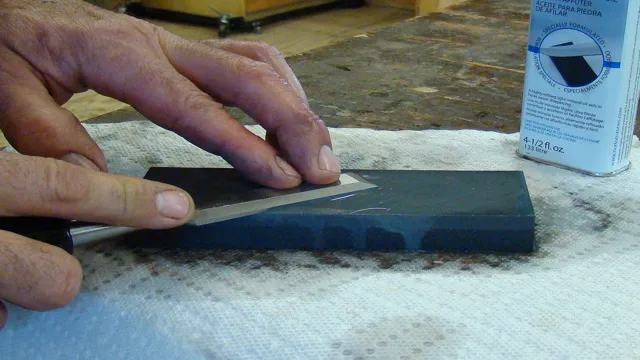
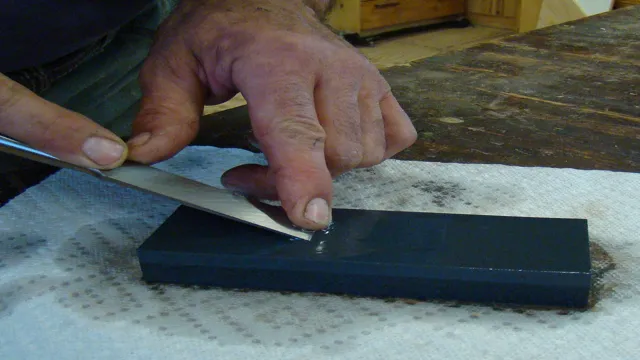
However, not just any sharpening stone will do. You need to get a quality stone that is coarse enough to remove any nicks or dents in the blade. Begin by rubbing the blade on the stone, holding it at about a 25-degree angle.
Work back and forth, making sure to keep the angle consistent. Once you’re satisfied with the edge, flip the chisel over and repeat the process on the other side. After sharpening, make sure to hone the blade, either by using a leather strop or by honing the edge on a piece of fine-grit sandpaper.
By preparing your chisels properly, you’ll be able to tackle any carving project with confidence and ease.
Disassemble the Chisel
To disassemble a chisel, you must first prepare it for the task at hand. This involves ensuring that the blade is sharp and in good condition, as well as removing any rust or debris that may impede your progress. Using a sharpening stone, hone the blade of the chisel until it is as sharp as possible.
Next, use a wire brush to remove any rust or dirt from the surface of the tool. This will not only help to prolong the lifespan of your chisel, but it will also make it easier to work with. With the chisel properly prepared, you can then proceed with disassembly, carefully removing each component in turn until you have access to the blade.
Whether you are repairing a damaged chisel or simply replacing some of its parts, this process will ensure that you can work safely and efficiently.
Clean and Dry the Blade
Before using a chisel, it is important to ensure that the blade is clean and dry. This is an important step to prepare the chisel for use, as any dirt or moisture on the blade can affect its sharpness and durability. To clean the blade, use a soft cloth to wipe off any dirt or dust that may have accumulated on it.
If there are any stubborn stains, you can use a mild solvent to remove them. Ensure that the solvent is fully rinsed off before drying the blade. To dry the blade, use a dry cloth to remove any remaining moisture, ensuring that the blade is completely dry before use.
By following these simple steps, you can ensure that your chisel is in good condition and ready for use whenever you need it. Remember, a well-prepared chisel is essential for achieving precise and clean cuts in woodworking projects.
Inspect for Damage or Wear
Before you start using a chisel, it’s crucial to inspect it for any damage or wear. This is necessary to ensure a smooth and efficient cutting process and a long-lasting tool. Look out for any cracks or chips on the blade and handle, as well as any signs of rust or corrosion.
If you notice any damage, it’s best to replace the chisel rather than risk compromising its performance. Additionally, make sure the blade is sharpened to prevent it from getting stuck in the wood or damaging it. A well-prepared chisel will not only make your woodworking projects easier but also safer.
So, take a few minutes to inspect and prepare your chisel before using it, and you’ll be rewarded with a high-quality end result.
Sharpening the Blade
Carving chisels are an essential tool for any woodcarver, but they lose their edge over time. To keep your chisels sharp and ready to use, make sure you have the proper tools, such as a honing guide and sharpening stones or sandpaper. Start by removing any burrs or nicks from the blade with a coarse grit stone or sandpaper.
Then, move on to a finer grit stone or sandpaper to create a sharp cutting edge. Make sure to maintain the original bevel angle of the chisel, as this is crucial for its performance. Keep the blade lubricated with honing oil or water and test the sharpness by shaving a piece of paper.
With a little practice and patience, you’ll be able to sharpen your carving chisels like a pro. Don’t let dull chisels slow down your woodworking projects – sharpen them up and get back to creating!
Choose the Correct Stone Grit
When it comes to sharpening your knife or blade, choosing the correct stone grit is crucial. Stone grit is essentially the level of abrasiveness that a sharpening stone has, and it determines how much metal is removed and how sharp your blade becomes. Higher grit stones are less abrasive and are used for honing and refining an already sharp edge, while lower grit stones are more abrasive and are used for repairing and reshaping dull edges.
The most common grits for sharpening stones are 1000, 2000, and 3000. A 1000 grit stone is best for repairing damaged edges, a 2000 grit stone is great for refining the edge, and a 3000 grit stone is perfect for polishing and creating a razor-sharp edge. Choosing the right stone grit for your blade depends on its condition and how sharp you want your blade to be.
So, the next time you sharpen your blade, remember to choose the right stone grit for optimal results and a longer-lasting edge.
Apply Lubricant to the Stone
When it comes to sharpening your blade, applying lubricant to the stone is a critical step for achieving a razor-sharp edge. The lubricant serves several purposes. Firstly, it reduces friction between the blade and the stone, which helps prevent the blade from getting too hot and losing its temper.
Secondly, it helps remove any metal shavings or debris that have accumulated on the stone. Lastly, it helps ensure a smooth and consistent honing motion. Oil-based lubricants, such as mineral oil or honing oil, are popular choices as they do not dry out quickly and provide sufficient viscosity for honing.
Simply apply a few drops of the lubricant onto the sharpening stone and spread it evenly over the surface before you begin sharpening. Your blade will thank you for the extra care and attention you give it during the sharpening process, as it will be sharper, smoother, and perform better than ever before.
Hold the Chisel at the Correct Angle
When it comes to sharpening the blade of your chisel, it’s important to hold it at the correct angle. The proper angle will not only allow you to sharpen the blade effectively but it will also prevent damage to the blade. Generally, a chisel should be sharpened at a 25-degree angle.
However, this angle can vary depending on the type of chisel you have. For example, a paring chisel should be sharpened at a 20-degree angle while a mortise chisel should be sharpened at a 30-degree angle. It’s essential to use a sharpening guide to ensure that you hold the chisel at the correct angle while sharpening.
By doing so, you’ll get the best possible edge on your chisel and it will remain sharp for longer. So, take care to hold that chisel at the correct angle, and you’ll get great results every time you use it!
Work the Blade Across the Stone
Sharpening your blade is an essential step in maintaining your tools’ longevity and performance. To begin sharpening, you’ll need water stones and your blade. Begin by soaking your stones and then placing them on a flat surface.
Take your blade and place it at a 20-degree angle on the coarsest stone, this is the start of your sharpening process. Work the blade across the stone, making sure the entire length of the blade is sharpened. Start with the heel of the blade and gradually work your way to the tip.
Repeat this step four to five times on each side of the blade, then move on to finer grit stones. Repeat the sharpening process on each stone, progressively making the grind finer with each pass. As you sharpen, be sure to keep a consistent angle, use even pressure, and keep the blade’s edge in contact with the stone.
Sharpening is a skill that takes time and patience to master, but with practice, you’ll be able to keep your blades razor-sharp and performing to their full potential.
Check for a Bur on the Edge
When it comes to sharpening your blade, one crucial step that you should never overlook is checking for a bur on the edge. A bur is a tiny metal hook that forms along the blade’s edge after sharpening, and it can cause the blade to tear instead of slicing smoothly through your material. To check for a bur, you can carefully run your finger along the blade’s edge and feel for any rough spots.
Alternatively, you can inspect the edge under a bright light and look for any irregularities or small protrusions. If you do find a bur, you can use a honing stone or steel to gently rub it off and smooth out the edge. By taking the time to check for a bur and removing it, you’ll be able to sharpen your blade more effectively and achieve cleaner, more precise cuts.
So, always remember to check for a bur before using your newly sharpened blade to avoid any mishaps in the future.
Repeat on the Other Side of the Blade
When it comes to sharpening the blade of your knife or tool, it’s important to remember to repeat the process on the other side of the blade to get the best results. While it may seem like common sense to some, many people forget this step and end up with an unbalanced edge that doesn’t work as effectively as it could. So, after you’ve honed and polished one side of the blade, be sure to flip it over and repeat the process on the other side.
This will ensure that both sides of the blade are equally sharp and ready for whatever task you have in store for them. Remember, a sharp blade not only makes your job easier, but it can also be much safer to use than a dull one. So take the time to properly sharpen and maintain your knives and tools, and you’ll be rewarded with better performance and longevity from them.
Repeat with the Next Higher Grit Stone
Once you’ve completed sharpening your blade with the first stone, it’s time to move up to the next higher grit stone. This process may take some time, but it’s worth it to achieve a razor-sharp edge. Using the higher grit stone will begin the finer honing process and remove any remaining burrs or nicks from the previous sharpening.
Remember to maintain a consistent angle and pressure as you swipe the blade across the stone in a back and forth motion. As you progress through the higher grits, you’ll notice the blade becomes smoother and more polished. Don’t rush the process, take your time, and be patient.
The result will be a sharp and precise blade that will make your cutting tasks effortless.
Honing the Blade
Carving chisels are fantastic tools for crafting intricate designs and patterns into wood, but they require regular sharpening to maintain their edge. Sharpening may seem daunting at first, but it’s actually quite simple with the right technique. To sharpen your carving chisels, start by choosing a sharpening stone of appropriate grit, with coarser stones being used for severely dull blades and finer ones for touch-ups.
Once you’ve selected your stone, apply a small amount of honing oil to the surface and begin running the chisel’s bevel against it at a 20-degree angle, moving it back and forth in a fluid motion until a burr forms. Flip the chisel over and repeat the process on the other side, then gently remove the burr with a fine-grit honing stone. With a little practice, sharpening your carving chisels will become second nature and your tools will be able to produce stunning, crisp details with ease.
Strop the Blade or Apply Honing Compound
“blade honing” When it comes to maintaining sharp and efficient cutting blades, honing is crucial. Depending on the type of blade you’re working with, you may either strop or apply honing compound to it. Stropping involves running a blade across a leather or suede surface to remove burrs and nicks on the blade’s edge.
This process can be repeated several times until the blade is razor-sharp. Alternatively, you may opt to apply honing compound to the blade, a special abrasive paste that can be applied to the stropping surface. By rubbing the blade across the surface, the compound helps to remove any remaining blemishes on the blade while sharpening it to precision.
Ultimately, whether you choose to strop or use honing compound, honing your blades regularly can extend their lifespan and improve their performance, making them a worthwhile investment.
Hold the Chisel at the Correct Angle
When it comes to woodworking, honing the blade is an essential task that ensures your chisels and other tools remain sharp and ready for use. Holding the chisel at the correct angle is crucial for getting the most out of your sharpening efforts. The angle at which you hold your chisel affects how efficiently it cuts and how long it stays sharp.
To hone your blade, start by placing the chisel on your sharpening stone, with the bevel facing down. Next, hold the chisel at the angle that corresponds to the bevel, which is typically around 25 degrees. Use your other hand to apply pressure and slowly move the chisel back and forth across the sharpening stone.
Be sure to keep the angle consistent as you work, as this will ultimately determine the edge you achieve. By taking the time to hone your blades correctly, you’ll enjoy better results during your next woodworking project while also extending the life of your tools.
Work the Blade Across the Strop or Compound
When it comes to ensuring that your blade is razor-sharp, honing is key. Honing is the process of using a strop or a compound to polish the edge of your blade, keeping it sharp and ready to use. To hone your blade, you will need to work the blade across the strop or compound, applying pressure evenly and consistently.
This will help to remove any burrs or imperfections from the blade’s edge, creating a clean and sharp edge. Honing takes practice and patience, as it can take time to get the angle and pressure just right. However, with regular honing, you’ll find your blade stays sharp for longer, making your cutting tasks much easier.
So, the next time you find your knife or tool is getting dull, hone the blade to bring it back to its prime.
Repeat on the Other Side of the Blade
Honing the blade of your knife is a critical skill that every chef should master. And a crucial part of honing the blade is repeating the process on the other side. After you’ve honed one side of the blade, flip the knife and repeat the process on the other side.
This will ensure that the blade is honed evenly and symmetrically, resulting in a sharp and precise cutting edge. Don’t skip this step, or you may end up with an uneven edge that won’t perform as well. When honing on the other side, remember to maintain the same angle as you did on the first side, and repeat the same number of strokes.
By doing so, you’ll ensure that your knife is perfectly honed and ready to tackle any slicing, dicing, or chopping task in the kitchen. And remember, honing your knife regularly will not only keep it sharper but also extend its lifespan.
Reassembling and Testing the Chisel
Sharpening carving chisels can be a daunting task for beginners, but it is an essential one. Once you have disassembled the chisel, the next step is to reassemble it and test it for sharpness. It is important to ensure that all parts fit securely back together, so the chisel does not wobble while you carve.
Once you have reassembled it, it’s time to test the sharpness. It’s best to start with a piece of soft wood to avoid damaging the edge. Press the chisel to the wood and push it through with smooth, firm strokes.
If it cuts effortlessly, your chisel is sharp and ready to use. If it struggles to cut and leaves rough edges, it needs more sharpening. You can repeat this process until you have achieved the desired sharpness.
Sharpening your carving chisels takes time and practice, but it pays off with more effortless carving and cleaner results.
Reassemble the Chisel
After you have sharpened your woodworking chisel in the previous steps, it’s time to reassemble it and test it out. Begin by removing the tape around the chisel blade and cleaning off any excess oil, debris, or burrs. Next, insert the chisel blade into the handle and tap it gently with a rubber mallet until it is secure.
Make sure the chisel sits snugly into the handle so it won’t loosen while using it. If the chisel feels wobbly or unstable, disassemble it and repeat the steps to ensure a proper fit. Once the chisel is assembled, test it out on a scrap piece of wood to make sure it’s cutting smoothly and accurately.
You can adjust the angle of the bevel or the depth of the cut as needed to achieve the desired results. Don’t forget to store your chisel in a dry, protected area to prevent any rust or damage. With a properly assembled and sharpened chisel, you’ll be ready to tackle any woodworking project with ease!
Test the Sharpness of the Blade
After cleaning and sharpening the chisel, reassembling it is the next step to take. Firstly, ensure that the handle fits snuggly. It should not wobble or be too loose.
Once you have secured the handle, it’s time to test the sharpness of the blade. A sharp chisel is essential for clean and precise cuts. One way to test the sharpness is to hold the chisel under a light source and observe how light passes through the cutting edge.
If the blade is sharp enough, you should see a clear reflection of the light on the edge. Another way to test the sharpness is to make a cut on a piece of wood. The chisel should glide smoothly into the wood without leaving splinters.
If it doesn’t, then it needs more work on the sharpening stone. Remember always to store the chisel in a dry place and wipe the blade with a cloth before and after use to prevent rusting. In conclusion, reassembling and testing the sharpness of the blade are crucial processes in maintaining your chisel, ensuring it functions correctly, and helps you achieve your desired results.
Make Any Necessary Adjustments
After disassembling and cleaning the chisel, it’s important to make any necessary adjustments before reassembling and testing it. Check the cutting edge and ensure that it’s sharp and free of any nicks or chips. If there are imperfections, use a sharpening stone or sandpaper to even out the edge.
Next, check the handle and determine if it’s loose or damaged. If it is, replace it with a new one or use epoxy to secure it in place. Additionally, check the metal collar and ensure that it’s securely attached to both the blade and the handle.
Once you’ve made all necessary adjustments, carefully reassemble the chisel, making sure that all the parts fit together properly. Finally, test the chisel on a piece of wood to ensure that it’s cutting smoothly and efficiently. By taking the time to make any necessary adjustments, you can ensure that your chisel will perform as well as it did when it was brand new.
Conclusion
In conclusion, sharpening carving chisels is not just a simple task of grinding metal to a sharp edge. It requires patience, attention to detail, and a willingness to embrace the art of honing your craft. It’s like carving a sculpture: you start with a rough piece of material and gradually refine it until it’s a masterpiece.
So, the next time you pick up your favorite chisel, let your inner artist shine and put in the effort to sharpen it like a pro.”
FAQs
What is the proper angle for sharpening carving chisels?
The proper angle for sharpening carving chisels is typically between 20-25 degrees.
Can I use a sharpening stone to sharpen carving chisels?
Yes, a sharpening stone is a great tool for sharpening carving chisels. Just make sure to use the correct grit for your chisel.
How often should I sharpen my carving chisels?
It depends on how frequently you use them, but generally, sharpening after every 2-3 hours of use is recommended.
Is it necessary to use a honing guide when sharpening carving chisels?
No, it’s not necessary to use a honing guide, but it can help ensure a consistent and accurate angle while sharpening.
Can I use a power grinder to sharpen carving chisels?
Yes, a power grinder can be used to sharpen carving chisels, but it’s important to use caution and avoid overheating the blade.
How can I tell if my carving chisels need sharpening?
You can tell if your carving chisels need sharpening if they are difficult to push through the wood or if they are leaving fuzzy or rough cuts.
What type of lubricant should I use when sharpening carving chisels?
You can use water, oil, or a sharpening lubricant specifically designed for honing and sharpening chisels. Just make sure to clean your chisels thoroughly after sharpening.

