How to Sharpen Metal Lathe Tools Like a Pro: Tips and Tricks
Metal lathe tools are essential for any workshop or DIY enthusiast who wants to achieve precision in their metalworking projects. But over time, the edges of these tools inevitably become dull, making it challenging to produce accurate cuts. This not only leads to frustration but also wastage of materials, money, and time.
Fortunately, there’s a solution. By mastering the art of sharpening metal lathe tools, you can breathe new life into them, and save yourself from the agony of poorly performing tools. But how do you sharpen metal lathe tools the right way? In this blog, we’ll cover everything you need to know about sharpening metal lathe tools, from the various methods to the tools required, right down to the techniques used in sharpening.
We’ll provide simple tips and tricks that even beginners can use – no prior experience required. Whether you’re a seasoned machinist or just starting out, read on to discover how to sharpen metal lathe tools and get the precision you need in your metalworking projects.
Understanding Lathe Tool Geometry
If you’re new to metalworking or just getting into it as a hobby, understanding lathe tool geometry is essential. When you’re shaping metal on a lathe, the tool’s shape and angle make all the difference in the finished product’s precision and smoothness. To sharpen metal lathe tools, you’ll need to pay close attention to the angles of the tool.
Understanding the difference between the rake, the clearance angle, and the cutting edge can be complex, but it’s crucial to getting a sharp tool. A good rule of thumb is to grind the tool to an angle of 60 degrees, with a smooth cutting edge and a small radius. Grinding the tip to a sharp point will give you a cleaner cut and tighter tolerances.
With practice, you’ll become more familiar with the specific angles and shapes required for different materials and cuts. Overall, knowing how to sharpen your metal lathe tools will improve your precision and efficiency in metalworking while giving you greater satisfaction with your finished products.
Identifying Different Parts of a Metal Lathe Tool
When it comes to understanding the different parts of a metal lathe tool, it’s important to start with the basics of lathe tool geometry. Essentially, a lathe tool has a cutting edge, a nose, a shank, and a tool tip. The cutting edge is what actually removes material from the workpiece, while the nose serves as a support for the tool as it cuts.
The shank is the section of the tool that connects to the lathe and holds the tool in place, while the tool tip is the part that actually does the cutting. For those who are new to lathe tooling, it can be a bit overwhelming to try to identify all of these different components, but with some practice and guidance, it’s possible to become an expert in no time. So whether you’re a seasoned lathe operator or just starting out, taking the time to understand the different parts of a metal lathe tool can help you to work more efficiently and accurately, which is always a good thing when it comes to precision machining.
Grinding Wheel Selection for Sharpening
When it comes to sharpening a lathe tool, understanding its geometry is crucial for selecting the right grinding wheel. The most common shapes are straight, pointed, and round nose, each with specific angles and radii that affect the tool’s performance. For example, a straight tool is ideal for rough turning, while a round nose tool is great for finishing.
The correct grinding wheel selection can help you achieve the desired shape and sharpness, minimizing vibration and chatter, and increasing the tool’s lifespan. Factors to consider include the abrasive material, grit size, and bonding agent. For instance, aluminum oxide wheels are versatile and used for high-speed steels, while silicon carbide wheels are more suitable for carbide-tipped tools.
A finer grit size means a smoother finish, while a coarser one removes material faster. The bonding agent can be vitrified, resinoid, or rubber, affecting the hardness and performance of the wheel. With the right grinding wheel and knowledge of lathe tool geometry, you’ll be able to achieve precise and efficient cuts, improving your work quality.
Sharpening Process
Sharpening metal lathe tools is a necessary task that ensures optimal performance and precise cuts. The sharpening process involves using a grinding wheel or a bench grinder to remove any nicks or dullness from the edges of the tool. Before starting the process, it is important to inspect the tool for any damages such as chips or cracks.
A damaged tool can lead to poor performance and safety hazards. Then, using a grinding wheel with the appropriate grit size, the tool’s edges can be honed to a razor-sharp point. It is essential to maintain the correct angle and consistent pressure while grinding to ensure even sharpening.
Once the edges are evenly ground, a honing stone can be used to give them a final touch-up and smooth out any irregularities. Finally, the tool should be tested on a scrap piece of metal to ensure it is cutting smoothly and accurately. With proper sharpening, metal lathe tools can last longer and provide superior performance.
Cleaning and Setting up the Grinder
When it comes to enhancing the quality of your coffee, sharpening your grinder blades is a crucial step. To start the process, ensure that your grinder is unplugged and empty. Detach the hopper and discard any remaining beans.
Then, examine the blades for any signs of dullness, removing them if necessary. To sharpen the blades, you may use a grinding wheel, a sharpening stone, or a professional grinding service. Using a grinder to sharpen is ideal as it produces a precise and consistent finish.
Once the blades are sharpened, use a brush or cloth to remove any debris or dust. After cleaning the grinder, reassemble it, adjusting the thickness of the coffee as needed. The process of sharpening your grinder blades may seem daunting at first, but it can lead to a more flavorful, high-quality cup of coffee.
So, why not give it a try and taste the difference for yourself?
Grinding the Top Face of the Tool
Sharpening the top face of a tool is an essential process in maintaining its performance and prolonging its lifespan. In this process, the top surface of the tool is re-shaped and honed to create a sharper edge. The first step is to examine the tool and determine the angle at which it needs to be sharpened.
Once this has been determined, the tool is placed on a grinding wheel, and the top face is ground down to form a new and sharper edge. This process requires some skill and patience, as grinding too much material off the top face can weaken the tool and reduce its lifespan. Using a grinding wheel with a fine grit can help achieve a smoother and sharper edge.
Once the top face has been ground down, the tool is honed with a sharpening stone, and the new edge is polished. Overall, grinding the top face of a tool is a vital step in maintaining its performance and is essential in achieving clean and precise cuts.
Grinding the Side Relief Angles of the Tool
To ensure that your tools perform optimally, it’s crucial to sharpen them regularly. One essential part of the sharpening process is grinding the side relief angles of the tool. This angle helps in preventing the tool from rubbing against the workpiece while allowing it to cut more efficiently.
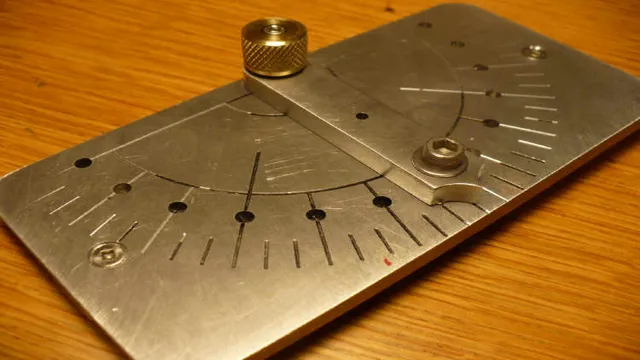
It’s essential to maintain the correct angle to avoid ruining the tool. To grind the side relief, first, set the grinder’s tool rest at a specific angle, depending on the tool’s type, size, and shape. You can use jigs to ensure accuracy while grinding, or you can do it by hand, but this can be tricky.
Move the tool back and forth across the grinding wheel, and remember to use light pressure. Check the angle with a protractor periodically and make any necessary adjustments. It’s essential to take your time with this step to ensure that you achieve a clean and precise result.
Remember, a poorly ground tool will not perform as well as a correctly sharpened one.
Grinding the End Cutting Edge of the Tool
When it comes to sharpening the end cutting edge of a tool, there are a few important things to keep in mind. First and foremost, it’s essential to use the right type of grinding wheel. A wheel that is too hard can cause excessive heat buildup, while a wheel that is too soft may not be able to remove enough material.
Once the wheel has been selected, it’s time to begin the grinding process. This can be done using a tool rest to guide the tool, or by holding it freehand. The key is to maintain a consistent angle and pressure throughout the process, so that the cutting edge is evenly sharpened.
Once the grinding is complete, it’s important to use a honing stone to remove any burrs and polish the edge. This will ensure that the tool is sharp and ready to use. By following these steps, you can ensure that your tools are always sharp and ready for any job that comes your way.
Finishing and Testing the Sharpened Tool
Sharpening metal lathe tools requires precision, patience, and attention to detail. Once you’ve properly sharpened the tool using a grinding wheel, honing stone, or other sharpening tool, it’s important to finish and test the tool to ensure it’s ready for use. First, use a small piece of emery cloth to smooth out any rough edges or burrs that may have been left from the sharpening process.
Then, test the tool by carefully making small cuts on a piece of scrap metal, checking for smoothness and accuracy. If necessary, repeat the sharpening process until you achieve the desired result. Remember that a well-sharpened and maintained tool can make all the difference in the success of your metalworking project.
Happy sharpening!
Grinding the Bottom Face of the Tool
Now that we’ve ground the top face of the tool, it’s time to move on to the bottom face. This is often the most overlooked step in the sharpening process, but it’s equally important to achieve a truly sharp edge. Start by placing the tool flat on the platform, holding it securely against the grinding wheel.
Slowly move the tool back and forth across the wheel, making sure to apply even pressure. Concentrate on keeping the tool flat against the platform to avoid any wobbling or shaking. Once you’ve ground the bottom face, check it for any nicks, scratches, or unevenness.
If you notice any imperfections, go back and repeat the previous steps until you achieve a smooth and even edge. Finally, it’s time to test your sharpened tool. Try making a few test cuts and inspect the results.
Is the cut clean and smooth? Is it effortless to make? If not, it’s time to go back to the grindstone and try again. Remember, sharpening is a skill that takes practice and patience to master. But with the right technique and a bit of perseverance, you can achieve a razor-sharp edge every time.
Deburring and Honing the Cutting Edge
When it comes to sharpening tools, the process doesn’t end with the grinding wheel. To create a truly effective cutting edge, deburring and honing are necessary steps that ensure the tool is both smooth and razor-sharp. Deburring refers to the process of removing any rough or jagged edges along the cutting edge.
This is important because any small burrs left on the edge can lead to imperfect cuts or even dull the blade prematurely. Honing, on the other hand, involves using a fine abrasive to finely sharpen and refine the edge. This step is crucial because it removes any remaining burrs and makes the edge as sharp as possible.
Once the tool has been deburred and honed, it’s important to test the edge to ensure it’s sharp enough for use. This can be done simply by gently running the edge over a piece of paper–if it cuts cleanly, the tool is ready for action!
Conclusion
Well, there you have it folks. Sharpening your metal lathe tools may seem like a daunting task, but with a little patience and some handy tips, you can turn those dull edges into precision cutting machines. Remember to take your time, use the right equipment, and most importantly, don’t be afraid to get a little gritty.
After all, a sharp tool is a happy tool, and a happy tool means happy turning. Happy sharpening, my fellow metalworkers!
FAQs
What are the different types of metal lathe tools that need sharpening?
The different types of metal lathe tools that require sharpening include turning tools, parting tools, threading tools, boring tools, and grooving tools.
What are the signs that indicate the need for sharpening metal lathe tools?
Dull edges, chipped or broken corners, rough surface finish on the workpiece, and increased cutting forces are some common signs that indicate the need for sharpening metal lathe tools.
How frequently should metal lathe tools be sharpened?
The frequency of sharpening metal lathe tools depends on the intensity of use, type of material being machined, and the desired surface finish. However, a general guideline is to sharpen the tools after every 3 to 4 hours of use.
What is the ideal angle for sharpening metal lathe tools?
The ideal angle for sharpening metal lathe tools varies with the type of tool and the material being machined. A common angle for turning tools is 60 degrees, while for parting tools, it is 90 degrees.
What are the different methods available for sharpening metal lathe tools?
The different methods for sharpening metal lathe tools include using bench grinders, sharpening stones, belt sanders, and diamond sharpeners.
What precautions should be taken while sharpening metal lathe tools?
Proper safety gear such as gloves, eye protection, and face shields should be worn while sharpening metal lathe tools. The tools should be secured firmly and checked for cracks or damage before sharpening.
Can unsharpened or poorly sharpened metal lathe tools cause damage to the machine or workpiece?
Yes, unsharpened or poorly sharpened metal lathe tools can cause excessive wear and tear of the machine, produce substandard surface finish, and lead to workpiece damage or accidents.

