How to Sharpen Mortise Hollow Chisels: A Step-by-Step Guide
If you’re into woodworking, you probably understand the need for a well-sharpened mortise hollow chisel. After all, it’s one of the most essential tools you’ll use while creating a woodwork masterpiece. A mortise chisel, unlike any regular chisel, is used to drill out square holes in the wood, called mortises.
You can’t do this without making sure your mortise chisel is perfectly sharp and free of nicks. Whether you’re a beginner or a seasoned woodworker, learning the best techniques for sharpening your mortise hollow chisels is crucial for achieving a successful project. But how do you do it? In this blog post, we’ll show you the ways!
Introduction
If you own a mortise hollow chisel, you know how important it is to keep it sharp. A dull chisel won’t give you a clean, precise cut, and it can even damage your workpiece. Fortunately, sharpening your mortise hollow chisel is a fairly straightforward process that you can do at home.
The first step is to disassemble the chisel and remove any rust or debris. Then, you’ll need to choose the right sharpening stone and ensure that it’s flat and well lubricated. From there, you can begin sharpening the bevel and honing the edge.
With a little practice, you’ll be able to sharpen your chisel quickly and effectively, ensuring that it’s always ready to use. So if you’re wondering how to sharpen mortise hollow chisels, don’t worry—it’s easier than you might think!
Explanation of Mortise Hollow Chisels
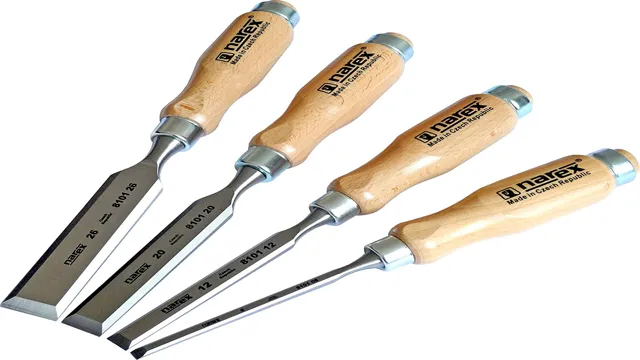
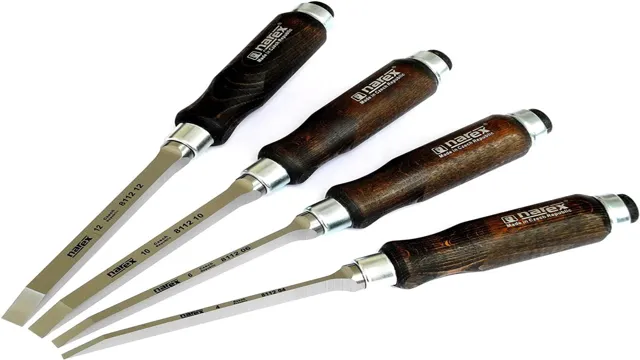
Mortise hollow chisels are an essential tool for any woodworker who wants to create mortise and tenon joints efficiently. These chisels are specially designed to remove material from the center of a hole and create a clean and precise mortise. Their unique shape, with a square shank and a hollow center, allows for accurate and quick cutting.
When selecting a mortise hollow chisel, consider the size and shape required for the project. The most common sizes are ¼ inch, ⅜ inch, ½ inch, ⅝ inch, and ¾ inch, but larger sizes are also available. It is essential to choose a chisel made from high-quality steel that will maintain its sharp edge throughout the project.
With proper care and maintenance, a mortise hollow chisel can last for many years and provide exceptional results on any woodworking project.

Why Sharpening is Important
Sharpening is often overlooked by many people, but it is an essential aspect of maintaining any blade or cutting tool. Whether it is a knife, scissors, or garden shears, a dull blade can be frustrating and dangerous. Sharpening not only enhances the performance of the tool but also extends its lifespan.
A well-sharpened blade ensures accuracy, precision, and ease of use. Without proper sharpening, the blade becomes blunt, which results in tearing and crushing instead of slicing, making the tool ineffective. Therefore, it is important to sharpen blades regularly to ensure they are always ready for use.
Don’t wait until it’s too late to have to replace your blades prematurely. Instead, take care of your tools and keep them sharp to get the most out of them.
Preparing chisels for sharpening
When it comes to sharpening mortise hollow chisels, it’s important to prepare your tools properly before getting started. Begin by checking the condition of the chisels and making sure they are clean and free of any debris or rust. If necessary, you can use a wire brush to remove any stubborn buildup.
Next, you’ll want to hone the edges of the chisels using a honing guide and sharpening stones or a grinder. It’s important to sharpen the chisels at a consistent angle to ensure consistent results. Once you have honed the edges to your liking, you can finish up by polishing the chisels with a strop or leather belt for a razor-sharp edge.
With a little preparation and a steady hand, you’ll be able to sharpen your mortise hollow chisels to perfection.
Cleaning the chisels
When it comes to preparing your chisels for sharpening, it’s essential to start by cleaning them thoroughly. The key to sharpening your chisels effectively is to remove any built-up dirt, grime, and rust that may have accumulated on them over time. You can use a variety of tools to clean your chisels, including a wire brush, sandpaper, or a chemical cleaning solution such as an anti-rust spray.
Using a wire brush or sandpaper can help remove any stubborn dirt or rust that is difficult to get rid of. Once you have cleaned the chisel, dry it off with a soft cloth or towel to prevent rust from re-forming. What’s more, it’s always a good idea to oil your chisels after cleaning them.
This helps prevent any future rust or corrosion and ensures that they remain clean and in good condition for as long as possible. By following these simple steps, you’ll be able to prepare your chisels for sharpening properly, giving you the best results possible.
Checking for any damages or nicks
When it comes to sharpening your chisels, the first step is to check for any damages or nicks. Inspect each chisel closely for any imperfections that could affect the sharpening process. Look for any chips on the cutting edge or any bending or warping on the blade.
It’s important to address any damages before proceeding with sharpening to ensure the best results. You wouldn’t want to sharpen a damaged chisel, as it could only worsen the problem. Once you’ve inspected your chisels and made note of any necessary repairs, it’s time to move onto preparing them for sharpening.
This process involves cleaning and honing the blade to prepare it for the actual sharpening process. By taking the time to inspect and prepare your chisels, you’ll be setting yourself up for success when it comes to sharpening them effectively.
How to Sharpen Mortise Hollow Chisels
Mortise hollow chisels are essential tools for woodworkers who want to precisely carve out deep, straight holes. However, like any blade, they can become dull over time and need sharpening. To sharpen your mortise hollow chisel, first, secure it in a bench vise or an impact-resistant clamp.
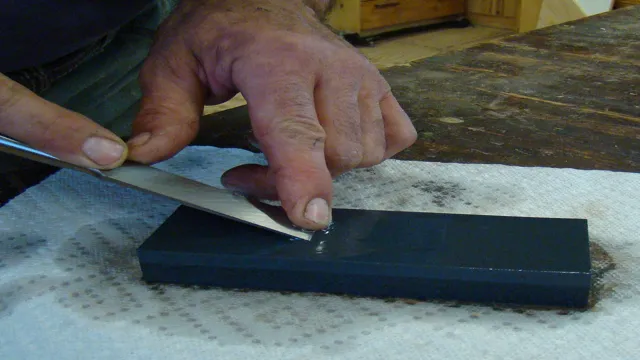
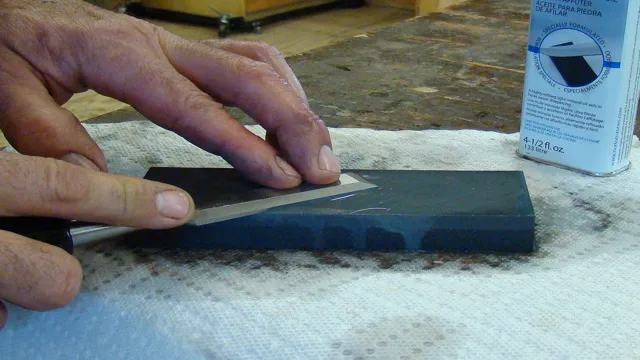
Next, use a sharpening stone to hone the bevel edge of the chisel. Start with a coarse grit stone to remove any nicks or burrs and then work your way up to a finer grit stone for a sharper edge. Use a honing guide to maintain the correct angle while you sharpen, and lubricate the stone with honing oil to prevent the chisel from getting too hot.
After honing, use a leather strop to polish the edge of the chisel. Regular sharpening and maintenance will ensure that your mortise hollow chisels stay sharp and functioning correctly for years to come.
Selecting a sharpening stone
When it comes to sharpening mortise hollow chisels, it’s important to have the right tools for the job. One of the most important tools you’ll need is a sharpening stone. When selecting a sharpening stone, it’s important to consider the type of chisel you’re working with and the level of sharpening you require.
For mortise hollow chisels, a hard, fine-grained stone is best. This will help you achieve a sharp edge without damaging the delicate convex shape of the chisel’s edge. Additionally, make sure to use a honing guide to ensure that you maintain a consistent angle as you sharpen.
By taking the time to select the right sharpening stone and employing proper technique, you can keep your mortise hollow chisels performing at their best for years to come.
Identifying the bevel
When it comes to sharpening mortise hollow chisels, one of the most critical steps is identifying the bevel. The bevel refers to the angle of the cutting edge, and it is essential to know whether it is a primary or secondary bevel. Typically, the primary bevel is the one closest to the cutting edge and is the one that needs to be sharpened.
On the other hand, a secondary bevel is a small area near the edge and can be beneficial for honing the blade’s sharpness. Once you have identified the bevel, you can use a sharpening stone to hone the edge to the appropriate angle. Sharpening mortise hollow chisels can be a bit tricky, but with a little practice, you will be able to master this process and keep your tools in top condition.
Remember, taking good care of your tools is essential to ensure they last a long time and perform effectively.
Establishing a bevel angle
When it comes to sharpening mortise hollow chisels, one of the key steps is establishing the bevel angle. This angle is crucial for achieving the proper cut and ensuring a clean and precise mortise. To determine the bevel angle, you will need to consult the manufacturer’s instructions or use a honing guide with an adjustable angle.
Generally, a bevel angle of 25-30 degrees is appropriate for most mortise hollow chisels. When sharpening, it’s essential to maintain a consistent angle and stroke to avoid uneven edges or unwanted burrs. Sharpening mortise hollow chisels may take some practice, but with the right technique and tools, you can achieve a razor-sharp edge for cleaner, more precise mortising.
Sharpening the bevel
When it comes to sharpening mortise hollow chisels, the key is to sharpen the bevel at the correct angle. The bevel of a mortise hollow chisel is the angled section at the end of the blade that does the cutting. To sharpen the bevel, start by placing the chisel in a sharpening jig at the correct angle (usually around 25 degrees for most chisels).
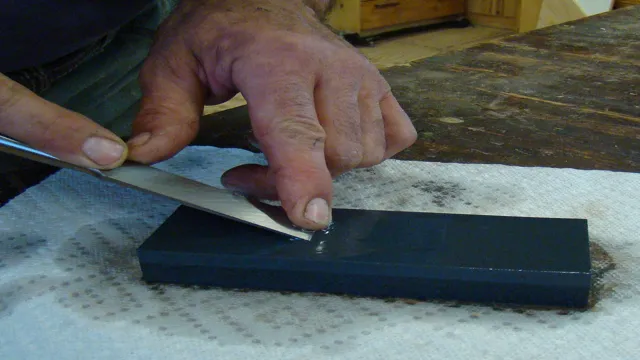
Then, use a sharpening stone to remove any nicks or burrs on the bevel, working your way up from a coarser grit to a finer grit. Make sure to keep the chisel at the correct angle throughout the sharpening process, and to work evenly along the entire bevel to avoid getting any uneven edges. With practice, sharpening your mortise hollow chisels will become quicker and easier, leaving you with a set of chisels that can make precise and clean cuts for your woodworking projects.
Honing the edge
Sharpening mortise hollow chisels can seem daunting, but with the right technique, it can be done easily and effectively. The first step is to make sure your chisel is in good condition, with no dents or chips on the cutting edge. Once you have verified this, you can begin to sharpen the blade.
To do so, first, securely clamp the chisel to a workbench and use a honing guide to ensure that the angle is correct. Next, use a coarse grit sharpening stone to remove any nicks or dullness on the blade. Move on to a finer grit stone to hone and polish the edge, then finish with a leather strop to further refine the blade.
Using this simple method, you can easily keep your mortise hollow chisels sharp and effective for all your woodworking needs.
Conclusion
And voila! You’ve now transformed your dull mortise hollow chisels into razor-sharp tools of destruction. Well, maybe not destruction – but definitely precision and accuracy. Remember, giving your chisels a proper sharpening not only ensures cleaner and easier cuts, but it also prolongs their lifespan.
So, don’t be afraid to invest a little time and effort into this crucial maintenance task. After all, a sharp chisel is a happy chisel – and a happy chisel means a happy woodworker!”
Safely storing chisels
When it comes to owning and working with chisels, it’s important to ensure that they are stored safely. This helps to prevent any damage or injuries that could occur from loose chisels lying around. One great option for storing chisels is to utilize a chisel rack or a designated storage case.
These can be purchased online or made at home using wooden planks and some nails. It’s also recommended to invest in blade guards to protect the sharp edges of the chisels. As for the maintenance of mortise hollow chisels, sharpening them is an essential process.
Firstly, ensure that the chisels are clean and free from any debris or rust. Next, using a sharpening stone, run the chisel back and forth, taking care to maintain a consistent angle. Repeat this process on both sides of the blade until it is sharp and honed.
Once sharpened, it’s important to maintain the chisel’s blade by regularly honing or sharpening it, which will ensure a longer lifespan and optimal performance. Overall, storing chisels safely and taking proper care of them by sharpening them regularly can make a significant difference in both the quality of the work produced and the longevity of the tools themselves. By following these tips, you can ensure that your chisels are always ready for use and that you are working as safely and efficiently as possible.
Maintaining sharpness with regular maintenance
Maintaining sharpness with regular maintenance is essential for the longevity of mortise hollow chisels. One of the best ways to keep your mortise hollow chisels sharp is by sharpening them regularly. First, start with cleaning the chisels to remove dirt and debris that accumulates with usage.
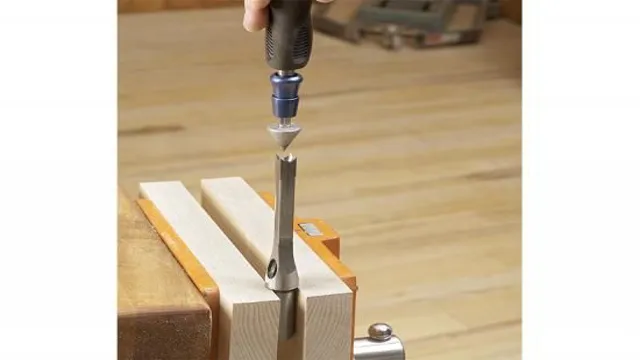
A sharpener can be used to sharpen the bevels of the chisels. Also, it is essential to maintain the correct angle while sharpening, which should be around 20 to 25 degrees. The best sharpeners to use are either a wet stone or a diamond-coated sharpening disk that can be used with a handheld drill.
Additionally, it is advisable to keep the chisels oiled to prevent rusting and other damages. Regular maintenance and sharpening will keep your mortise hollow chisels in top condition and ensure they keep serving you for a long time.
FAQs
What is a mortise hollow chisel and how is it used?
A mortise hollow chisel is a cutting tool used to create square or rectangular holes in wood, typically for joinery purposes. The chisel is first drilled into the wood, then pushed or pounded to create a clean, precise cut.
Why is it important to keep mortise hollow chisels sharp?
Keeping mortise hollow chisels sharp is essential for ensuring clean and precise cuts. A dull chisel can cause jagged edges and uneven holes, potentially leading to weak joints and unsightly finishes.
What equipment do I need to sharpen mortise hollow chisels?
To sharpen mortise hollow chisels, you’ll need a bench grinder, a honing guide, a sharpening stone or abrasive paper, and a set of safety glasses.
How do I use a honing guide to sharpen my mortise hollow chisels?
First, attach the honing guide to the chisel and adjust it so that the bevel angle matches the original grind. Next, slowly move the chisel back and forth across the sharpening stone, being careful to maintain the correct angle and remove any burrs.
Can I sharpen my mortise hollow chisels by hand, or do I need a power tool?
While it is possible to sharpen mortise hollow chisels by hand, it can be a difficult and time-consuming process. Using a power tool like a bench grinder can be faster and more efficient, provided you take the proper safety precautions.
How often should I sharpen my mortise hollow chisels?
The frequency of sharpening will depend on the frequency and intensity of use, as well as the type of wood being worked with. As a general rule, it’s a good idea to sharpen your chisels as soon as you notice a decrease in cutting performance.
Are there any special tips or tricks for sharpening mortise hollow chisels?
One useful tip is to alternate the direction of your sharpening strokes, which can help to create a more refined and precise edge. Another is to use a light touch and take your time, rather than rushing and potentially damaging the chisel blade.

