How to Test a Cordless Drill Battery Charger: A Step-by-Step Guide
Do you rely on your cordless drill for DIY projects or professional work? If so, it’s important to ensure it’s always charged and ready to go. But what if your battery charger isn’t working properly? How can you test if it’s the charger or the battery causing the issue? In this blog post, we’ll cover how to test a cordless drill battery charger, so you can troubleshoot and get back to work in no time. Whether you’re an experienced handyman or a DIY newbie, this guide will walk you through the steps to ensure your charger is in good working order and get your cordless drill back up and running.
So, grab your multimeter and let’s get started!
Introduction
If you own a cordless drill, it’s essential to keep the battery charger in good condition. But how do you know if your battery charger is working as it should be? Here’s how to test your cordless drill battery charger: First, confirm that the charger is plugged in and the battery is inserted correctly. Check the charger’s LED light to ensure it’s lit up.
If it’s not, the charger may be faulty. Next, use a multimeter to test the voltage output of the charger. Connect the charger’s positive and negative leads to the respective terminals on the multimeter and confirm that it’s outputting the correct voltage level specified on the charger’s label.
Finally, leave your battery on the charger for the recommended charge time, typically a few hours. If the battery doesn’t charge fully or the charge time is too long, it may be time to replace the charger or battery. Regularly testing your cordless drill battery charger will ensure that it’s in good working condition and prolong its lifespan, so you can keep your power tools working effectively.
What is a Cordless Drill Battery Charger?
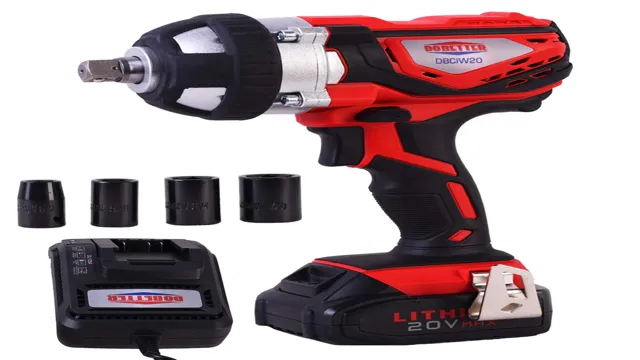
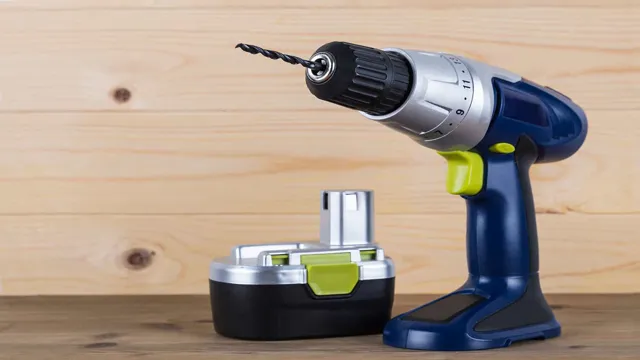
A cordless drill battery charger is an essential accessory for anyone who uses a cordless drill. It’s a device that charges the rechargeable battery that powers a cordless drill. These batteries are designed to be recharged and used repeatedly, which means that you don’t have to keep replacing them every time they run out of power.
A cordless drill battery charger can be designed to charge a specific type of battery, or it can be designed to work with a range of batteries. In either case, the charger will usually have a series of indicator lights or other features that let you know when the battery is fully charged and ready to use. With a cordless drill battery charger, you can ensure that your cordless drill always has the power it needs to get the job done, without having to worry about running out of batteries unexpectedly.
It’s a simple, yet essential, accessory for anyone who works with a cordless drill.
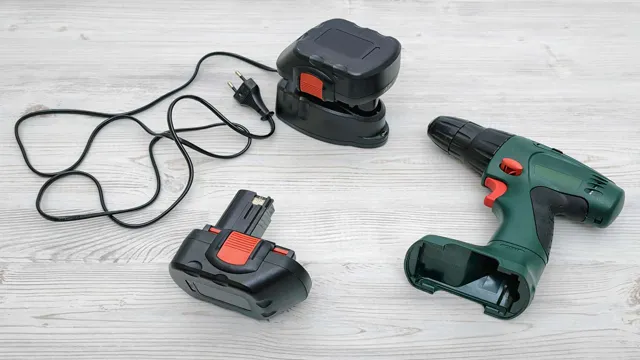
Why Should You Test a Cordless Drill Battery Charger?
Are you someone who frequently uses a cordless drill for DIY projects or other tasks that require drilling? If yes, then you know the importance of having a fully charged battery to ensure efficient and uninterrupted operation. Therefore, it is crucial to test your cordless drill battery charger to ensure it is functioning correctly. A faulty charger can cause irreparable damage to your drill’s battery, making it less effective.
A well-functioning charger ensures that your battery is always fully charged and extends its lifespan. So, before you think of disposing of your existing drill or buying a new battery, test your charger to identify and fix any potential issues. Trust me; you’ll save a lot of money by testing your cordless drill battery charger.
Testing Process
If you need to test a cordless drill battery charger, there are several steps you can take to ensure that it is functioning properly. Firstly, visually inspect the charger for any damage, such as cracks or frayed cables. Next, plug the charger into a power outlet and connect it to a compatible battery.
The charger should display a green light to indicate that it is charging. Alternatively, some chargers have a digital display that will show the charging progress. You can also test the charger’s voltage output using a multimeter to make sure it is within the correct range.
Finally, if you suspect that the charger is not working correctly, it may be necessary to try charging a different battery or to contact the manufacturer for further assistance. By following these simple steps, you can ensure that your cordless drill battery charger is working properly and efficiently.
Step 1: Check for Damage
When it comes to testing electronic devices, the first step is always to check for any kind of damage. This is especially important if the device has been dropped or mishandled in any way. Physical damage can be a sign of internal damage that can affect the device’s overall performance.
To ensure that your device is functioning correctly, carefully examine the exterior for cracks or scratches. Once you have done so, switch on the device and see how it responds. Check for any abnormal sounds or flickering screens.
You May Also Love:
If you find any issues, it is best to have a professional take a closer look. By spotting any damage early on, you can prevent further damage from occurring and keep your device functioning at its best. Remember, regular maintenance is essential for prolonging the life of your device and avoiding costly repairs.
Step 2: Check the Voltage Output
To ensure that your electronic devices are working properly, it’s important to check their voltage output. The testing process is relatively simple, but it requires some basic knowledge of electronics. First, you’ll need a multimeter, which is a device that measures the voltage, current, and resistance of an electrical circuit.
Once you have the multimeter, set it to measure DC voltage. Then, connect the positive lead to the positive terminal of the device you’re testing and the negative lead to the negative terminal. The voltage reading should match the expected voltage output of the device.
If it doesn’t, you may have a problem with the device or with the power source. It’s also important to check the voltage output under load, which means measuring it while the device is in use. This will give you a better idea of how the device is performing and whether it needs to be repaired or replaced.
By following these steps, you can ensure that your electronic devices are working properly and avoid any potential damage or safety hazards.
Step 3: Check for Overheating
When it comes to monitoring a computer’s health, overheating is a crucial factor to consider. This issue can cause damage to the internal hardware and even cause the system to shut down unexpectedly. To check for overheating, one useful tool is the speed fan application.
After downloading it, open the program to monitor the temperature readings of the computer’s various internal components. The ideal CPU temperature range is between 35 to 60 degrees Celsius, while the GPU temperature range is between 30 to 80 degrees Celsius. If the temperatures exceed these ranges, then the computer is overheating and needs to be addressed.
It’s essential to ensure proper ventilation and airflow, remove dust buildup on fans and heatsinks, and consider investing in an external cooling system to prevent overheating from happening again. Don’t ignore a simple sign of overheating as it can cause long-term damage to your computer.
Step 4: Check for Short Circuits
Short circuits are a common problem that occurs in electronic circuits. To check for short circuits, you need a multimeter that can measure resistance. Start by turning off the power supply of the circuit and disconnecting it from the mains.
Then, use the multimeter to measure the resistance between the power supply and ground to check for a short circuit. If the resistance is too low (less than a few ohms), there is likely a short circuit. Next, you need to disconnect the components from the circuit one by one until you find the faulty component causing the short circuit.
It’s important to be thorough and patient when checking for short circuits, as ignoring them can cause damage to other components in the circuit. Regularly checking for short circuits can prevent malfunctions and extend the lifespan of your electrical devices.
Conclusion
In conclusion, testing your cordless drill battery charger is a breeze. To kick things off, make sure you have a reliable multimeter, a fully charged battery pack and your charger. Once you have all the items ready, plug in your charger and measure the voltage output using your multimeter.
If the voltage output reads within the manufacturer’s specifications, your charger is in good condition. Remember, a faulty charger isn’t just a safety hazard, but can also harm your battery pack, tools and your wallet. So, be sure to test your charger often to get the most out of your cordless drill battery and power tools!”
Summary of the Testing Process
The testing process is a crucial part of software development that ensures the final product meets quality standards. The process begins with creating a test plan that outlines the testing objectives, scope, and strategies. Next, the testing team performs functional testing to identify any flaws in the software’s features and behavior.
Once the software passes functional testing, the team moves on to performance testing, load testing, and security testing. These tests help ensure the software can handle expected user traffic and maintain data security and privacy. Regression testing is also critical during the development process as it ensures that new features or changes to the software do not cause any unforeseen issues.
Overall, a comprehensive testing process is necessary to guarantee that software meets user requirements, benefits the organization, and minimizes the probability of errors and issues.
Final Thoughts
When it comes to software development, the testing process is just as important as the development process itself. There are a variety of testing methods that can be used, such as unit testing, integration testing, and user acceptance testing, among others. Each method focuses on a different aspect of the software, ensuring that it meets the necessary requirements, functions properly, and provides a good user experience.
The testing process can also help to identify any bugs, errors, or other issues that need to be addressed before the software is released to the public. By performing thorough testing, developers can ensure that their software is of the highest quality and meets the needs of their users. So, whether you’re a developer or a user, it’s important to understand and appreciate the testing process.
FAQs
Why is it important to test a cordless drill battery charger?
Testing a cordless drill battery charger is important because it ensures that the battery is being charged properly and efficiently, which ultimately prolongs the battery’s lifespan and improves the performance of the drill.
What are some signs that indicate a cordless drill battery charger needs to be tested?
Some signs that indicate a cordless drill battery charger needs to be tested include a decrease in the battery’s performance, longer charging times, and an inability to hold a charge for long periods.
Can I test a cordless drill battery charger myself or do I need professional assistance?
Testing a cordless drill battery charger can be done by anyone, but it’s important to follow the manufacturer’s instructions and take proper safety precautions. However, if you are unsure or uncomfortable with testing the charger yourself, seeking professional assistance is always an option.
What are the different methods for testing a cordless drill battery charger?
Some common methods for testing a cordless drill battery charger include using a voltmeter or multimeter, testing the charger’s output voltage, and examining the battery’s charge level before and after charging.
How often should I test my cordless drill battery charger?
It’s recommended to test your cordless drill battery charger at least once a year to ensure it’s functioning properly. However, if you notice any issues with your battery or charger, it’s important to test it immediately.
Can a faulty cordless drill battery charger damage my battery?
Yes, a faulty cordless drill battery charger can damage your battery if it overcharges or undercharges the battery, which can cause it to lose its ability to hold a charge and ultimately reduce its lifespan.
What should I do if I notice any issues with my cordless drill battery or charger during testing?
If you notice any issues with your cordless drill battery or charger during testing, it’s important to stop using them immediately and seek professional assistance. Continuing to use a faulty battery or charger can not only damage your equipment but also present safety hazards.

