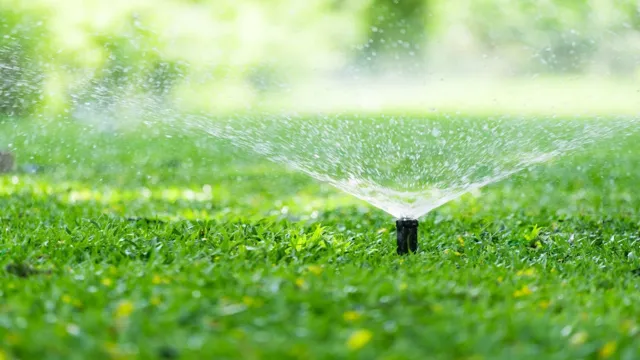
How to Turn the Sprinkler System On: A Step-by-Step Guide for Efficient Irrigation

Looking to keep your lawn green and vibrant during the dry summer months? Then turning on your sprinkler system is a key step in maintaining a healthy and lush yard. However, for many homeowners, the process of turning on their sprinkler system can seem daunting and unfamiliar. Fear not! In this blog, we’ll break down the steps to turn on your sprinkler system and provide you with helpful tips to ensure your lawn stays hydrated all season long.
From locating your sprinkler system’s control panel to testing each zone, we’ve got you covered. So, grab your gardening gloves and let’s get started!
Locate the Sprinkler System Control Box
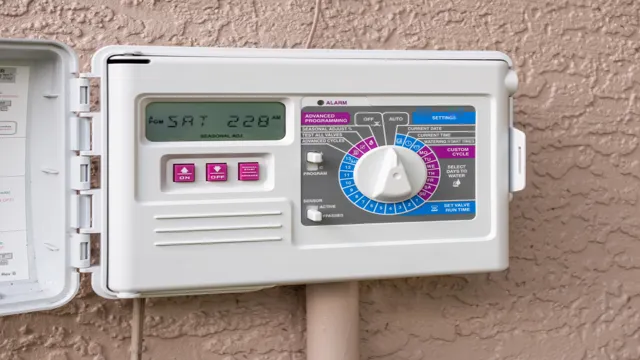
So you want to know how to turn on your sprinkler system, huh? Well, the first thing you need to do is locate the sprinkler system control box. This is usually located outside near where the irrigation lines enter your home. Once you have located the control box, you will need to open it up to access the controls inside.
This may require a key or a combination lock, so be sure to have those handy if necessary. Once you have access to the controls, you can turn on the sprinkler system by flipping the switch or pressing the button labeled “on”. Voila! Your sprinkler system should now be up and running.
Just be sure to adjust the settings to your liking and keep an eye on it to make sure everything is working properly.
Check for Power Supply
When it comes to troubleshooting your sprinkler system, one of the first things you should check is the power supply. Without power, your system won’t be able to function properly. To begin this process, you’ll need to locate the sprinkler system control box, which is often situated near the main water supply or within the basement or garage.
Once you’ve located the control box, you can open it up and check for any signs of damage or wear on the wires or electrical components. If everything seems to be in good condition, you can use a multimeter or voltage tester to check for a steady power supply. If you’re still experiencing issues with your sprinkler system after checking the power supply, it’s best to call in a professional to assess the situation.
By taking the time to properly diagnose and repair any issues with your sprinkler system, you can ensure that your lawn and garden stay healthy and vibrant throughout the year.

Identify the Zones
When it comes to watering your lawn or garden efficiently, locating your sprinkler system control box is crucial. The control box acts as the brain of your irrigation system, allowing you to program and regulate the watering schedule, adjust watering duration, and control specific zones. Once you find the control box, you can easily identify zones by the number of valves attached to it.
Each valve corresponds to a specific zone or area in your yard or garden, allowing you to customize water flow and duration for each zone. For instance, zone 1 may cover a sunny area in your lawn, while zone 2 may cover a shaded garden bed. By programming these zones, you can ensure that each area receives the optimal amount of water based on its specific needs, reducing water waste and saving money on your water bill.
Overall, locating the sprinkler system control box is the first step towards efficient and effective irrigation for a healthy and beautiful lawn or garden.
Manually Turn on Your Sprinklers
When the summer heat is upon us, it’s important to know how to turn your sprinkler system on to keep your lawn lush and green. If you’re new to owning a sprinkler system, it may seem like a daunting task, but it’s actually quite simple. First, locate your sprinkler system’s control panel, which is typically either in your basement or garage.
Look for a switch labeled “system on” and flip it to the on position. If your system has a timer, make sure it’s set to the appropriate schedule. Finally, go outside and manually turn on each zone of your sprinkler system using the zone valves.
Your sprinklers should now be up and running, effectively watering your lawn. Remember to turn off your system when it’s not needed to conserve water and energy. By following these steps, you can easily enjoy a beautiful green lawn all summer long while saving money on water bills.
Turn the Manual Lever to On Position
If you’re having trouble with your automatic sprinkler system, there’s an alternative you can use to manually turn on your sprinklers. All you need to do is locate the manual lever and turn it to the on position. This manual lever is usually located near the valve connected to your water source.
Once you turn the lever on, water will flow through to your sprinkler system, allowing you to water your lawn and garden. This method is particularly useful when you’re experiencing a power outage or have an issue with your automatic system. By using the manual lever, you can quickly and easily water your plants without having to call in a professional.
Just remember to turn the lever back to the off position once you’re finished watering to prevent any damage to your sprinkler system. With this simple trick, you can keep your lawn and garden looking lush and green without any hassle or expensive repairs.
Turn On One Zone at a Time
If you’re planning to turn on your sprinkler system manually, it’s a good idea to do it one zone at a time. This will help you avoid any potential issues with water pressure or flow rate, and make sure that each zone is working properly before you move on to the next one. Start by locating your sprinkler control panel and selecting the first zone you want to test.
Turn on the water supply to that zone and wait a few minutes for the system to pressurize. You should then see water flowing from the sprinkler heads in that zone. Check each sprinkler head to make sure it’s working correctly and adjust any that are spraying too high or too low.
Once you’re satisfied that the first zone is working properly, turn off the water supply and move on to the next zone. Remember to be patient and take your time – it’s better to be thorough than to miss a potential problem that could lead to costly repairs down the line.
Test Your Sprinkler Heads
If you want to ensure that your lawn is getting the proper amount of water it needs, it’s important to regularly test your sprinkler heads. One way to do this is by manually turning on your sprinklers and observing their performance. To get started, locate the sprinkler valve box and turn the valve to the “on” position.
Then, go to each individual sprinkler head and check for any obstructions or damage, such as clogs or broken parts. In addition, you can use a straightened paper clip to clear out any clogs that may be preventing water from properly flowing through the sprinkler. Repeat this process for all of your sprinkler heads to ensure that your lawn is receiving the proper amount of water and that your irrigation system is working efficiently.
Remember, proper maintenance of your sprinkler system can save you money in the long run by preventing costly repairs and ensuring optimal water usage.
Program Your Sprinkler System
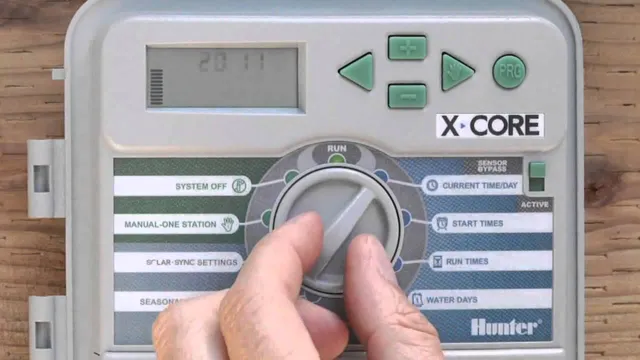
If you’ve never programmed your sprinkler system before, it might seem like a daunting task to turn it on. But don’t worry, it’s actually quite simple! Firstly, locate your sprinkler system controller. This is usually a box that is mounted on the side of your house or in your garage.
Once you find it, turn on the power button. Next, set up your watering schedule. Most controllers will have a menu that will allow you to set the days and times you want your sprinklers to run.
Once you’ve got that sorted, you can adjust other settings such as how long you want your sprinklers to run for and how often you want them to water different areas of your lawn. And that’s it – with just a few simple steps, your sprinkler system will be up and running in no time!
Set Up Your Controller
Setting up your controller is a crucial step in programming your sprinkler system. Your controller is the brain of the system, controlling when and how much water is used. To begin, make sure you have all the necessary components, including the controller, wiring, and valves.
Once you have everything you need, it’s time to install the controller. First, mount it in a safe, dry place, and then connect the wiring to the valves and the power source. When you turn on the controller, you should hear a clicking sound as it activates the valves.
It’s important to set up the controller properly, including the date and time, the watering schedule, and the zones of your yard. Make sure to test the system before fully programming it to ensure that everything is working correctly. By taking the time to set up your controller correctly, you’ll have a well-functioning sprinkler system that will keep your lawn and garden healthy.
Input Your Irrigation Schedule
One of the most crucial parts of having a lush and thriving lawn is a well-maintained irrigation system. Programming your sprinkler system can make all the difference in ensuring that your grass, plants, and flowers are getting the right amount of water. The process may seem intimidating, but it doesn’t have to be.
It all starts with inputting your irrigation schedule. This means deciding on the days, times, and duration you want your sprinklers to run. You’ll need to consider factors like the weather, soil type, and size of your lawn or garden beds.
It’s also essential to be mindful of water conservation, so you’re not wasting this precious resource or driving up your utility bill. With a little guidance, you can program your system to perfection, ensuring that your lawn and plants are healthy and thriving all year round.
Conclusion
In conclusion, turning on the sprinkler system requires more than just flipping a switch. It requires understanding the system, checking for leaks, adjusting sprinkler heads, and determining the best schedule for watering. It’s like a game of chess, with each move critical to achieving the perfect lawn.
So, don’t be afraid to get your hands dirty and put in the time and effort for a lush, green yard. Remember, the grass is always greener when your sprinkler system is properly maintained and turned on.”
FAQs
What is a sprinkler system?
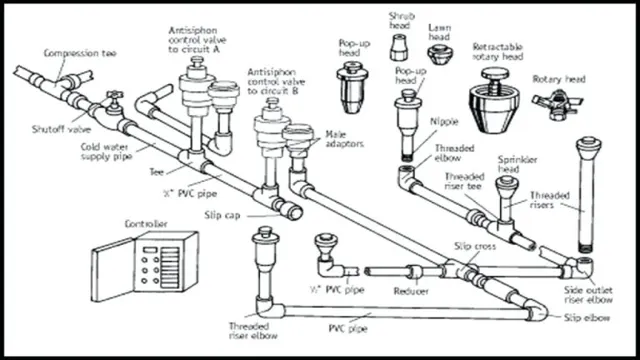
A sprinkler system is a network of pipes and nozzles designed to distribute water to a specific area in a controlled manner.
How do I turn on my sprinkler system?
To turn on a sprinkler system, locate the control box, turn the system to the “on” position, and follow any additional instructions provided by your specific system.
How often should I water my lawn with a sprinkler system?
The recommended watering schedule for a lawn with a sprinkler system is typically 1-2 times per week, depending on various factors such as soil type and weather conditions.
What is the ideal time of day to water my lawn with a sprinkler system?
The ideal time to water a lawn with a sprinkler system is in the early morning, before the sun rises. This allows for maximum absorption and prevents water loss due to evaporation.
Do I need to winterize my sprinkler system?
Yes, it is important to winterize a sprinkler system to prevent damage from freezing temperatures. This involves draining the system and shutting off the water supply.
Can a sprinkler system be installed in an existing lawn?
Yes, a sprinkler system can be installed in an existing lawn, but it may require some additional work such as trenching and reseeding.
How long should I run my sprinkler system for?
This can vary depending on factors such as soil type and weather conditions, but as a general rule, it is recommended to water for 20-30 minutes at a time, 1-2 times per week.

