How to Use a Honing Guide for Chisels: A Comprehensive Guide for Perfect Sharpening
If you’re a woodworking enthusiast, you know how important it is to keep your chisels sharp for precise and clean cuts. However, achieving a perfectly honed edge with your chisels can be a tricky task without the right tool. This is where a honing guide comes in handy.
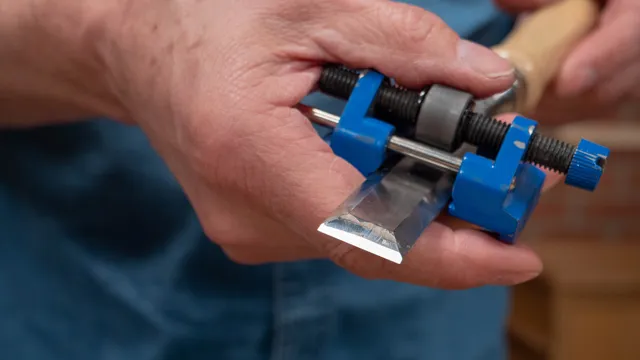
A honing guide is a simple device that holds your chisel at a fixed angle while you sharpen it with a stone. Using a honing guide for chisels is an excellent way to ensure consistent angles and an accurate edge. It eliminates guesswork and minimizes the risk of ruining your chisels while sharpening.
With a honing guide, you can achieve razor-sharp edges for your chisels, and this will help you take your woodworking skills to the next level. If you’re new to woodworking, using a honing guide might seem confusing, but it’s actually quite a straightforward process. You don’t have to worry about holding the chisel at the correct angle as the guide does it for you.
All you have to do is secure the chisel in the guide and move it back and forth against the sharpening stone until you achieve the desired sharpness. Overall, using a honing guide for chisels is a game-changer for woodworking enthusiasts. It simplifies the sharpening process and helps you achieve consistent results every time.
So, if you’re struggling to get your chisels sharp, consider investing in a honing guide. Your woodworking projects will thank you for it!
What is a Honing Guide?
A honing guide is a tool used in woodworking to maintain and sharpen the edges of chisels, planes and other cutting tools. If you are looking to improve the accuracy of your cutting tools, using a honing guide for chisels is a great first step. The honing guide helps to set the angle at which the tool is sharpened and keeps it consistent throughout the sharpening process.
This helps to reduce errors and ensure that the tool is sharpened evenly. To use a honing guide, you should first place your chisel in the guide and adjust the guide to achieve the desired sharpening angle. Then, you can use a sharpening stone to sharpen your chisel, moving it back and forth along the blade until the desired sharpness is achieved.
The honing guide provides more control and precision to your sharpening project, making the process easier for both professionals and beginners. So, invest in a honing guide today and experience the benefits of accurate sharpening.
Explanation of honing guides and their benefits
A honing guide is a tool used by people who sharpen and grind blades regularly. It works by holding the blade at a set angle, allowing for a consistent and precise sharpening process. Honing guides come in different designs, some of which are adjustable, enabling users to sharpen blades at different angles with ease.
One of the primary benefits of using a honing guide is that it ensures uniformity in sharpening, so users can get the same results every time they sharpen their blades. It also provides added safety by keeping the blade in place and protecting the user’s hand from accidental slips. With a honing guide, users can sharpen blades quickly and accurately.
Whether you are a carpenter, a chef, or someone who needs sharp blades regularly, using a honing guide can ease the sharpening process, enhance safety, and improve the performance of your blades.
Preparing Your Chisel
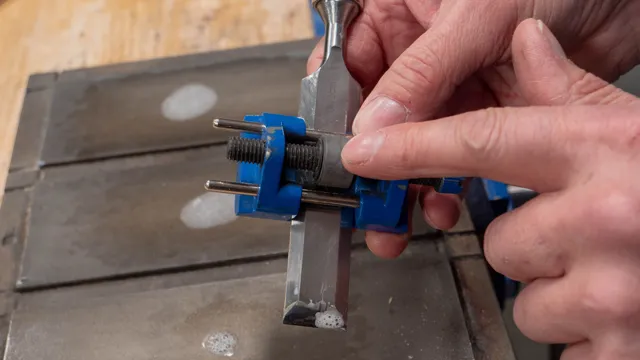
When it comes to woodworking, using a honing guide for chisels can make a big difference in your final product. Before you start, it’s important to prepare your chisel properly. Begin by removing any rust or debris that may have built up on the blade.
Using sandpaper with a high grit, such as 1000 or 2000, rub the blade until it’s smooth and shiny. Then, make sure the chisel is the right size for your honing guide. Place the chisel in the guide and tighten it securely.
Finally, make sure the guide is set to the correct angle for your project. With these steps complete, you’re ready to start honing your chisel using the guide. By doing so, you’ll get a sharper, more precise edge on your chisel every time.
Ensuring the chisel is clean and sharp before honing
Preparing your chisel for honing is crucial for achieving a sharp and polished edge. One of the key steps in this process is ensuring that your chisel is clean and sharp before honing. This may seem like an obvious step, but it’s one that is often overlooked.
A dirty or dull chisel can lead to a poor honing job, which can impact the overall quality of your workpiece. Before honing, take the time to clean your chisel thoroughly, removing any dirt, dust, or debris. This can be done using a soft cloth or a specialized cleaning tool.
Once your chisel is clean, check that the blade is sharp, as a dull blade can be dangerous to use and will not produce a sharp edge. If your chisel is dull, sharpen it using a sharpening stone or a specialized tool to ensure the blade is even and sharp. Overall, taking the time to properly prepare your chisel before honing will result in a sharper and more precise edge, leading to better woodworking results.
Setting Up the Honing Guide
If you’re looking to sharpen your chisels, a honing guide can make the process much easier and more efficient. To get started, you’ll need to set up the honing guide properly. First, loosen the screw that locks the guide in place and adjust the rollers to match the width of your chisel.
Next, insert the chisel into the honing guide and slide it up against the rollers until it is snugly in place. Finally, adjust the angle of the guide to match the bevel of your chisel. Once everything is set up, you’ll be able to maintain a consistent angle and produce a sharp edge every time.
Remember to take your time and be patient when honing your chisels – it’s a process that requires precision and attention to detail. By using a honing guide, you’ll be well on your way to achieving professional-quality sharpening results.
Steps for attaching and using the honing guide
Attaching and using a honing guide may seem like a daunting task, but by following a few simple steps, you can easily achieve a perfectly sharpened tool. The first step is to set up the honing guide by adjusting the angle according to your tool’s requirements. Next, clamp the honing guide onto a sturdy surface to ensure a stable sharpening experience.
Once your honing guide is in place, it’s time to insert your sharpening stone into the guide’s holder. Make sure the stone is secure and level with the honing guide before moving on to the final step. Finally, you’re ready to sharpen your tool by sliding it back and forth over the stone while holding it against the honing guide.
With these simple steps, you can easily achieve a razor-sharp edge on your tools, making your woodworking experience a breeze.
Honing Your Chisel
Using a honing guide for chisels can greatly improve the sharpness and precision of your chisel’s blade. First, attach the chisel to the guide with the bevel facing down and tighten the screws. Then, adjust the guide’s rollers so that the chisel moves smoothly along the sharpening stone.
With the stone in place, gently push the chisel along the stone while maintaining constant pressure on the guide. Keep the chisel at the same angle and switch to finer grits as you go along until the blade is sharp and shiny. Using a honing guide ensures a consistent angle and even honing, resulting in a sharp edge that will last longer and work more effectively.
Of course, it’s essential to maintain proper safety measures while using a honing guide, including wearing safety goggles, gloves, and securing the stone and guide to a flat surface. With a little practice and a good guide, honing your chisel can be a simple and effective way to enhance your woodworking projects.
Guide to honing the chisel with the honing guide and sharpening stone
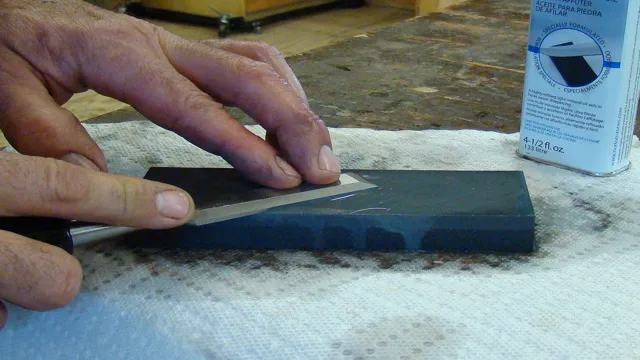
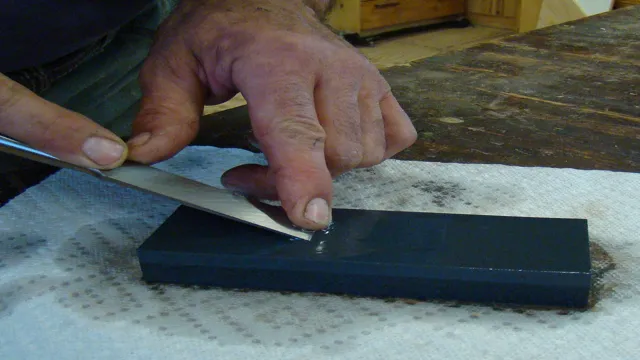
Honing your chisel is an important part of woodworking. A honing guide and sharpening stone can assist in making this task much easier. Firstly, ensure that your chisel is clean and free of any chips or nicks.
Next, use the honing guide to set the correct angle for your chisel – usually between 25-30 degrees. This will provide the best cutting edge. Set your sharpening stone on a flat surface and apply a lubricant.
Then, slide the chisel into the honing guide and gently place it on the sharpening stone. Begin honing the chisel by applying light pressure and moving the guide in a circular motion. Be sure to maintain a consistent angle and check the progress frequently.
Once a fine edge has been achieved, use a leather strop to remove any burrs and polish the edge. With practice and the right technique, honing your chisel will become a breeze and your woodworking projects will shine with professional results.
Tips and Tricks
If you’re looking to sharpen your chisels but don’t know how to use a honing guide, don’t worry! A honing guide is a simple tool that helps you sharpen your chisels with precision and consistency. To use a honing guide, start by adjusting the guide to fit the width of your chisel. Next, clamp the chisel into the guide and adjust the angle of the guide to match the factory bevel of the chisel.
Once the guide is set up, you can start sharpening the chisel by running it back and forth across a sharpening stone. Use a moderate amount of pressure and be sure to keep the honing guide level as you sharpen. After a few passes on each side, check the edge of the chisel for sharpness.
If necessary, adjust the guide and continue sharpening until you achieve the desired edge. With a little practice, you’ll be able to sharpen your chisels like a pro using a honing guide!
Additional tips for getting the best results from your honing guide
When it comes to sharpening your own tools, a honing guide can be a game-changer. But, getting the best results from your honing guide requires a bit of knowledge and technique. Here are a few tips and tricks to help you get the most out of your honing guide.
First, make sure to clean your blades before sharpening them. Dust and debris can clog your sharpening stone, and ultimately ruin your blade. Additionally, make sure to position the blade correctly in the honing guide.
Be sure the blade is clamped down tightly and flatly, to give it the best chance to sharpen effectively. Lastly, take your time and use consistent, even pressure while sharpening. Rushing the process or unevenly applying pressure can cause you to end up with an uneven blade, or even ruin the blade altogether.
By following these tips, you’ll be able to get the best results from your honing guide and enjoy sharp, effective tools.
Conclusion
Using a honing guide for chisels is like having a personal stylist for your tools. Just like how a stylist helps you look sharp and put together, a honing guide helps you sharpen and fine-tune your chisels to achieve the perfect edge. With the right technique and this handy tool, you’ll be able to transform your dull and lackluster chisels into sharp and precise workhorses.
So go ahead and channel your inner craftsman, because with a honing guide in hand, you’ll be honing your skills and your chisels in no time.”
Recap of the benefits and importance of using a honing guide for chisels
Using a honing guide can greatly benefit the sharpening process of chisels. Not only does it ensure a consistent angle, but it also saves time and prevents errors. By attaching the chisel to the honing guide, the guide serves as a reference point for maintaining a precise angle while sharpening.
This eliminates the need for trial and error, resulting in a perfect edge every time. Additionally, utilizing a honing guide can save time by allowing for quick adjustments between different size chisels. Using a guide can also prevent accidents, as it keeps the blade safely secured while sharpening.
The importance of a honing guide should not be underestimated for those looking to achieve optimal results with their chisel sharpening process.
FAQs
What is a honing guide and how does it work for chisels?
A honing guide is a tool used to hold chisels at a consistent angle while sharpening. It allows for precision and accuracy in achieving a sharp edge on the chisel.
How do I choose the right honing guide for my chisels?
The right honing guide for your chisels depends on the size and shape of the chisel. Look for a honing guide that is adjustable to fit a range of sizes and has a secure grip to hold the chisel in place.
What sharpening stones should I use with a honing guide for chisels?
You can use any sharpening stones with a honing guide for chisels, but it’s recommended to use a series of grits from coarse to fine for a more polished edge.
Can I use a honing guide for curved or angled chisels?
Yes, but you may need to adjust the honing guide to accommodate the curve or angle of the chisel. It may also require more practice and patience to achieve a sharp edge on a curved or angled chisel.
How often should I use a honing guide for my chisels?
It depends on how often you use your chisels and how dull they become. Generally, it’s recommended to sharpen chisels once every few weeks or as needed for optimal performance.
Can a honing guide be used for other tools besides chisels?
Yes, a honing guide can be used for other tools such as plane irons or spokeshaves. However, it may require adjusting the guide to fit the size and shape of the tool.
How do I maintain my honing guide for longevity?
To maintain your honing guide, keep it clean and dry after each use. Lubricate moving parts with a light oil and store it in a dry place. Regular maintenance will help ensure a longer lifespan for your honing guide.

