How to Use a Honing Guide to Sharpen Chisels: A Step-by-Step Guide
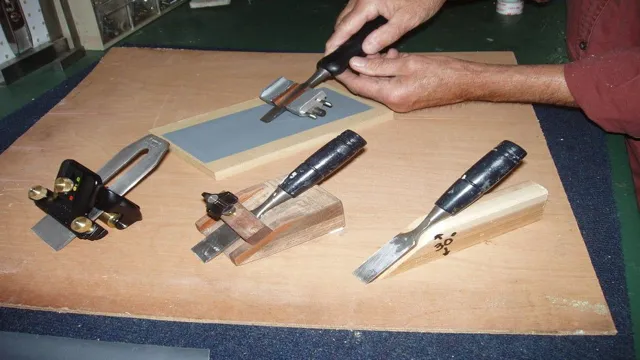
Do you dread sharpening your chisels? It’s time to put an end to the frustration and get yourself a honing guide. This handy tool will ensure that you are sharpening your chisels at the correct angle every time, resulting in a sharp edge that will make your woodworking experience much more enjoyable. Imagine trying to cut through a piece of wood with a dull chisel, it’s like trying to slice bread with a butter knife.
A honing guide will give you the sharp edge you need to make precise cuts with ease. Sharpening your chisels doesn’t have to be a tedious task, with the help of a honing guide you can improve your woodworking skills and enjoy your craft to the fullest. In this blog post, we’ll cover why using a honing guide is essential, and give you a step-by-step guide on how to use one effectively.
So, let’s get started!
What is a Honing Guide?
If you’re looking to sharpen your chisels, a honing guide can be a useful tool in your kit. A honing guide is a device that helps to maintain consistent angles while sharpening, which can be difficult to achieve by hand. To use a honing guide, you first need to select the appropriate angle for your chisel or plane blade.
This will vary depending on the tool and its intended use. Once you have the correct angle, you can attach your chisel to the guide and start sharpening. The guide will ensure that the angle remains consistent throughout the process, allowing you to achieve a sharp edge evenly across the blade.
While honing guides can be a bit tricky to use at first, with some practice, they can help you achieve professional-level sharpening results. With a honing guide and a bit of patience, you’ll be able to get your chisels and plane blades sharper than ever before.
Definition and Advantages
A honing guide is a tool that helps you sharpen your tools easily and efficiently. It is essentially an adjustable jig designed to hold your blade at a specific angle, allowing you to sharpen it at a consistent and accurate angle. A honing guide can be used for a variety of tools, including plane irons, chisels, and knives.
The main advantage of using a honing guide is that it allows you to maintain a consistent angle while sharpening your tool. This is important because different tools require different angles to achieve optimal sharpness. If you’re sharpening by hand, it can be difficult to maintain the same angle throughout the sharpening process.
With a honing guide, you can set the angle beforehand and be confident that you are sharpening your tool correctly. Another advantage of using a honing guide is that it can help you to sharpen your tools faster. Because you are able to maintain a consistent angle throughout the entire process, you can complete the sharpening process in less time than if you were doing it by hand.
Overall, a honing guide is a great investment for anyone who wants to maintain their tools and keep them in top working condition. By using a honing guide, you can achieve consistent and accurate results, and you can save time and effort in the process. Whether you’re a professional woodworker or a DIY enthusiast, a honing guide is a tool that you’ll find extremely useful.
Preparing Your Tools
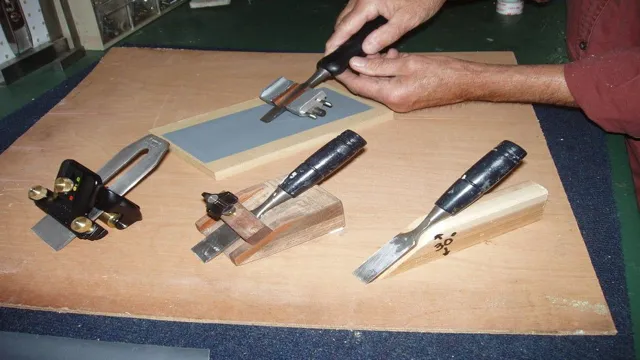
Before you start using a honing guide to sharpen your chisels, it’s important to prepare your tools properly. First, make sure your chisels are clean and free of any debris. You can use a wire brush or sandpaper to remove any stubborn particles.
Next, choose the right size honing guide to fit your chisels. Make sure it’s securely clamped to your work surface before you start sharpening. You’ll also need a sharpening stone, lubricating oil, and a ruler or depth gauge to set the angle of your chisels.
With all of your tools properly prepared, you’ll be ready to start honing your chisels to perfection with your honing guide. Remember to take your time and use a consistent motion to achieve the best results.
Setting Up the Honing Guide and Chisel
Setting up the honing guide and chisel can seem like a daunting task, but with a little practice and know-how, anyone can do it. First, ensure that your chisel is clean and free of any debris or rust. Next, insert the chisel into the honing guide and tighten the screws to secure it in place.
The honing guide will help you maintain a consistent angle while sharpening your chisel. It’s essential to select the right angle for your chisel, typically ranging from 25 to 30 degrees, depending on your preference and task. Set the angle on your honing guide and adjust it accordingly to achieve the desired angle.
Remember to take your time with this process, as a dull blade can be dangerous. Once you’ve honed your chisel, test it out on a scrap piece of wood to ensure a sharp edge. Practice makes perfect, and with a little bit of patience, you’ll be sharpening your chisels like a pro in no time.
Choosing the Right Angle
When it comes to choosing the right angle for your project, it’s important to make sure your tools are prepared ahead of time. One of the first things you should do is check your saw blade to ensure it’s sharp and ready to make precise cuts. A dull blade can cause your cuts to be uneven and ruin the final product.
Additionally, you’ll want to make sure you have the right sized drill bit to create any necessary pilot holes for screws or nails. Taking the time to properly prepare your tools can save you a lot of frustration and headache down the road.
Sharpening Your Chisel
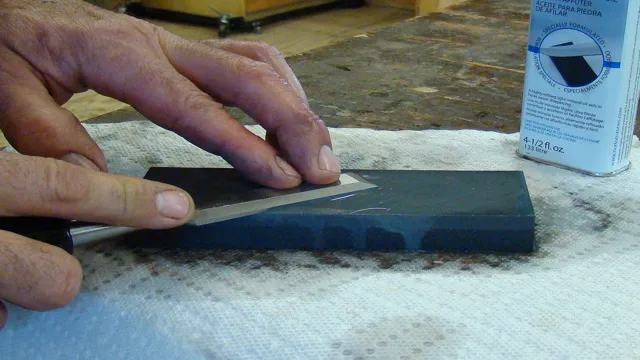
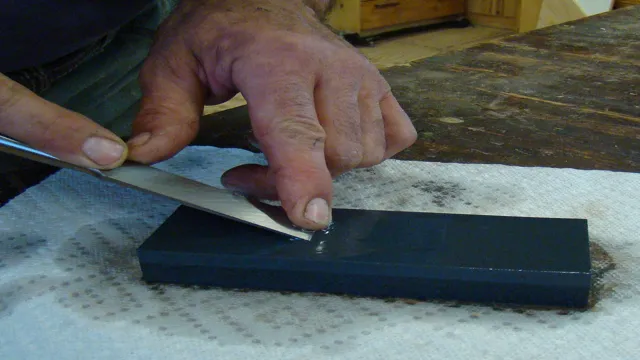
If you’re looking to sharpen your chisels to a fine edge, using a honing guide can make the process much easier. A honing guide keeps your chisel at the correct angle as you sharpen it, which is crucial for achieving a razor-sharp edge. To use a honing guide, simply clamp your chisel into the guide and adjust the angle to match the bevel angle of your chisel.
Then, secure the guide to your sharpening stone and begin honing. Start with a coarse grit stone and move on to finer grits until you’ve achieved the desired sharpness. Remember to take your time and use consistent pressure and motion to ensure an even, straight edge.
With a little practice, you’ll be able to sharpen your chisels like a pro!
Starting with Coarse Grit
When it comes to sharpening your chisel, starting with a coarse grit is key. This is because a dull or damaged chisel blade requires a lot of material to be removed in order to restore its sharp edge. A coarse grit does this job quickly and efficiently.
You may be tempted to start with a finer grit, thinking that it will create a smoother edge, but this is a mistake. The finer grit will simply polish the dull surface, leaving the blade still dull. Using a coarse grit first will remove the damaged or dull parts of the blade, creating a fresh surface to work with.
Only then can you move on to finer grits to create the desired level of sharpness and smoothness. Remember that a sharp chisel is essential for precise and satisfying woodworking, so don’t skimp on the sharpening process.
Moving to Fine Grit
As you progress in sharpening your chisel, it’s important to move onto fine grit. Fine grit helps to smooth out any rough edges left from the previous course grit sharpening. It’s important to note that fine grit doesn’t necessarily mean the highest number on the scale.
It’s all about finding the right grit that works for your chisel. The grit size can range anywhere from 600 to 1500 for a fine grit sharpening stone. Don’t be afraid to experiment and find the right grit for your chisel.
Keep in mind that a fine grit sharpening stone can help you achieve a sharper edge, but it also requires more patience and time to use properly. You’ll need to take your time and work the stone evenly to get the desired results. Once you master the art of fine grit sharpening, your chisel will be ready to make precise cuts and get the job done.
Polishing Your Edge
Sharpening your chisel is an essential part of polishing your edge as a woodworker. Just like a knife, a chisel needs to be kept sharp to maintain its cutting power and precision. Dull chisels can lead to frustrating and time-consuming work, and they can also be dangerous if they slip or don’t cut through wood cleanly.
To sharpen your chisel, you’ll need a combination of tools: a sharpening stone or honing guide, a leather strop, and some honing compound. First, use the sharpening stone or honing guide to grind down the metal on the bevel of the chisel until it’s razor-sharp. Then, use the leather strop and honing compound to polish the edge and remove any small burrs left over from sharpening.
Finally, test the chisel on some scrap wood to make sure it’s cutting smoothly and cleanly. With a properly sharpened chisel, your woodworking projects will be a breeze and your finished products will look sharper than ever.
Tips for Success
If you’re interested in keeping your chisels sharp and effective, using a honing guide can be a great tool in your arsenal. A honing guide helps you maintain a consistent angle on the bevel of your chisel or other cutting tool, allowing you to achieve a razor-sharp edge with ease. To use a honing guide effectively, start by setting the angle you want to maintain.
Many guides have adjustable stops or other features to help you lock in the correct angle. Next, clamp your chisel or other tool into the guide, making sure it’s secure and won’t move during the honing process. Finally, use your honing stone to sharpen the tool by moving it back and forth over the bevel, being careful not to apply too much pressure.
With practice, you’ll be able to use a honing guide to sharpen your chisels quickly and effectively, ensuring they’re always ready when you need them.
Maintaining Consistent Angles
Maintaining consistent angles in any activity that requires precision and accuracy is vital for a successful outcome. Whether it’s sports, carpentry, or photography, mastering the art of keeping consistent angles will give you an edge over your competitors. One essential tip for success is to practice regularly.
Just like any other skill, the more you practice, the better you become. You will begin to develop the muscle memory required to maintain a consistent angle effortlessly. Another tip is to invest in quality equipment.
Your tools will significantly impact your ability to maintain consistent angles. Cheap, flimsy tools will not only hinder your performance but may also lead to frustration and disappointment. Finally, find a mentor or role model who excels at maintaining consistent angles.
Observe and learn from them, and see what works for you. With these tips and determination, you’ll be ready to maintain those perfect angles with ease.
Avoiding Over-Sharpening
Over-sharpening is a common mistake in photo editing that can ruin the final result. It happens when you edit a photo using overly aggressive sharpening tools, resulting in visible halos and a loss of details. To avoid this, you should start by selecting the right sharpening tool and avoiding the use of extreme settings.
It’s also important to preview your edits at 100% to see if there’s any halos or other unwanted effects. Additionally, you can use masks to selectively sharpen certain areas of the photo while leaving the rest untouched. Remember, the goal is to enhance the details in your photo without creating an unnatural or over-processed look.
By following these tips, you can achieve a sharper and more professional-looking photo without the risk of over-sharpening.
Keeping Your Tools Clean and Maintained
When it comes to getting the most out of your tools, it’s important to keep them clean and properly maintained. One tip for success is to make sure you clean your tools after each use. This helps prevent rust and keeps them in good condition.
It’s also important to regularly inspect your tools for any signs of damage or wear and tear. If you notice anything wrong, address it right away so you can avoid further damage. Another tip is to store your tools properly.
Keep them in a dry, cool place where they won’t be exposed to moisture or extreme temperatures. By taking these simple steps, you can ensure that your tools last longer and perform better, which can ultimately save you both time and money. So don’t neglect the importance of keeping your tools clean and maintained – it’s an investment that will pay off in the long run.
Conclusion
In conclusion, using a honing guide to sharpen chisels is like having a personal trainer for your tools. It takes some practice, patience, and attention to detail, but the end result is a sharper and more efficient chisel that will make all your woodworking projects a breeze. So, grab your honing guide, hone your skills, and watch your chisels transform from dull to dazzling in no time!”
FAQs
What is a honing guide?
A honing guide is a tool used to hold a chisel at a consistent angle while sharpening.
Why use a honing guide?
A honing guide ensures that the chisel is sharpened at a consistent angle, resulting in a sharper edge and more precise cuts.
How do I choose the right honing guide?
Consider the size of the chisels you will be sharpening and the angle range of the honing guide. Look for a guide with secure clamping and adjustability.
How do I set the angle on the honing guide?
Adjust the angle on the honing guide by loosening the screw and sliding the guide up or down until the desired angle is reached. Then tighten the screw to secure it in place.
How do I use a honing guide with different sized chisels?
Adjust the jaws of the honing guide to fit the width of the chisel and set the angle as needed.
How often should I sharpen my chisels using a honing guide?
It depends on how frequently you use your chisels, but as a general rule, it’s good practice to sharpen them before each use.
Can a honing guide be used for other tools besides chisels?
Yes, a honing guide can be used to sharpen other tools such as plane irons, spokeshaves, and gouges. Just adjust the guide to fit the tool being sharpened.

