How to Use a Paint Sprayer Interior: Tips and Tricks for a Flawless Finish

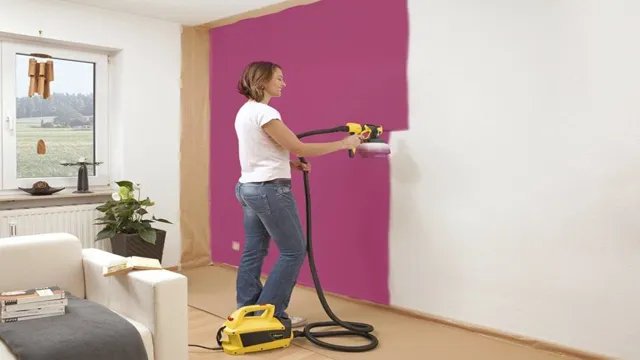
If you’re looking to give your room a fresh coat of paint, using a paint sprayer may be a smart and efficient way to get the job done with minimal hassle. Not only does this method save time and energy, but it also leaves a smooth and professional finish that is unrivaled by traditional brushing and rolling. Whether you’re a DIY enthusiast or a professional painter, using a paint sprayer for your interior walls can make the painting process more enjoyable and less tedious than you’d expect.
In this post, we’ll delve into the various benefits of using a paint sprayer for interior walls, and provide you with some helpful tips to ensure that your DIY paint job goes off without a hitch. So settle in, grab a cup of coffee, and let’s get started!
Preparing the Surface
When it comes to using a paint sprayer for interior painting, preparation is key. One of the first steps is to properly prepare the surface you plan to paint. This includes ensuring it is clean and free of any debris or dust.
You may need to sand down any rough patches or use a filler to smooth out any holes or dents in the surface. Additionally, you should tape off any areas you do not want to paint, such as trim, windows, and doors. By taking the time to properly prepare the surface, you can ensure a smooth and even finish for your paint job.
Using the right technique and equipment, along with a high-quality paint, will result in a professional-looking interior space. So, before you begin using your paint sprayer, take the time to properly prepare your paint surface for best results.
Clean the walls thoroughly
Before you start painting your walls, it’s important to prepare the surface by cleaning it thoroughly. This will ensure that the paint adheres well and lasts longer. Begin by dusting the walls with a soft cloth or duster.
Remove any cobwebs, dirt, or debris with a vacuum cleaner or broom. Next, use a mild detergent solution to wipe down the walls. You can use a sponge or a soft cloth to scrub the surface gently.
Pay attention to areas that are prone to stains, such as near the stove or in the bathroom. For tougher stains or grease, use a stronger cleaning agent like trisodium phosphate (TSP). Rinse the walls with clean water to remove any soap residue and allow them to dry completely before painting.
By taking the time to clean your walls properly, you’ll ensure a smooth, flawless finish that will last for years.

Fill in any holes or cracks with spackle
When it comes to painting a room, proper preparation is key to achieving professional-looking results. One vital step in preparing the surface for painting is to fill in any holes or cracks with spackle. Before applying spackle, make sure the area is clean and dry.
Using a putty knife, apply enough spackle to the hole or crack to fill it completely. Smooth the surface with the putty knife, removing any excess spackle and ensuring the area is level with the surrounding surface. Allow the spackle to dry completely before sanding it with a fine-grit sandpaper.
Once sanded, wipe the area clean with a damp cloth to remove any dust before painting. Not only does filling in holes and cracks with spackle create a smoother surface for painting, but it can also prevent paint from flaking or peeling in the future. By taking the time to properly prepare your surface, your paint job will look flawless and last longer.
Prepping the Paint Sprayer
Using a paint sprayer for your interior walls may seem like a daunting task, but it doesn’t have to be. First, it’s important to prep the sprayer properly. Start by familiarizing yourself with the equipment and reading the instruction manual.
Then, clean the sprayer by spraying water through it and wiping down any residue. Next, mix the paint thoroughly and strain it to remove any clumps or impurities. Adjust the pressure and atomization settings on the sprayer to ensure even coverage and avoid overspray.
Test the sprayer before starting to paint by spraying a small area to make sure the settings are correct. With a well-prepped sprayer and paint, your interior walls will have a professional finish in no time.
Choose the right spray tip
When it comes to prepping your paint sprayer, there are a few key steps you should take to ensure a smooth and efficient painting process. First and foremost, you need to choose the right spray tip for the job. The spray tip determines the spray pattern and size, which can greatly impact the quality and speed of your painting.
Consider the type of paint you’re using, the surface you’re painting, and the desired finish when selecting your spray tip. Additionally, make sure to clean the spray tip thoroughly before and after each use to prevent clogging and ensure optimal performance. Taking these steps can save you time and hassle in the long run, and help you achieve a flawless finish.
Thin the paint if necessary
When it comes to prepping your paint sprayer, thinning the paint may be necessary to ensure a seamless and even application. Thinning the paint helps the sprayer atomize the paint better, making it easier to spray and preventing clogging. The level of thinning required will depend on the type of paint and the manufacturer’s recommendations.
Some paints require only a small amount of thinning, while others may require up to 20%. Always refer to the paint’s instructions and test the viscosity of the paint before beginning to ensure optimal performance of your sprayer. It’s vital to thin the paint correctly, as over-thinning can cause the paint to run or sag, while under-thinning can lead to a bumpy or grainy finish.
To thin the paint, you can use paint thinning agents, water, or specific solvent-based thinners. Remember to stir the paint thoroughly after adding the thinner to achieve a consistent texture throughout. Overall, preparing your paint sprayer by thinning the paint correctly is essential for achieving a professional-looking finish to your projects.
Practice on a test surface first
When it comes to prepping your paint sprayer, it’s important to practice first on a test surface to ensure a smooth finish on your project. Before you begin, it’s essential to thoroughly clean your spray gun to prevent any debris or old paint from affecting your paint job. Then, adjust the spray pattern to match your desired technique.
Many beginners tend to overspray, leading to drips and uneven coverage. A good analogy to remember is to treat your spray gun like a garden hose: start with low pressure and work your way up until you find the perfect flow. By taking the time to properly prep your paint sprayer and practice on a test surface, you’ll save yourself time and costly mistakes in the long run.
So, don’t skip this crucial step in your painting process and achieve a professional-looking finish every time!
Application Techniques
When it comes to using a paint sprayer for interior painting, there are a few application techniques to keep in mind. First and foremost, it’s important to make sure that your paint sprayer is set up correctly and that you are using the right type of paint for the job. Once you have everything in order, you can focus on applying the paint in smooth, even strokes, being careful not to oversaturate any one area.
It’s also a good idea to start at the top of the room and work your way down, making sure to cover all areas evenly. One of the most important things to keep in mind is to maintain a consistent distance from the surface being painted – too close and you risk overspraying and causing drips, while too far away may result in a patchy finish. With a little bit of practice, a paint sprayer can be a great tool for achieving a professional-looking interior paint job.
Hold the sprayer 6-8 inches away from the wall
When it comes to spray painting walls, many people tend to hold the sprayer too close, resulting in uneven paint application and dripping. To avoid this, it’s important to follow the proper application technique. One of the key things to remember is to hold the sprayer 6-8 inches away from the wall throughout the entire process.
This distance allows for the paint to be evenly distributed in a smooth and controlled manner without over saturating one area. Holding the sprayer too far away, on the other hand, can result in the paint becoming too thin and not fully covering the surface. So, the next time you’re spray painting a wall, keep the sprayer at a distance and watch as your paint job becomes seamless and professional-looking.
Move the sprayer in a consistent direction
When it comes to using a sprayer, it’s important to apply the product in a consistent direction. This means avoiding sudden stops and starts, as well as overlapping each pass slightly. By doing this, you’ll ensure that the coverage is even, and you won’t miss any spots.
Keep in mind that the direction you move the sprayer in should be determined by the shape and size of the area you’re spraying. For example, if you’re spraying a large, open field, you may want to move in straight lines, while if you’re spraying a garden bed, you may need to make more intricate movements to avoid hitting plants or obstacles. With a little practice, you’ll be able to apply the product evenly and efficiently, without wasting any of it.
So don’t be afraid to experiment and find the technique that works best for you!
Overlap each pass of the sprayer by 50%
When it comes to using a sprayer for application purposes, it’s important to ensure that there is proper coverage of the product. One effective technique to ensure this is to overlap each pass of the sprayer by 50%. This means that when making a new pass with the sprayer, the nozzle should spray half on the previous pass and half on the new area.
This helps to avoid missing any spots and ensures that there is adequate product coverage all around. It’s also a good idea to use a slow and steady pace with the sprayer to ensure precise coverage. By using this technique, it will save time, product, and help to get the job done effectively.
Overall, this is an easy and effective way to apply products with a sprayer and is well worth implementing into any application process.
Cleaning and Maintenance
When it comes to using a paint sprayer for interior projects, it is important to also consider proper cleaning and maintenance for the sprayer itself. After each use, make sure to clean the sprayer thoroughly to prevent paint from drying and clogging the machine. Start by flushing the sprayer with water or a cleaning solution, and then disassemble the different parts of the sprayer to clean them individually.
Additionally, make sure to lubricate any moving parts and replace any worn or damaged parts as needed. By taking good care of your paint sprayer, you can ensure that it will continue to work effectively and efficiently for all of your interior painting projects.
Clean the sprayer after each use
Maintaining your sprayer is crucial to ensure its longevity and efficiency. One essential step in keeping your sprayer in good condition is cleaning it after every use. Not only does this prevent any leftover chemicals from corroding the equipment, but it also ensures that the next time you use the sprayer, there are no leftover chemicals that could negatively impact your plants or crops.
To properly clean your sprayer, start by flushing the tank with water. Make sure to remove the nozzle and filter before cleaning them thoroughly and inspecting them for any damage. If any parts are damaged, consider replacing them before the next use.
Once everything is cleaned and inspected, reassemble the sprayer and store it in a dry and safe location until the next use. Remember, taking the extra time to clean your sprayer after each use can save you time and money down the road. It also ensures that you are using a safe and effective product on your plants or crops.
So, take the time to give your sprayer a little TLC, and it will reward you with a longer lifespan and better performance.
Store properly to prevent damage
When it comes to keeping your belongings in good condition, proper storage is key. Not only does it prevent damage from external factors such as moisture and dust, but it also helps maintain the integrity of the item itself. Whether it’s clothing, electronics, or furniture, storing them correctly can help ensure their longevity.
One way to do this is by cleaning and maintaining them regularly. This not only prevents buildup but also helps identify and address any potential issues early on. For example, wiping down leather furniture with a damp cloth can prevent cracks and deterioration, while dusting electronics and appliances prevents overheating and malfunctions.
In addition to cleaning, proper storage also involves careful handling and organization. Items should be stored in appropriate containers or covers, with heavier items at the bottom and fragile items on top. This reduces the risk of damage from shifting and falling, as well as from scratches and dents.
Part of proper storage also involves knowing when to let go. Keeping items that are no longer functional or useful not only takes up valuable space but can also lead to clutter and disorganization. Knowing when to donate or dispose of items can save both time and effort in the long run.
Ultimately, taking the time to properly store and care for your belongings can make a big difference in their lifespan and overall condition. From regular cleaning to careful handling and knowing when to let go, these tips can help you keep your items in great shape for years to come.
Perform regular maintenance to ensure optimal performance
Regularly cleaning and maintaining your equipment is crucial to ensure it operates at its best. Neglecting maintenance can lead to decreased performance or even equipment failure. Taking the time to wipe down surfaces, replace worn-out parts, and lubricate moving components can extend the lifespan of your equipment and save you money in the long run.
One way to ensure you stay on top of maintenance is to create a schedule and stick to it. Set aside time every month to inspect and clean your equipment. Not only will this keep your equipment performing at its best, but it also allows you to catch any potential issues before they turn into costly repairs.
So, don’t wait until something goes wrong – make cleaning and maintenance a regular part of your routine and keep your equipment in top shape.
Conclusion
In conclusion, using a paint sprayer for your interior painting needs can be a game-changer. Not only does it save time and energy, but it also provides a more even and professional-looking finish. However, it’s important to keep in mind some key factors such as choosing the right paint, preparing the surface appropriately, and practicing with the spray before tackling your big project.
So, get ready to transform your space with a paint sprayer, because with a little patience and some spritzing finesse, you’ll be a painting pro in no time!”
FAQs
What type of paint can I use with a paint sprayer for interior walls?
You can use any type of paint with a paint sprayer, including latex, enamel, and oil-based paints.
Can I use a paint sprayer for small interior painting projects?
Yes, paint sprayers are versatile tools that can be used for both small and large painting projects.
How do I prep my walls before using a paint sprayer to paint the interior?
You should always clean the walls thoroughly and repair any cracks or holes before painting with a sprayer.
Do I need to thin my paint before using a paint sprayer for interior walls?
It depends on the thickness of your paint and the type of sprayer you are using. Check the manufacturer’s instructions to determine if thinning is necessary.
What safety precautions should I take when using a paint sprayer for interior painting?
Always wear protective eyewear, a mask, and gloves when using a paint sprayer. You should also make sure to properly ventilate the room you are painting in.
How do I clean my paint sprayer after using it to paint the interior?
Follow the manufacturer’s instructions for cleaning your paint sprayer thoroughly after each use.
Can I use a paint sprayer to paint textured walls or ceilings?
Yes, you can use a paint sprayer to paint textured walls or ceilings, but you may need to adjust the settings on your sprayer to achieve the desired finish.


