How to Use a Professional Paint Sprayer: A Beginner’s Guide to Achieving Perfect Results

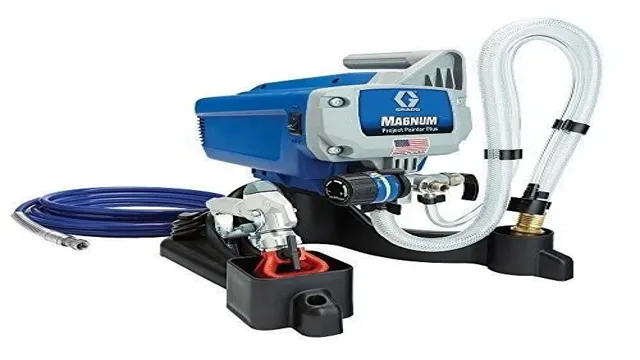
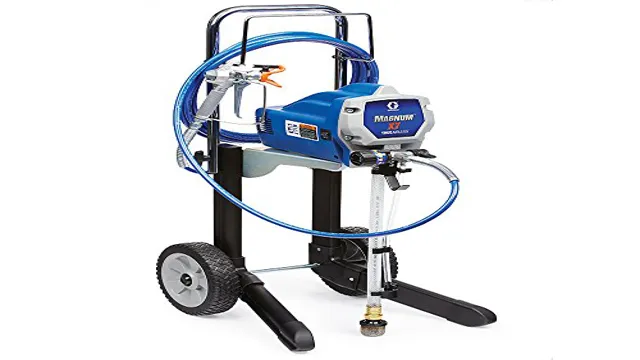
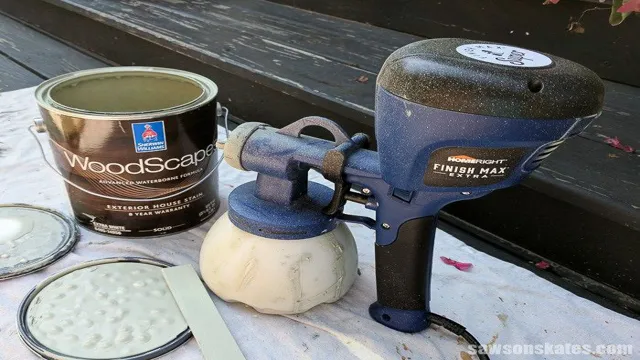
Ready to give your walls a fresh coat of paint, but dreading the task of manually applying it with a brush and roller? Enter the professional paint sprayer. With its ability to evenly and quickly apply paint to any surface, it’s no wonder why more and more DIYers and professionals alike are turning to this tool. But how do you effectively use a professional paint sprayer? In this blog, we’ll explore the ins and outs of using a professional paint sprayer, from choosing the right tip size to maintaining the sprayer for long-term use.
So sit back, grab a paint sprayer, and let’s get started!
Preparation
If you’re looking to give your home a new coat of paint, using a professional paint sprayer can save you a lot of time and effort. However, before you start spraying, it’s important to properly prepare the surface you’ll be painting. This includes thoroughly cleaning the area and removing any loose paint or debris.
You should also cover any surfaces you don’t want to get paint on with drop cloths or plastic sheets. Next, make sure to fill in any cracks or holes with spackle or putty, and sand the surface smooth. Finally, apply a primer before spraying on the actual paint to ensure a more even and long-lasting finish.
With these preparations done, you’ll be ready to start using your professional paint sprayer with confidence and ease.
Choose the Correct Paint and Sprayer
If you want to achieve a professional-looking paint job, you need to choose the correct paint and sprayer. First, you need to prepare the surface by cleaning it and filling in any cracks or holes. Then, select the appropriate paint for the project.
The paint choice will depend on the type of surface you are painting and the desired finish. For example, if you are painting a metal surface, you will need a type of paint that is designed for metal. Once you have selected the paint, you will need to choose the right sprayer.
There are many types of sprayers available, including airless, HVLP, and compressed air sprayers. The sprayer you choose will depend on the type of paint you are using, the size of the project, and your budget. A high-quality sprayer will give you a smooth, even finish and make the job much easier.
By taking the time to prepare the surface and choose the correct paint and sprayer, you can achieve a flawless paint job that will look great for years to come.

Prepare the Surface to be Painted
When it comes to painting, preparation is key to getting the perfect finish. One of the most important steps in preparing a surface to be painted is making sure it’s clean and dry. This may sound simple, but it’s crucial to removing any dirt, dust, or other debris that can prevent the paint from adhering properly.
To clean the surface, you can use water and soap or a cleaning solution specifically designed for the type of material you’re working with. After you’ve cleaned the surface, let it dry completely before moving on to the next step. Another important aspect of preparation is making any necessary repairs to the surface, such as filling in cracks or holes, sanding rough patches, and applying a primer to ensure even coverage and durability.
By taking the time to properly prepare the surface, you can ensure your paint job looks flawless and lasts for years to come.
Protect the Surrounding Area
Preparation is key when it comes to protecting the surrounding area during any construction project. You need to take the necessary steps to ensure that the area is safe and that your work won’t negatively affect the environment. Before starting any work, assess the area and identify any potential issues that could arise.
Consider using barriers or fencing to contain the project and prevent any debris from spreading beyond the site. It’s also crucial to communicate with neighbors and stakeholders beforehand and inform them of your plans, timeline, and any possible disruptions. This way, you can address concerns in advance and minimize any issues that may arise.
By taking the time to prepare and plan for any contingencies, you can protect the area and ensure the project’s success. Remember, an ounce of prevention is worth a pound of cure.
Operating the Sprayer
How to Use a Professional Paint Sprayer Are you new to using a professional paint sprayer? Don’t worry; it’s not as complicated as it may seem. First, you’ll need to make sure you’ve set up your equipment correctly, including the paint container and spray gun. Once this is done, you’ll need to choose your paint type and adjust the pressure settings on the sprayer.
Then, start spraying from a distance of 10-12 inches, moving the gun in a consistent back and forth motion, ensuring an even coat is applied. It’s important to overlap each pass slightly to avoid leaving gaps. Make sure to keep the sprayer vertical and maintain a steady pace to avoid over-spraying or dripping.
Finally, clean the sprayer thoroughly with the appropriate cleaning solution after use to ensure longevity and performance. With a bit of practice, using a professional paint sprayer can save time and provide a smooth and flawless finish on your painting projects.
Set Up the Sprayer
Operating a sprayer involves more than just turning it on and pointing it at your target. Before you begin, you need to make sure the machine is set up correctly to ensure a successful application. First, fill the tank with the appropriate chemical and dilute it to the desired concentration.
Next, attach the nozzle or wand you plan on using, making sure it is secure and properly configured. Finally, prime the pump and check for leaks before starting the spraying process. Taking these steps will help ensure that your sprayer is operating efficiently and safely.
Remember, operating a sprayer requires careful attention to detail to achieve the best possible results. So, take your time when setting up the sprayer and follow the manufacturer’s instructions closely to avoid any potential issues.
Practice Using the Sprayer
Operating the sprayer can seem intimidating at first, but with practice, it becomes second nature. Before starting, it’s essential to read the manufacturer’s instructions thoroughly and make sure you understand all safety measures. Once you feel comfortable, fill the sprayer with the appropriate chemicals or liquid.
Before spraying, choose the correct nozzle and adjust the spray pressure accordingly. While spraying, maintain a consistent pace and keep the nozzle at a consistent distance from the surface being treated. Be sure to avoid over-spraying or missing spots by overlapping each pass slightly.
After use, clean the sprayer thoroughly and store it in a dry, cool place. With proper practice and attention to detail, you can operate the sprayer safely and efficiently, achieving the desired results for your project.
Spray Technique
When it comes to operating a sprayer, there are a few spray techniques you should be aware of. First, always make sure to read the manufacturer’s instructions carefully before starting. The most important thing to remember is to maintain a consistent spraying pattern and angle.
This will ensure that the coating is evenly distributed without any overlapping or missed spots. To do this, stand perpendicular to the object being sprayed and keep a steady pace while moving the sprayer back and forth. It’s also important to maintain a proper distance from the object being sprayed, as getting too close will cause the coating to run and not getting close enough will result in inconsistent coverage.
Another important technique to remember is to avoid spraying in windy or dusty conditions, as this can affect the spray pattern and lead to uneven coverage. By following these tips, you’ll be able to operate your sprayer with ease and achieve perfect results every time.
Cleaning and Maintenance
If you are planning to use a professional paint sprayer for the first time, it is essential to know how to clean and maintain the tool after using it. Remember, regular cleaning and maintenance will lengthen the paint sprayer’s lifespan, improve its performance, and prevent clogs and blockages. The first step is disconnecting the spray gun and wiping off any excess paint on the sprayer.
Then, flush the sprayer with clean water or solvent to remove all paint residues. You can use a soft-bristle brush to gently scrub the areas with stubborn paint. After cleaning, ensure everything is dry before storing the paint sprayer.
If you have been using a water-based paint, ensure you remove all water before storage to prevent rust or corrosion. Proper cleaning and maintenance of your professional paint sprayer will help you achieve superb finishes that are not only durable but also professional-looking. So don’t overlook cleaning and maintaining your paint sprayer after each use, especially if you want to enjoy years of painting with the same tool.
Clean the Sprayer after Use
Cleaning and maintaining your sprayer after use is essential to keep it in good condition and to help it perform optimally for years to come. While it may be tempting to skip the cleaning process, doing so can lead to clogs, buildup, and other issues that can compromise your sprayer’s performance. To clean your sprayer, start by flushing out any remaining liquid in the tank and removing any remaining spray tip or nozzle.
Then, disassemble the sprayer and use a hose or pressure washer to rinse off any dirt, debris, or residue. Make sure to clean all parts thoroughly, including the hoses, filters, and fittings. Once you’ve finished cleaning, dry all the parts thoroughly before reassembling the sprayer.
By taking the time to clean and maintain your sprayer after use, you’ll be able to enjoy reliable performance and a longer lifespan for your equipment.
Regular Maintenance Tips
Regular maintenance is essential to keep any appliance running in optimal condition, and your vacuum cleaner is no exception. To ensure your vacuum lasts for longer, regular cleaning and maintenance is key. This entails emptying the dustbin, replacing bags and filters, checking the brushes and hoses, and wiping down the exterior.
Neglecting these tasks can lead to blockages, reduced suction, and even total breakdowns. For instance, cleaning the filter once a week prevents it from becoming clogged with dirt and dust, leading to inadequate airflow, and the motor could overheat and thus burn out. Therefore, it is important to prioritize the cleaning and maintenance of your vacuum to save money on costly repairs and replacements.
Conclusion
In conclusion, using a professional paint sprayer is like having a magic wand that transforms any surface into a work of art. It requires a steady hand, a bit of practice, and the right techniques to achieve professional-looking results. But once you’ve mastered the art of spraying, you’ll wonder how you ever managed to paint anything without it.
So grab your sprayer, don your painter’s cap, and unleash your inner Picasso, because with the right tools and mindset, the possibilities are endless!”
FAQs
What is a professional paint sprayer?
A professional paint sprayer is a tool used for painting large surfaces such as walls, ceilings, and furniture quickly and efficiently.
How do I choose the right professional paint sprayer for my needs?
You should consider the type of project you will be using it for, the type of paint you will be using, the size and weight of the sprayer, and your budget.
What type of paint can I use with a professional paint sprayer?
Most paint sprayers can handle different types of paint including latex, enamel, oil-based, and stain.
How do I properly clean and maintain my professional paint sprayer?
After each use, flush the sprayer with water or a cleaning solution recommended by the manufacturer. Store the sprayer in a clean, dry place.
How do I prevent overspray when using a professional paint sprayer?
You can use masking tape to cover areas you don’t want to paint, adjust the spray pattern and pressure, and practice on scrap material before starting your project.
Can a professional paint sprayer be used for small projects or touch-ups?
Yes, but you may need to adjust the settings and use a smaller nozzle or spray tip.
How do I avoid clogging when using a professional paint sprayer?
Use a paint strainer or filter before pouring the paint into the sprayer, ensure the paint is properly mixed, and avoid using paint that has been sitting for a long time.


