How to Use a Ryobi Cordless Drill: A Beginner’s Guide to Efficient DIY Projects
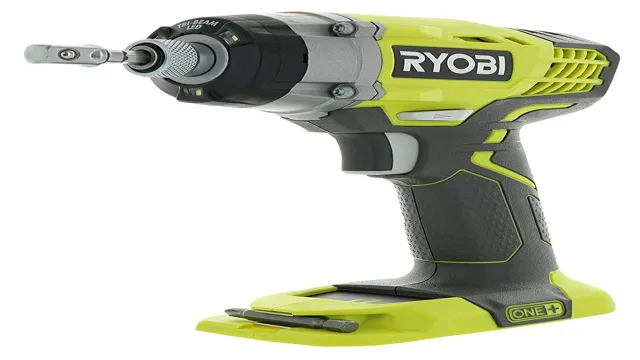
Do you want to revolutionize your DIY projects and take them to the next level? Well, if you’re a DIY enthusiast, or even an experienced professional, using a Ryobi cordless drill can be a total game-changer. This versatile tool is a must-have for anyone looking to tackle tough jobs without being tethered to a power source. With its exceptional performance and portability, the Ryobi cordless drill can handle various tasks ranging from simple home repairs to complex woodworking projects.
So, why use a Ryobi cordless drill, you ask? Well, buckle up, and let’s dive into the world of this game-changing tool. Imagine this: you’re working on a home renovation project and need to drill a hole in a tight space. With a corded drill, you’d find yourself struggling to maneuver the long, bulky cord around tight corners, putting the spin control in question.
However, with a Ryobi cordless drill, you’re free to move wherever you need without worrying about a pesky cord being in the way. The portability and flexibility of using a cordless drill will allow you to work with freedom and ease. But that’s not the only benefit of using a Ryobi cordless drill; it provides unbeatable power and torque that can handle even the most challenging drilling tasks.
Whether you’re drilling into thick hardwood or drywall, this tool will have the right amount of power to make your job easier. Additionally, the one-handed drill and lock chuck mechanism make changing bits simple and straightforward, saving you both time and effort. In summary, using a Ryobi cordless drill allows you to unlock your DIY potential and take on any project with ease and speed.
No matter what task you need to tackle, you can trust that this tool will deliver power and precision while enabling you to have the freedom to work from wherever you want. Investing in a Ryobi cordless drill is a smart choice that will make your DIY experience faster, easier, and more enjoyable.
Preparing the Drill
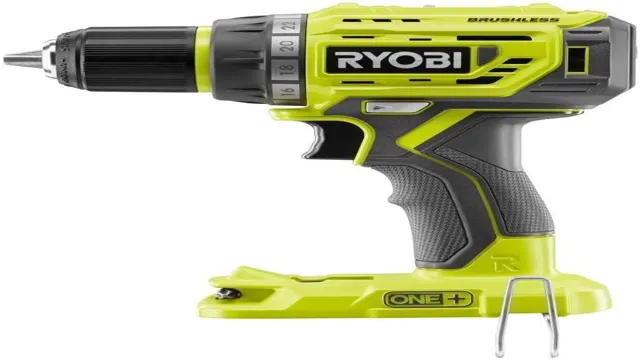
Are you new to using a Ryobi cordless drill? Before diving into your project, it’s important to prepare the drill properly. Start by inserting the battery into the bottom of the drill handle, making sure it clicks into place securely. Next, select the appropriate drill bit for your specific task and use the keyless chuck to tighten it into place.
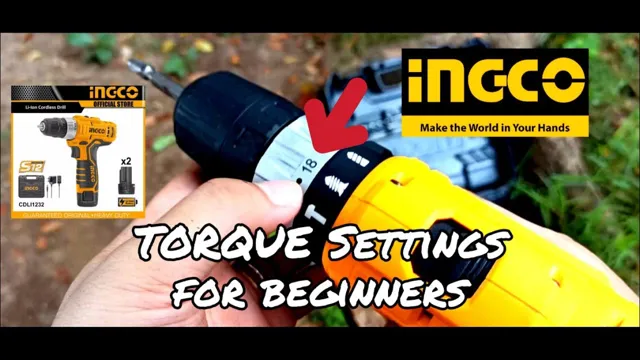
Be sure to check that the bit is secured tightly before starting your project. Finally, adjust the torque settings on the drill to ensure you have the right amount of power for your job. With these simple steps, you’ll be well on your way to using your Ryobi cordless drill like a pro.
Charge the Battery
To prepare your drill, the very first thing to do is to charge the battery. Before you start any project, make sure that the battery is fully charged and ready to use. A low battery can cause frustration and slow down the work, which could lead to an unproductive day.
To ensure that the battery is charged, insert it into the charger and wait for the LED indicator light to turn from red to green. The charging process typically takes a few hours, but it is always a good idea to consult the instructions manual, which will give you the exact time needed for a full-charge. Remember that a fully-charged battery will not only make your work smoother and faster, but it can also extend the life of your drill’s motor.
A high-quality battery can last for years, depending on how often you use and maintain it.
Select the Drill Bit
Selecting the right drill bit is crucial for any drilling project. The type of drill bit you choose will depend on the material you are drilling into and the size of the hole you need. When preparing the drill, start by selecting the appropriate drill bit and attach it securely to the drill.
Be sure to choose a drill bit that is the correct size for the hole you need and that is designed for the material you are drilling into. For example, if you are drilling into metal, you will need a high-speed steel bit. If you are drilling into wood, you can choose a carbon steel bit.
By taking the time to select the right drill bit for your project, you can ensure that your drilling is successful and that you achieve the desired results.
Setting Up the Drill
Using a Ryobi cordless drill is a great addition to any homeowner’s toolkit. Before you start drilling, you need to make sure that your drill is set up properly. The first thing you need to do is insert the battery into the drill.
Next, make sure that the drill bits are tightened properly in the chuck. This can be done by turning the chuck clockwise until it is tightly secured. If you’re using the drill for the first time, you may need to adjust the torque settings according to the material you’ll be drilling into.
You May Also Love:
This is an important step as it will prevent you from damaging the material or breaking your drill bits. Once you’ve made all the necessary adjustments, you’re all set to start using your Ryobi cordless drill. It’s that easy!
Insert the Drill Bit
If you’re new to woodworking or drilling in general, setting up your drill may seem intimidating. However, it’s really a simple process. The first step is to insert the drill bit into the chuck.
Ensure that the bit is securely locked into place, but don’t tighten the chuck too much, as this can damage the bit or the drill itself. It’s essential to choose the right bit for your project’s requirements. Different bit types and sizes are available for various materials, including wood, metal, and plastic.
Therefore, before inserting the bit, determine the proper size and type. After the initial setup, you’re ready to use your drill in your project. With practice and experience, you’ll not only become more confident in setting up your drill, but you’ll also become more skillful in using it for many DIY projects.
Adjust the Clutch
Adjust the Clutch Setting up the drill can be a tricky business, especially if you’re unsure of what you’re doing. To adjust the clutch, the first thing you need to do is locate the clutch adjustment screw. This is typically located on the housing of the drill, near the chuck, and is usually marked with a plus and a minus sign.
Turn the screw in the direction of the plus sign to increase the clutch tension, and turn it in the opposite direction to decrease tension. If your drill has a clutch dial instead of a screw, turn it towards the higher numbers for more tension, and towards the lower numbers for less tension. It’s important to note that the ideal clutch tension can vary depending on the material you’re drilling into, so make sure to test the tension on a piece of scrap material before making any adjustments.
A loose clutch can cause the drill to spin out of control, while a tight clutch can cause the drill’s motor to overheat and wear out faster. Therefore, finding the right balance is important for both safety and longevity.
Select the Direction
When it comes to setting up a drill, the direction you choose can make a big difference in the success of your project. Selecting the correct direction can minimize the risk of the drill bit getting stuck or breaking, as well as ensure that the hole is drilled in the desired location. Before drilling, take the time to determine the best direction for your project based on your materials, the shape of the hole, and the type of drill bit being used.
It’s also important to make sure the drill is securely mounted or held in place, so that it doesn’t slip or move during use. By carefully planning and setting up your drill, you can ensure a clean and precise hole every time. So, the next time you approach a drilling project, remember to select the direction that will yield the best results for your specific needs.
Using the Drill
If you’re looking to tackle some DIY projects, knowing how to use a Ryobi cordless drill can be a game-changer. First, make sure your drill is charged and loaded with the right bit for the job. Turn on the drill by pressing the trigger, and adjust the torque setting and speed as needed.
When drilling, apply steady pressure, and let the drill do the work. Be sure to keep a firm grip on the tool while working. When it’s time to switch to a screwdriver bit, loosen the chuck by turning it counterclockwise and swapping the bits.
Whether you’re hanging shelves, assembling furniture, or building a birdhouse, a Ryobi cordless drill will make quick work of any project!
Hold the Drill Correctly
When it comes to using a drill, holding it correctly is crucial for both your safety and the effectiveness of the tool. The first step is to make sure you have a good grip on the drill, with your dominant hand firmly holding the handle and your thumb resting on the side. Your other hand should be positioned on the drill’s body, away from the bit.
It’s also important to keep the drill straight and parallel to the surface you’re working on. If the drill is tilted, it can cause the bit to slip or break, which can be dangerous. Another tip is to use both hands when drilling through tough materials or when using a larger drill.
This will give you more control and prevent the drill from wobbling. Overall, taking the time to hold the drill correctly will lead to safer and more efficient drilling. So next time you pick up a drill, remember to grip it tightly and keep it parallel to the surface for a smooth and successful drilling experience.
Place the Drill Bit in Position
When it comes to using a drill, one of the most important steps is placing the drill bit in position. Start by selecting the appropriate bit for the task at hand and ensure that it is securely fastened in place. Position the bit at a 90-degree angle to the surface you are drilling and ensure that it is straight before starting the drill.
This will help prevent the bit from slipping or damaging the surface you are working on. Always be sure to wear appropriate safety gear when using a drill, including eye and ear protection. With a bit of practice, you’ll be able to master the art of using a drill like a pro.
So go ahead, give it a try, and don’t be afraid to ask for help if you need it!
Press the Trigger
Using a drill may seem like a straightforward task, but it’s essential to know how to operate it effectively. One critical element to using a drill efficiently is understanding how to press the trigger. The trigger controls the speed and power of the drill.
You want to make sure you start slow and gradually build up the speed, depending on the material you’re drilling into. Pressing the trigger halfway will result in a slower speed, while pressing it fully will enable the drill to work faster. It’s important to note that drilling at a high-speed level is ideal for softer materials while drilling at a slow speed level is best for harder materials.
Additionally, make sure you have a firm grip on the drill and position it correctly before pressing down on the trigger to avoid slipping and causing damage or injury. With proper control of the trigger, you’ll have greater accuracy and get the job done right the first time.
Adjust the Speed
When using a drill, adjusting the speed is key to achieving the best results. It’s important to consider the material you’re working with and the type of drill bit you’re using. For example, when working with delicate materials like glass or ceramics, a slow speed is necessary to avoid cracking or chipping.
Conversely, when drilling through tougher materials like metal, a higher speed will help cut through smoothly. Most drills come with adjustable speeds, so it’s important to read the manual and familiarize yourself with the different settings. Experiment with different speeds and keep in mind that it’s better to start slow and gradually increase the speed to avoid any mishaps.
Don’t forget to wear protective gear and take breaks to avoid strain or discomfort. Keeping these tips in mind will help you master the art of drilling and achieve the best results.
Control the Depth of the Hole
When using a drill, it’s important to be able to control the depth of the hole you’re making. This can be achieved through a few different methods. One option is to use a depth stop, which is a mechanism that attaches to the drill and allows you to set a specific depth for the hole.
Another option is to use masking tape as a visual guide, wrapping it around the drill bit at the desired depth to ensure you don’t drill too far. It’s also important to note the speed and pressure that you use when drilling, as these factors can affect the depth of the hole as well. By experimenting with these techniques and finding what works best for you, you’ll be able to confidently and accurately control the depth of your drill holes.
Maintenance and Storage
If you want to learn how to use a Ryobi cordless drill, it’s essential to know how to maintain and store it properly to ensure its longevity. Firstly, always keep the drill clean after use and make sure to remove any dust or debris from the motor vents. This will help prevent overheating and damage to the drill.
Additionally, keep the drill’s battery charged and only use the charger that came with the tool. When it comes to storage, keep the drill in a cool, dry place and away from direct sunlight and heat sources. It’s also a good idea to store the drill in its original carrying case to protect it from any potential damage.
By following these simple maintenance and storage tips, you can ensure that your Ryobi cordless drill will perform at its best for many years to come.
Clean the Drill Regularly
Regular maintenance of your drill is crucial to ensure it functions effectively and safely. One essential part of keeping your drill in tip-top shape is to clean it regularly. Dirty equipment can affect the performance of your drill and even shorten its lifespan.
After each use, wipe down your drill with a clean, dry cloth to remove any debris or dust that may have accumulated. Use a soft-bristled brush or toothbrush to clean hard-to-reach areas, and avoid using water or harsh cleaning agents. It’s best to inspect and clean your drill every few uses, depending on how frequently you use it and the amount of debris it collects.
By taking the time to clean your drill, you can ensure it runs smoothly and efficiently, and avoid costly repairs. Remember, a drill is a considerable investment, so treat it with care and give it the proper maintenance it needs to last for years to come.
Store the Drill and Battery Safely
When it comes to maintaining and storing your drill and battery, there are a few things to keep in mind. First, it’s essential to store them in a cool, dry place that’s away from direct sunlight or other heat sources. This will help ensure that the battery stays at its optimal temperature and doesn’t overheat or get damaged over time.
Additionally, it’s crucial to keep your drill and battery separate when storing them to avoid any accidental damage or discharge. Investing in a sturdy storage case or bag can be an excellent way to keep everything organized and protected. Another thing to keep in mind is to regularly check and clean both your drill and battery.
This includes wiping down any dirt or debris from the exterior and cleaning the battery contacts. Not only can regular cleaning help ensure that your tools work properly, but it can also extend their lifespan. Remember, proper maintenance and storage can go a long way in keeping your drill and battery in top condition, so they are ready to go when you need them the most.
Conclusion
When it comes to using a Ryobi cordless drill, there’s no need to be intimidated. Just remember to charge the battery, choose the right drill bit for the job, and always wear safety gear. Whether you’re a DIY enthusiast or a seasoned pro, this versatile tool will help you get the job done with ease.
So go ahead, grab your Ryobi and get to work! After all, nothing says “I can fix that!” like a trusty cordless drill in your toolkit.”
FAQs
What is the battery life of a Ryobi cordless drill?
The battery life of a Ryobi cordless drill can vary depending on the model and usage, but it typically ranges from 30 minutes to an hour.
Do I need to charge the battery before first use?
Yes, it is recommended to fully charge the battery before first use to maximize its lifespan.
Can I use the Ryobi cordless drill for heavy-duty tasks?
Yes, Ryobi cordless drills are designed for a variety of tasks, including heavy-duty use. Be sure to choose a model with the appropriate power and torque for your intended applications.
How do I change the drill bit on a Ryobi cordless drill?
To change the drill bit on a Ryobi cordless drill, first ensure the drill is turned off and the battery pack is removed. Then, loosen the chuck by rotating it counterclockwise, insert the new bit, and tighten the chuck by rotating it clockwise.
Can I use Ryobi cordless drill in wet conditions?
It is generally not recommended to use cordless drills in wet conditions to avoid electrical shock and damage to the tool.
How long does it take to fully charge the battery on a Ryobi cordless drill?
The charging time for a Ryobi cordless drill can vary depending on the battery model and charger, but it typically takes around 60 minutes to fully charge the battery.
How do I store my Ryobi cordless drill?
To store your Ryobi cordless drill, be sure to remove the battery pack and store it in a cool, dry place. Keep the tool in a secure location to prevent damage and maintain its performance.

