How to Use an Angle Grinder to Remove Rust Effectively: A Comprehensive Guide
Have you stumbled upon an old, rusty object that needs a little love and attention? Rust can be a stubborn problem to tackle, but fear not! With the right tool, the task becomes a breeze. Enter: the angle grinder. This versatile tool can make quick work of rust, leaving you with a clean surface ready for a fresh coat of paint or a new purpose.
In this blog post, we’ll cover the ins and outs of using an angle grinder to remove rust. So, grab your safety gear and let’s get started!
What You Will Need
Angle grinders are excellent tools for removing rust from metal surfaces. Before you begin, it’s important to gather the necessary tools to ensure safety and efficiency. You will need an angle grinder with the appropriate disc for rust removal, safety goggles or glasses, a dust mask or respirator, and gloves to protect your hands.
It’s also a good idea to have a container for the removed rust to avoid scattering it over your work area. Make sure that your work area is clear of any flammable materials and that you have adequate ventilation. Once you have everything you need, you can begin the process of removing rust from your metal surfaces using your angle grinder.
Angle grinder
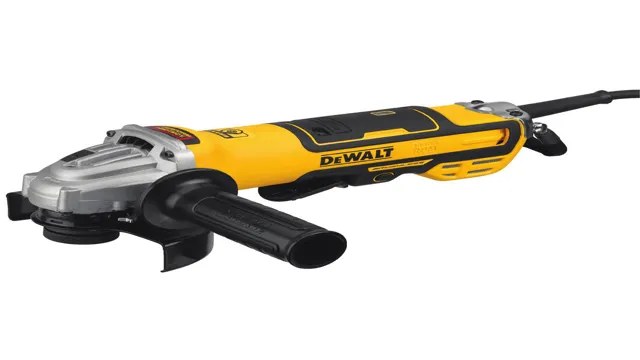
To operate an angle grinder safely and efficiently, you will need a few key tools and equipment. Firstly, you’ll need an angle grinder itself, which is a handheld power tool that is designed for cutting, grinding, and polishing a variety of materials. Angle grinders come in different sizes, so make sure you choose the right size for your intended usage.
You should also have a selection of grinding discs, cutting discs, and polishing pads that are compatible with your angle grinder, as well as protective gear such as safety glasses, earplugs, and gloves to ensure your safety. Additionally, you may need a clamp or vice to secure the material you are working on, and a dust mask to protect yourself from the dust and debris that is generated from the grinding process. Overall, having the right tools and equipment can make all the difference when it comes to using an angle grinder effectively and safely.
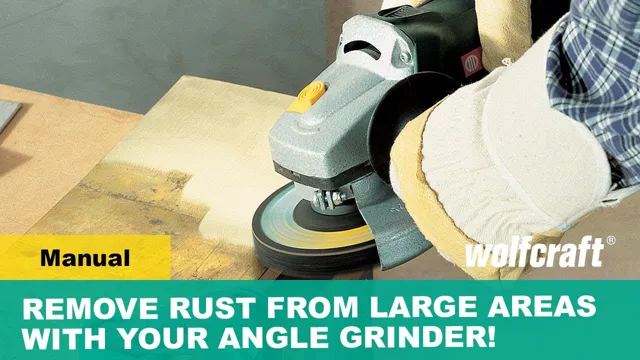
Wire brush or abrasive discs
When it comes to smoothing out rough surfaces or removing rust and paint from metal, wire brushes and abrasive discs are two of the most common tools used. To get started, you will need a few key items. First, you’ll need a wire brush or abrasive disc that’s suitable for the material you’ll be working on.
For example, a wire brush with stainless steel bristles is a good choice for removing rust from metal, while an abrasive disc with diamond grit is better for smoothing out hard materials like concrete or granite. You’ll also need a power tool to attach the wire brush or disc to, such as an angle grinder or drill. Make sure the tool has a secure grip and adjustable speed settings, as you’ll need to control the speed at which the brush or disc spins.
Finally, be sure to wear protective gear like gloves and eye goggles to keep yourself safe while working. With the right tools and safety precautions, wire brushes and abrasive discs can be effective tools for a variety of DIY and professional projects.
Safety gear
When embarking on any construction project, safety should always be a top concern. The right safety gear can make all the difference in preventing injuries and ensuring that the job is completed safely and efficiently. Some of the essential safety gear you will need include hard hats, safety glasses or goggles, work gloves, and steel toe boots.
Hard hats protect your head from falling debris or other hazards on the construction site. Safety glasses or goggles shield your eyes from flying objects or harmful chemicals. Work gloves will protect your hands from injuries and provide a better grip on tools.
Lastly, steel toe boots prevent injuries from heavy objects falling on your feet, as well as protecting your toes from being crushed. By investing in quality safety gear, you can ensure that your construction project is carried out safely and without any unfortunate accidents.
Preparing the Angle Grinder
Before removing rust with an angle grinder, it’s important to properly prepare the tool. Begin by attaching the appropriate grinding wheel or sanding disc to the grinder. It’s important to choose the correct grit for the job – a lower grit will remove rust more aggressively, while a higher grit will provide a smoother finish.
Make sure the wheel is securely tightened onto the spindle before use. Next, adjust the guard on the angle grinder to ensure it covers the majority of the wheel. This will help to protect your hands and face from flying debris while you work.
If you’re using a wire brush wheel, be sure to wear safety goggles and a dust mask to protect yourself from stray wire bristles. Finally, adjust the speed of the angle grinder to match the task at hand. Higher speed settings will remove rust more quickly, but may also leave behind more scratches.
Lower speeds will be gentler on the surface, but will require more time to remove rust. With these steps complete, you’re ready to use your angle grinder to remove rust – but be sure to follow proper safety procedures and use caution at all times.
Select the right abrasive disc
When it comes to using an angle grinder, the first step is to prepare it by selecting the appropriate abrasive disc. Choosing the wrong disc can result in damage or injury, so it’s vital to ensure that the grit, size, and material of the disc match the task at hand. Once you have the right disc, it’s time to attach it securely to the grinder’s spindle.
Make sure that the grinder is unplugged and the disc is facing the correct direction before tightening the spindle nut. If you’re not sure how to do this, consult the manual or seek help from a professional. With the disc attached and secured, you’re ready to use your angle grinder effectively and safely.
Remember to always wear protective gear, keep a firm grip on the tool, and be mindful of the sparks and debris that may be generated during use. By taking these precautions and selecting the right abrasive disc for your project, you can ensure a successful outcome while minimizing the risk of accidents or damage.
Insert the abrasive disc into the angle grinder
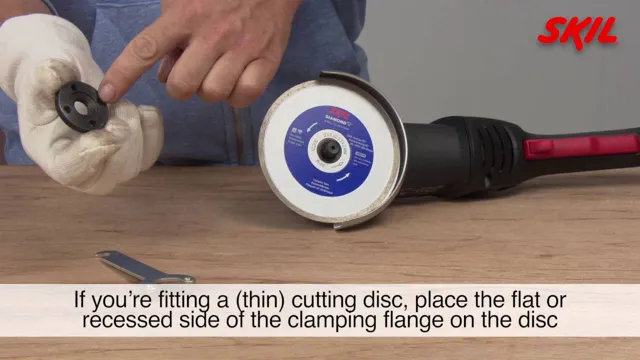
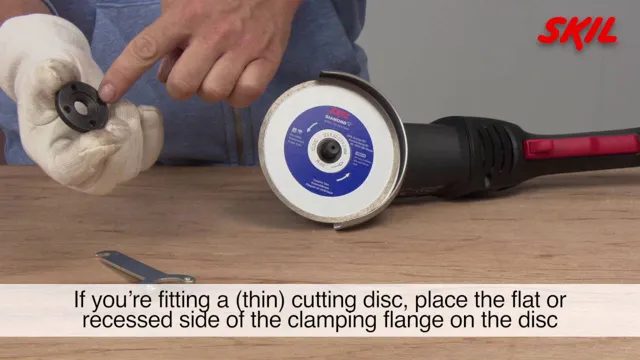
Before using an angle grinder, you’ll need to prepare it by inserting an abrasive disc. First, ensure the grinder is turned off and unplugged. Next, locate the locking nut on the base of the grinder and use the provided wrench to loosen it.
Place the abrasive disc onto the spindle, making sure it sits flush against the grinder. Then, thread the locking nut back onto the spindle, using the wrench to tighten it securely. It’s important to make sure the disc is properly installed to prevent any accidents or damage.
Once the disc is securely in place, plug in the grinder and you’re ready to go. By taking the time to properly prepare the angle grinder, you can avoid any mishaps and ensure safe and effective use.
Adjust the guard if necessary
When preparing your angle grinder, it’s important to double-check the guard before use. The guard serves as a protective barrier between the disc and your hands, so it’s crucial that it’s properly adjusted. Depending on the project you’re working on, you may need to adjust the guard to fit different sized discs.
Make sure that it’s secure and tight before proceeding with your work. It’s also important to ensure that the guard is positioned to protect you from any potential kickback. By taking the time to adjust the guard, you can safeguard yourself from potential injury and ensure that your project runs smoothly.
Don’t neglect this crucial step and always put safety first.
Removing Rust
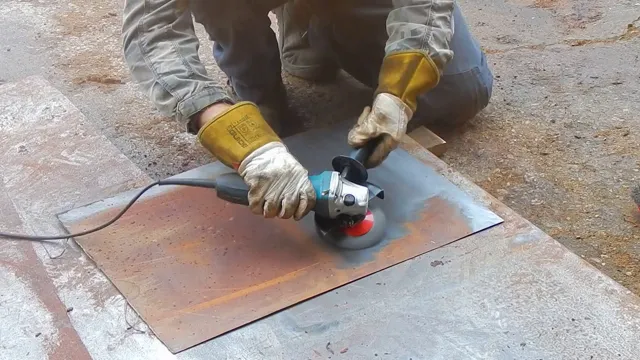
Trying to remove rust from metal surfaces can be frustrating, but an angle grinder is a powerful tool that can make the job a lot easier. To begin the task, ensure that you have the proper safety gear, including eye and ear protection, gloves, and a mask. Next, find the right disc for the job, either a flap disc or a wire brush.
Attach it securely to your angle grinder and begin grinding away at the rust. Make sure to work slowly and steadily, using a back-and-forth motion to avoid gouging the metal. After you’ve removed the rust, wipe the surface clean with a rag or brush to remove any remaining debris.
The best part about using an angle grinder is that it minimizes the amount of manual labor involved, making the task quicker and less tiring. With proper technique and safety precautions, you can easily remove rust and restore your metal surfaces to their original shine.
Secure the object to be worked on
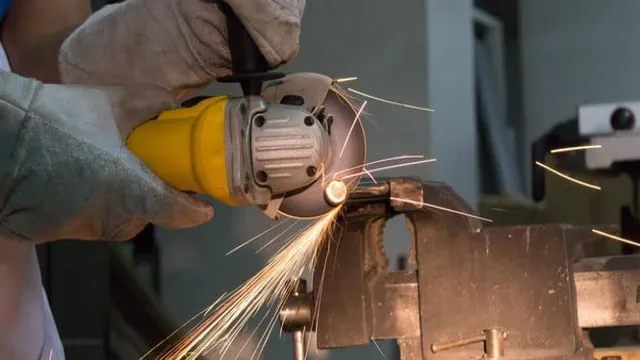
When removing rust, it is important to secure the object you’ll be working on. Depending on the project, this may mean clamping or fixing the object to a workbench, a table, or an adjustable vice to keep it steady while you work. This is especially important when using power tools, such as grinders or sanders, since they can easily slip or bounce unevenly on a free-moving object and cause damage or injury.
You will also want to make sure the object is clean and dry before starting the rust removal process. Any loose debris or moisture can get in the way and make it difficult to see how much rust has been removed. So, be sure to wipe it down with a dry cloth or use compressed air to remove any debris or moisture.
By taking these steps, you can help ensure that the rust removal process goes smoothly and safely, and that you won’t have any unexpected surprises while you work.
Hold the angle grinder with both hands
When it comes to removing rust, an angle grinder can be a powerful tool. But before you start, it’s important to hold the grinder correctly. Make sure to use both hands, firmly gripping the handle.
This will give you better control and prevent the grinder from slipping out of your hands. It’s also important to wear protective gear like gloves, safety glasses, and a dust mask. Once you’re ready to start grinding, use a wire brush attachment to remove any loose rust or dirt.
Then, switch to a grinding wheel and work in small sections, moving the grinder back and forth along the metal surface. Keep the grinder at a slight angle to the workpiece, and be patient. Grinding away rust can take some time, especially if it’s heavily built up.
With the right technique and a bit of practice, however, you can safely and effectively remove rust using an angle grinder.
Turn on the angle grinder and start grinding the rust away
Rust can be a real pain to deal with, but with the right tools and techniques, it can be effectively removed. One of the best tools for the job is the angle grinder – a versatile power tool that can make short work of even the toughest rust and scale. To remove rust with an angle grinder, you’ll need to first select the right attachment.
A wire cup brush or grinding wheel is a good choice for heavy-duty rust removal, while a flap disc can be useful for lighter rust and corrosion. Once you have your attachment selected, it’s time to get to work. Turn on the angle grinder and start grinding the rust away, using even, circular motions to ensure even coverage and a smooth finish.
Be sure to wear all the proper safety gear, including eye and ear protection, as well as a dust mask, as grinding can create a lot of dust and debris. With a bit of effort and the right tools, you can easily remove rust and get back to enjoying your tools and equipment in no time!
Move the grinder in circular motions and apply steady pressure
If you have a rusty item that needs to be cleaned up, a grinder can come in handy. The key is to move the grinder in circular motions while applying steady pressure. This will help to remove the rust without damaging the underlying metal.
It’s important to keep a close eye on the item you’re working on, as you don’t want to take off more than just the rust. As you work, you may find that the rust comes off in flakes or large chunks. Don’t worry, this is normal.
Just keep grinding until all the rust has been removed. Remember to wear safety gear like eye protection and gloves to protect yourself from any sparks or debris that may fly off while you’re working. Ultimately, with the right technique and the right tools, you can quickly and easily remove rust from just about any item, returning it to its former glory.
Finishing up
In conclusion, using an angle grinder to remove rust from metal surfaces can be a simple and effective solution. By following the right steps, wearing appropriate safety gear, and using the right abrasive discs, you can effectively remove rust and prepare the metal for painting or other treatments. Remember to always consider the size and location of the rusted area, the type of metal you’re working with, and the power of the angle grinder you’re using.
With a bit of practice and patience, you can quickly become proficient in removing rust and restoring metal surfaces to their former glory. So, next time you come across a rusted metal object, don’t hesitate to break out your angle grinder and get started on restoring it to its former luster!
Use a wire brush or abrasive disc to remove any remaining rust or debris
If you’re looking to restore an old metal item or remove rust from a metal surface, using a wire brush or abrasive disc is an essential step in the process. These tools allow you to remove any remaining rust or debris, leaving your metal surface clean and ready for further restoration or painting. It’s important to choose the right type of wire brush or abrasive disc for your specific task.
For lighter jobs, a copper wire or nylon brush may work well, while heavier tasks may require a steel wire brush or abrasive disc. Keep in mind that using these tools can be dangerous, so always wear protective gear such as gloves and goggles to avoid injury. With the right tools and precautions, removing rust and debris from metal surfaces with a wire brush or abrasive disc is a simple and effective part of the restoration process.
Clean the area with a rag or brush
Now that you have successfully cleaned the area thoroughly with appropriate cleaning agents, it’s time to finish up the job! Use a clean rag or brush to wipe the area clean of any remaining dirt, dust, or debris that may have accumulated during the cleaning process. Make sure to cover all the corners and crevices to remove any last bits of grime. The final step is to double-check the area to ensure all the stains, dirt, and smudges are removed entirely.
Take a deep breath and admire your sparkling clean area! Completing the cleaning process can leave you with a great sense of accomplishment, knowing you have created a healthy and clean environment for yourself and others. So don’t forget to pat yourself on the back and enjoy your spotless surroundings.
Inspect the area for any missed spots or rough areas
As you come to the end of your project, it’s important to take a step back and inspect the area for any missed spots or rough areas. This is the final stage of finishing up and can make a big difference in the final appearance of your work. Look closely and take note of any areas that may need some extra attention.
Go over those spots with a fine-grit sandpaper to smooth out any rough edges or inconsistencies. It’s easy to overlook small imperfections, but taking the time to go over everything thoroughly will pay off in the long run. Once you’re satisfied with the overall appearance, it’s time to put away your tools and enjoy the fruits of your labor.
Congratulations on a job well done!
Apply a rust converter or paint to protect against future rusting
As you finish up your rust removal process, it’s important to take steps to prevent future rusting. One effective way to do this is by applying a rust converter or paint. Rust converters work by converting the existing rust into a protective coating that helps to prevent further rusting.
These products are easy to apply and can be found at most hardware stores. Paint can also be used to protect against future rusting. Be sure to choose a high-quality rust-inhibiting paint that is specifically designed for metal surfaces.
Applying a coat of paint can not only protect against rust, but also enhance the overall appearance of your metal surfaces. By taking these preventative measures, you can help keep your metal surfaces looking great for years to come.
Conclusion
Now that you’ve mastered the art of using an angle grinder to remove rust, you’re one step closer to being a DIY pro. Just remember to wear protective gear, take breaks, and always keep safety top of mind. And if anyone questions your newfound skill, just tell them you can handle anything that comes your way – even the toughest rust spots!”
FAQs
What safety precautions should I take when using an angle grinder to remove rust?
Before using an angle grinder, always wear safety goggles, a dust mask, and sturdy gloves to protect yourself from flying debris and rust particles.
Which type of grinding disc is best for rust removal with an angle grinder?
A wire brush or flap disc are both effective options for removing rust with an angle grinder.
What is the optimal angle to hold the angle grinder when removing rust?
Hold the angle grinder at a 20-30 degree angle with the grinding disc touching the surface at all times for best results.
Can I use an angle grinder to remove rust on delicate surfaces such as chrome?
No, an angle grinder can be too aggressive for delicate surfaces like chrome. Use a gentler method such as a chemical rust remover or fine-grit sandpaper instead.
How frequently should I change the grinding disc when removing rust with an angle grinder?
You should change the disc as soon as it starts to wear down, become clogged or lose effectiveness.
After removing rust with an angle grinder, how should I clean and protect the surface?
Use a wire brush or damp cloth to remove any leftover debris, then apply a rust inhibiting primer and topcoat to protect the surface from future rusting.
What is the best way to store an angle grinder after using it to remove rust?
Clean the grinder thoroughly and store it in a dry, secure location with the grinding disc removed to prevent rusting.

