How to Use Digital Angle Finder: A Comprehensive Guide for Accurate Measurements
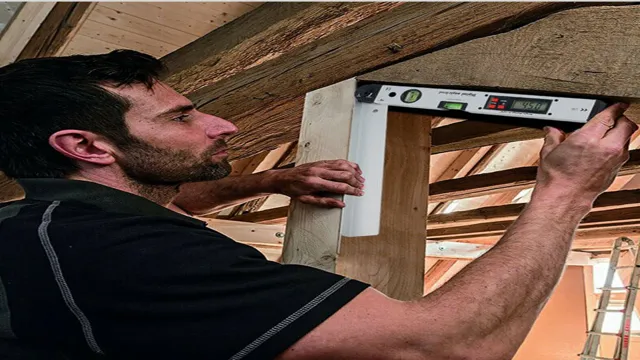
Have you ever struggled with finding the perfect angle for your DIY projects or construction works? It can be quite tricky to achieve the exact angle you need, especially if it requires a high level of precision. Fortunately, there’s a tool that can make this task a lot more effortless and efficient: a digital angle finder. Digital angle finders are a must-have tool for anyone who needs to measure or replicate angles accurately.
They are easy to use and can help you save time, money, and energy by ensuring that your angles are always precise. Whether you’re a carpenter, woodworker, metalworker, or just a DIY enthusiast, a digital angle finder can help you achieve professional-level results with ease. In this guide, we’ll show you everything you need to know about using a digital angle finder, including how to calibrate it, how to measure angles accurately, and how to use it for various applications.
We’ll also discuss the different types of angle finders available on the market and the features you should look for when choosing one. We’ll cover everything from basic angles to more advanced measurements, so whether you’re a beginner or an experienced user, you’ll find something useful in this guide. By the end of this article, you’ll have a clear understanding of how to use a digital angle finder and how it can help you achieve accurate angles and perfect cuts every time.
So, grab your digital angle finder and let’s get started!
What is a Digital Angle Finder?
If you’re looking to measure angles accurately and quickly, a digital angle finder is the tool for you. It’s a device that can measure angles with precision, which makes it ideal for professionals and DIY enthusiasts. A digital angle finder can be used to measure the angles of different surfaces including walls, floors, and roofs.
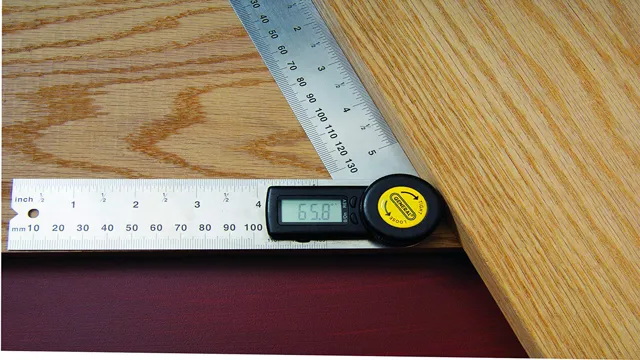
One of the main benefits of using this tool is that it eliminates the need for manual measurements, which can be time-consuming and inaccurate. The digital angle finder can also display the angle readings in degrees, providing you with an accurate measurement that you can easily read and understand. To use this tool, simply place it on the surface you want to measure, and it will give you a reading of the angle.
It’s effortless, and you don’t need any special skills to use it. So, whether you’re hanging shelves, installing a roof, or building a deck, a digital angle finder will make your job much easier and more precise.
Explanation of what it does
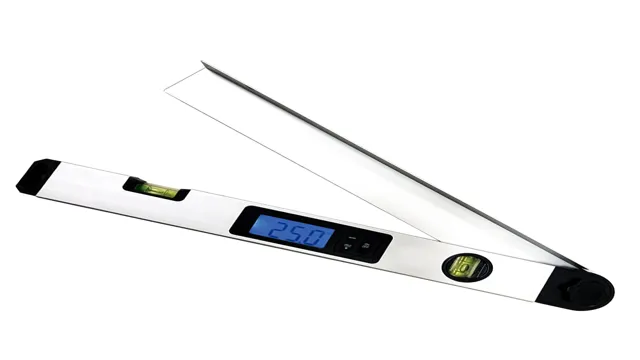
A digital angle finder is a handy tool that measures angles with high accuracy levels. It has a digital display that shows the angle measurement in degrees, increasing precision and ease of use. These tools come in different shapes and sizes, catering to various applications.
Some digital angle finders also feature memory storage, which saves the previous angle measurements, making them more efficient and time-saving. Moreover, they can measure not only angles in a single plane but also angles in 2D and 3D space. Gardeners, woodworkers, construction professionals, and metalworkers are among the high-end users of this tool.
In summary, a digital angle finder is a versatile tool that makes measuring angles much quicker, easier, and more precise, ensuring accuracy in numerous applications.

Benefits of using a digital angle finder
A digital angle finder is a modern tool that is used to measure angles accurately. It is a device that is equipped with digital sensors and a display screen that shows the measurements of angles in degrees, minutes, and seconds. The digital angle finder is a versatile tool that can be used for a wide range of applications, including woodworking, metalworking, and construction.
The device can help you measure angles with great accuracy, which can save you time and improve your overall productivity. One major benefit of using a digital angle finder is that it eliminates the need for manual calculations, which can be time-consuming and prone to errors. With a digital angle finder, you can quickly and easily determine the angle at which two surfaces meet, which is useful for a wide range of applications.
Additionally, the device is portable and easy to use, making it an essential tool for anyone who needs to measure and work with angles regularly. So, if you want to work accurately and efficiently, a digital angle finder is definitely an essential tool that you should have in your toolkit.
Preparing Your Digital Angle Finder
Using a digital angle finder is a fantastic way to achieve precise measurements on a range of DIY and professional construction projects. When it comes to preparing your digital angle finder, the first thing you should do is ensure that the device is properly calibrated. To do this, you will need to place the device on a completely flat surface and zero it out.
It’s a simple process that can be completed by pressing the “calibrate” button. Once the calibration process is complete, you’re ready to start using your digital angle finder. Remember, always use your digital angle finder within its specified limits and avoid exposing it to extreme temperatures or conditions.
With a bit of practice, you’ll soon be using your digital angle finder to make precise and accurate measurements on all kinds of projects.
Choose correct battery/s
To ensure that your digital angle finder is working correctly, it’s essential to choose the correct batteries. The type of batteries you’ll need will be determined by the manufacturer’s recommendations, so be sure to check the manual or online specifications for your device. Some models may require standard alkaline batteries, while others may require rechargeable options.
It’s crucial to make sure that the voltage and capacity requirements are met to avoid damaging your device or experiencing a shorter battery life. Additionally, it’s always a good idea to have extra batteries on hand, so you don’t have to pause your work in progress due to a dead battery. By choosing the right batteries and having spares readily available, you can prepare your digital angle finder for any task at hand without interruption.
Turn on the device
To get started with your digital angle finder, the first step is to turn on the device. Locate the power button on your angle finder, typically located on the side or top of the tool. Press and hold the button until the screen or display lights up.
Once the device is turned on, you can begin to calibrate it to ensure accurate measurement readings. Remember to refer to the user manual for specific information on calibration and use of your digital angle finder. Turning on the device is a simple and crucial step that sets the foundation for precise angle measurement.
So, don’t forget to turn on your digital angle finder before using it to measure angles for any project.
Taking Measurements
If you’re looking to get precise measurements for various DIY projects, a digital angle finder can be a great tool to have on hand. Here’s how to use it properly. First, place the angle finder on the surface you want to measure and press the “zero” button to calibrate it.
Then, rotate the tool until it aligns with the angle you want to measure. Once the angle is locked in place, you can read the measurement on the tool’s digital display. Some models may also have features like hold and recall, which can be useful for recording multiple measurements.
With a digital angle finder, you’ll never have to guess at angles or struggle with a traditional protractor again.
Determining your starting point
When starting on a fitness journey, it’s important to take measurements to determine your starting point. This will give you a baseline to track your progress and make adjustments to your routine as needed. Some measurements you can take include body weight, body composition (such as body fat percentage), and measurements of specific body parts (like waist or bicep circumference).
It’s also recommended to take pictures of yourself from different angles to visually track your progress. By taking these measurements, you can set realistic goals and have a better understanding of how your body is changing. Remember, everyone’s starting point is different, and there’s no one-size-fits-all approach to fitness.
Just focus on making progress towards your own goals at your own pace.
Place the angle finder on your workpiece
When it comes to measuring angles on a workpiece, an angle finder is a handy tool to have. Once you’ve identified the angle you need to measure, the next step is to place the angle finder on your workpiece. Depending on the type of angle finder you have, you may need to use its magnetic base or calibrate it to zero degrees before taking your measurement.
Once it’s in position, you can then read the angle from the tool’s display or by lining up the pointer with the appropriate angle mark. It’s important to keep the angle finder steady while taking your measurement to ensure accuracy. By using an angle finder correctly, you can take precise measurements for all kinds of woodworking or metalworking projects.
Reading the digital display
When it comes to taking measurements using a digital display, it’s important to understand how to read the display properly to ensure accurate results. The display typically shows a numerical value, which represents the measured quantity. Most digital displays include units of measurement, such as centimeters or grams, to help you understand the measurement being displayed.
Pay attention to the number of decimal places being shown as this will determine the precision of the measurement. It’s also important to note any symbols or indicators on the display, such as a negative sign or an error message, which can indicate if there are any issues with the measuring device or the measurement itself. By taking the time to properly read the digital display, you can ensure accurate and reliable measurements.
Tips for Accuracy
If you’re looking to ensure accuracy when measuring angles, using a digital angle finder can be a game-changer. To start, make sure to calibrate your device before use to ensure precise measurements. When taking measurements, be sure to hold the device firmly and level with the surface you’re measuring.
Also, take several readings from different positions and angles to get a more accurate average. It’s also important to take into account any environmental factors that could affect your measurements, such as wind or vibrations. With the help of a digital angle finder, you’ll be able to make highly accurate measurements with ease.
Consistent pressure
When it comes to accuracy in shooting or any other skill-based activity, consistency is key. One essential aspect of consistency is maintaining proper pressure on your equipment. Whether it’s a trigger, string, or grip, the pressure you apply should be consistent throughout each shot.
Inconsistent pressure can cause your shots to veer off-target, even if you have perfect form and aim. To improve your accuracy, try focusing on the pressure you’re applying when you take each shot. Make sure you’re not jerking or flinching, which can cause sudden changes in pressure.
Instead, keep your grip steady and apply pressure consistently, almost like you’re squeezing an orange without breaking its skin. With practice, you’ll be able to maintain consistent pressure and achieve greater accuracy in your shooting.
Check calibration often
Calibrating your equipment is a key factor in achieving accurate measurements. It’s important to note that calibration should be done frequently to ensure the reliability and accuracy of your results. By checking the calibration of your equipment, you can spot any issues that may be affecting the results.
If the equipment is not calibrated properly, the measurements may be off, and this could lead to errors in analysis and conclusions. It’s important to maintain equipment regularly to ensure it is performing at its best. Think of it like how a car needs regular maintenance, so does your lab equipment.
By taking the time to check and calibrate often, you can save time, money, and improve the accuracy of your results. So make it a priority to check the calibration of your equipment on a regular basis.
Conclusion
So, there you have it – a digital angle finder may seem like a complex tool, but with a little bit of practice and some patience, you’ll soon be using it like a pro. Whether you’re a DIY enthusiast or a professional carpenter, this nifty device can save you time and frustration when it comes to measuring and cutting angles accurately. Just remember to read the instructions carefully, check your calibration, and always keep your batteries fully charged.
Because, let’s face it, no one wants to be caught with a wonky angle – your furniture (and your clients) will thank you for it!”
FAQs
What is a digital angle finder and how does it work?
A digital angle finder is a tool used to measure angles. It works by using digital sensors to read the angle of a surface and display the measurement on an LCD screen.
Can a digital angle finder be used for both indoor and outdoor measurements?
Yes, most digital angle finders are designed to work in both indoor and outdoor settings. However, it’s important to check the product specifications to ensure it’s suitable for the environment in which you’ll be using it.
What is the accuracy of digital angle finders?
The accuracy of digital angle finders varies from model to model. Some are accurate to within 0.1 degrees, while others may have a margin of error of up to 0.5 degrees.
Can a digital angle finder be used to measure the slope of a roof?
Yes, a digital angle finder can be used to measure the slope of a roof. Simply place the tool on the roof surface and it will display the angle measurement.
Do digital angle finders have a hold function to freeze the angle reading?
Yes, most digital angle finders do have a hold function to freeze the angle reading. This can be helpful when you need to record the measurement without having to keep the tool in place.
How long does the battery in a digital angle finder last?
The battery life of a digital angle finder varies depending on usage, but most models have a battery life of 100-200 hours. It’s always good to have spare batteries on hand just in case.
What is the difference between a digital angle finder and a protractor?
A digital angle finder is a more advanced tool than a protractor. While a protractor is a simple angle-measuring tool, a digital angle finder has additional features such as an LCD display, hold function, and the ability to measure angles in degrees, radians, and percentages.

