How to Use Fluke Voltage Tester: A Step-by-Step Guide for Safe Electrical Testing
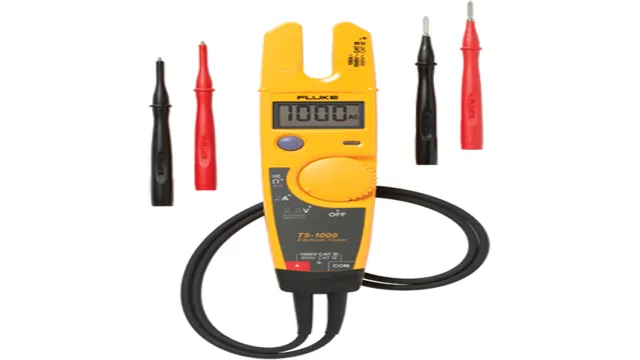
Do you ever wonder about the voltage of a circuit or power outlet but don’t know how to test it? Look no further than a Fluke voltage tester. Designed for both professionals and DIY enthusiasts, the device effectively measures AC and DC voltage levels and alerts users to any potential dangers. But, how exactly does one use a Fluke voltage tester? In this blog post, we’ll delve into the basics of operating the tester, including safety precautions to take and how to read the displayed results.
With this helpful guide, you’ll become a pro at detecting voltage in no time!
Safety First: Precautions when handling electricity
When it comes to working with electricity, safety should always be the top priority. One essential tool to have in your arsenal is a Fluke voltage tester, which can help determine if a circuit is live or not. Before using the tester, it’s crucial to make sure the equipment is in good working condition and to follow the manufacturer’s instructions carefully.
Additionally, always unplug or turn off power to the circuit before testing, and never touch exposed wires or electrical components with your bare hands. Use insulated tools and wear protective gear, such as gloves and safety glasses. Remember that electricity can be dangerous and even deadly, so never take shortcuts or assume anything when it comes to electrical work.
Stay vigilant, take the necessary precautions, and use tools like a Fluke voltage tester to ensure a safe and successful job.
Wear proper protective gear
Handling electricity can be a risky business, and it is crucial to take all the necessary precautions to avoid any mishaps. One of the most important steps to keep yourself safe while working with electricity is to wear proper protective gear. This could include things like rubber gloves, safety glasses, and even a hard hat to protect yourself from any unexpected falls or bumps.
Similarly, if you’re working with electrical machinery, you should ensure that you’re wearing non-conductive footwear to prevent any risks of electric shock. By wearing the right kind of protective gear, you minimize the chances of accidents and can work with electricity with confidence. Remember, safety always comes first when handling electricity.
So, be sure to gear up before you plug in and switch on!
Turn off power before testing
Electricity is a powerful and potentially dangerous force that requires proper handling to avoid accidents and injuries. One of the essential precautions to take when dealing with electrical equipment is to turn off the power source before testing. This simple step can save lives and prevent damage to property.
It is crucial to be familiar with the equipment you are working with and plan ahead before starting any electrical work. Always wear protective gear, such as rubber gloves, safety glasses, and insulating boots, to minimize the risk of electric shock. Don’t take shortcuts or try to rush the process.
Take your time to ensure everything is in place, and double-check your work before turning the power back on. Remember, it’s better to be safe than sorry when dealing with electricity.
Testing Voltage with a Fluke Voltage Tester
If you’re wondering how to use a Fluke voltage tester, it’s important to understand the basics of voltage testing. First, make sure your tester is in working order by confirming the indicator lights are functioning properly. Then, check the voltage setting and set it to the appropriate level for your testing needs.
When testing, always start with the highest setting and work your way down to avoid any potential shock hazards. When measuring voltage, make sure the tester is correctly grounded and touch the leads to the source of power to get a reading. It’s important to note that voltage testing should only be done by trained professionals and with proper safety precautions taken.
By using a Fluke voltage tester properly, you can ensure accurate and reliable readings.
Select the voltage range
When it comes to testing voltage, selecting the right voltage range is crucial for accuracy and safety. A Fluke voltage tester is a reliable and easy-to-use tool that can help you select the appropriate voltage range for your specific needs. With the help of the Fluke voltage tester, you can avoid overloading your equipment or exposing yourself to electrical hazards.
By simply switching between voltage ranges on the Fluke tester, you can quickly and effectively test various power sources. Whether you are a professional electrician or a DIY enthusiast, a Fluke voltage tester can be a valuable addition to your tool kit. So, next time you need to test voltage, be sure to select the correct voltage range with the help of a Fluke voltage tester, and stay safe while getting the job done right.
Touch one lead to the hot wire
When it comes to electrical work, safety is paramount. One of the most important tools in your kit should be a voltage tester, and a Fluke Voltage Tester is one of the best on the market. To test voltage with a Fluke Voltage Tester, you should first make sure the unit is properly calibrated.
Then, touch one lead of the tester to the hot wire, and the other to the ground wire or a neutral wire. The tester will display the amount of voltage present. This is an easy and effective way to ensure that the electrical current is properly flowing and prevent potential electrical hazards.
So next time you’re working with electricity, be sure to have a Fluke Voltage Tester on hand for added peace of mind.
Touch the other lead to ground
When working with electrical systems, it’s crucial to have a reliable voltage tester like the Fluke Voltage Tester, which can help you determine if there is power flowing through specific wires without the need for a multimeter. Using this device is relatively simple; all you need to do is touch the tester tip to the wire that you want to test while keeping the other lead near the affected circuit’s ground. If it detects voltage, the tester will light up and sound an alarm, indicating that there is power flowing through the wire.
This tool is useful for identifying live wires and faulty connections, which can help to prevent damage, electrical shock and even death. Remember, though that it’s essential to take care when working with electrical systems, especially if you’re not trained or accredited to do so.
Interpreting Fluke Voltage Tester Readings
If you’re looking to use a Fluke voltage tester, it’s useful to know how to interpret its readings. Firstly, make sure the tester is set to the appropriate setting for the voltage level you’re checking. When the tester is placed on a live wire or circuit, a reading will be displayed.
If the reading matches the anticipated voltage level, then the circuit is functioning normally. If the reading is significantly lower or higher than expected, there may be an issue with the circuit. It’s important to note that a voltage tester can only detect the presence of voltage, not the absence, so it’s always important to follow proper electrical safety protocol when handling wires or circuits.
With a Fluke voltage tester, you can quickly and easily diagnose potential issues in electrical systems for safer and more efficient troubleshooting.
Read the display
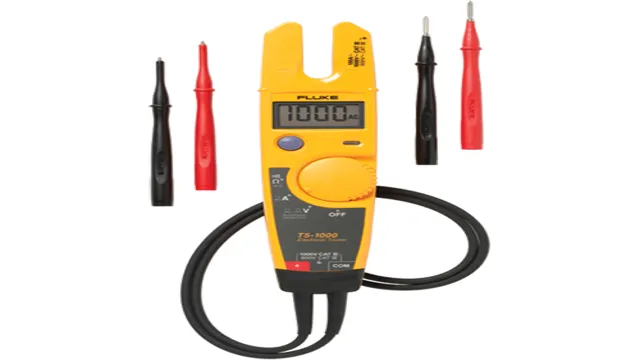
Interpreting Fluke Voltage Tester Readings can be confusing for those who are new to it. Understanding the display and what it means can be the difference between safe electrical work and a dangerous situation. The Fluke voltage tester is designed to display the presence of voltage in a circuit and give an indication of how much voltage is present.
The display usually shows a numerical value that represents the voltage level, along with a range of lights indicating whether the voltage level is low, medium, or high. The key to interpreting these readings is knowing what voltage level is safe for the task at hand. It is important to always follow proper safety precautions and use protective gear when working with electricity, even if the voltage reading appears to be low.
Determine the voltage level
When using a Fluke voltage tester, it is important to be able to interpret the readings. The first step is to determine the voltage level, which can be indicated by the LED lights on the tester. The colors of the lights may vary based on the model of Fluke tester, but generally green means a safe voltage level, yellow indicates caution, and red means danger.
Another way to determine the voltage level is to look at the numerical reading displayed on the tester. This will tell you the exact voltage level present. Make sure to also pay attention to any symbols or indicators on the tester, such as AC or DC voltage, to ensure you are measuring the correct type of voltage.
Always follow proper safety procedures when working with electricity, and double check your readings before making any adjustments or repairs. By understanding how to interpret Fluke voltage tester readings, you can ensure a safer and more accurate electrical work experience.
Additional Tips for Using a Fluke Voltage Tester
If you’re new to using a Fluke voltage tester, there are a few additional tips that can help you get the most out of your device. Firstly, always ensure that you have the correct model and that it’s appropriate for the voltage range you’re working with. Secondly, test your device on a known voltage source before use to make certain it’s working correctly.
It’s also helpful to familiarize yourself with the different settings and modes available on your Fluke tester, as this can help you narrow down the cause of any issues you may encounter. Another tip is to always follow proper safety procedures when using your tester, such as wearing safety glasses and gloves and ensuring that the circuit is completely de-energized before testing. Finally, don’t be afraid to ask for help or advice if you’re unsure about anything – using a Fluke voltage tester can be complex, and it’s always better to err on the side of caution.
By following these tips, you can help ensure that you get accurate results and avoid any potential hazards when working with electricity.
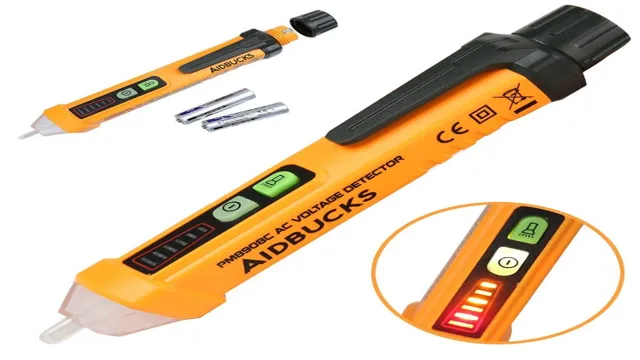
Use a non-contact voltage tester for initial checks
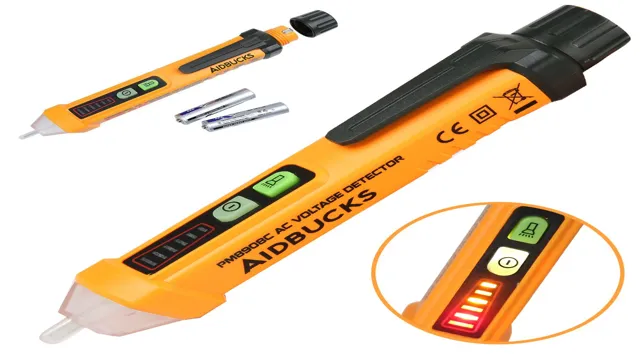
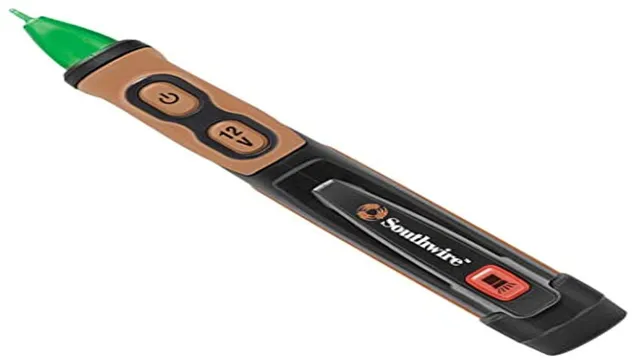
When it comes to using a Fluke voltage tester, there are always some tips that can come in handy. For starters, using a non-contact voltage tester can be incredibly helpful for initial checks. This will allow you to quickly and safely test if there is any voltage present without actually making contact with the wires.
It’s also a good idea to make sure that your tester is calibrated properly before use, as this can impact its accuracy. Additionally, when using a voltage tester, it’s important to remember to always check for voltage across multiple points to ensure accuracy, as sometimes a single point can give a false reading. Finally, when using the tester, be sure to hold it securely and make sure your hands are dry to avoid any electrical shocks.
By following these tips, you can ensure that you’re using your Fluke voltage tester safely and effectively.
Verify accuracy with a multimeter
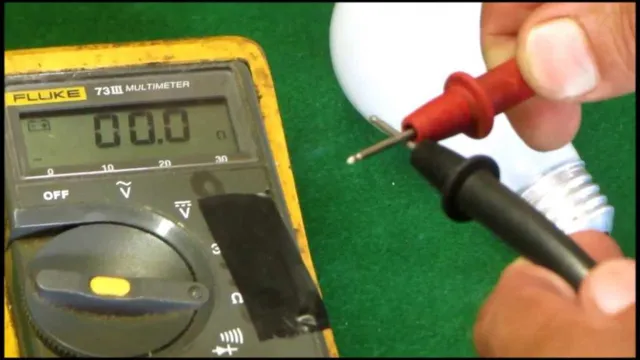
When using a Fluke voltage tester, it’s always a good idea to verify accuracy with a multimeter. This will give you added confidence that the readings you’re getting are correct. Additionally, here are a few more tips for using a Fluke voltage tester.
First, make sure to always follow safety protocols when working with electrical systems. This includes wearing appropriate protective gear, such as rubber gloves and safety glasses. Second, double-check that your Fluke tester is properly calibrated before use, as this can affect its accuracy.
Lastly, remember to always test your tester on a known voltage source before using it on an unknown one to ensure that it’s working properly. With these tips in mind, you can use your Fluke voltage tester with ease and accuracy.
Conclusion
In conclusion, using a Fluke voltage tester is as easy as pie! Simply make sure the tester is properly calibrated and follow the manufacturer’s instructions. And remember, unlike pie, electricity is not something to play around with – always handle it with caution and respect! Happy testing, electricians!”
FAQs
What is a Fluke voltage tester and how does it work?
A Fluke voltage tester is a tool used to detect the presence or absence of an electrical current. It works by measuring the voltage or voltage drop between two points in an electrical circuit.
How do you use a Fluke voltage tester to test for voltage?
To test for voltage, you need to first turn on the voltage tester and select the appropriate range for the voltage you are testing. Then, touch the test leads to the two points in the circuit you wish to test. If voltage is present, the tester will alert you with a visual or audible signal.
Can a Fluke voltage tester measure both AC and DC voltage?
Yes, most Fluke voltage testers are capable of measuring both AC and DC voltage.
What is the maximum voltage that a Fluke voltage tester can measure?
The maximum voltage that a Fluke voltage tester can measure varies depending on the specific model. However, most Fluke voltage testers are rated to measure up to 1000 volts.
Can a Fluke voltage tester be used to test for continuity?
Yes, many Fluke voltage testers also have a continuity function which can be used to test for a complete circuit.
What safety precautions should be taken when using a Fluke voltage tester?
When using a Fluke voltage tester, it is important to wear appropriate personal protective equipment such as gloves, eye protection, and safety shoes. It is also important to ensure that the circuit you are testing is turned off and that you are familiar with the correct testing procedures.
How often should a Fluke voltage tester be calibrated?
Fluke recommends that their voltage testers be calibrated once a year to ensure accuracy. However, if you notice any issues with the tester’s readings or performance, it should be calibrated immediately.


