How to Use a Wagner Paint Sprayer: Tips and Tricks for a Flawless Finish

Do you feel overwhelmed by the thought of painting your walls or furniture using a traditional paintbrush and roller? Have you considered using a Wagner paint sprayer to make the job easier and faster? This innovative tool allows you to apply paint evenly and smoothly in a fraction of the time it would take with a manual method. Whether you are a DIY enthusiast or a professional painter, a Wagner paint sprayer can help you achieve impressive results with minimal effort. The device works by spraying a fine mist of paint onto the surface, covering it evenly and minimizing streaks and drips.
With different nozzle sizes and spray patterns, you can customize the spray to match your project’s needs, whether you are painting a large area, a small corner, or intricate details. However, using a Wagner paint sprayer requires some preparation and technique, as you need to ensure proper ventilation, masking, and clean-up to avoid any accidents or damage. In this blog post, we will guide you through the steps of using a Wagner paint sprayer effectively, from choosing the right paint and equipment to cleaning and storing the tool.
By the end of this article, you will know how to make the most of your Wagner paint sprayer and achieve a professional finish on your painting projects.
Prepare the Work Area
Before you jump into using your Wagner paint sprayer, make sure to properly prepare your work area. This will ensure that your painting project goes smoothly and efficiently. You’ll want to start by covering any furniture or surfaces that you don’t want to get paint on with drop cloths or plastic.
This includes floors, walls, outlets, and light fixtures. Next, make sure that your paint sprayer is set up correctly and that your paint is properly mixed. Use a test board to make sure that your sprayer is working properly before tackling your main project.
Finally, make sure that you’re wearing the appropriate protective gear, including gloves, eye protection, and a respirator mask. By taking these steps, you’ll be setting yourself up for success and a beautiful finished product. And don’t forget to have fun while you’re at it!
Clear the Area
Clearing the area before starting a project is essential for safety, productivity, and efficiency. Depending on the project, the workspace should be free of debris, clutter, and potential hazards. This is especially important if you’re working with tools or machinery that require a clear workspace.
Before starting any project, take the time to remove any unnecessary items from the area and store them in a safe place. Make sure to also clean the work area by sweeping or vacuuming to avoid accidents. It’s crucial to ensure that there are no tripping hazards or loose materials lying around.
By taking the time to prepare the work area before starting a project, you’ll create a safer and more efficient environment for yourself and any others who may be working with you. Remember, a little preparation can go a long way in keeping everyone safe and productive.

Protect Surfaces
If you’re starting a new home renovation project, it’s essential to prepare the work area to protect surfaces beforehand. Protecting surfaces is particularly important when it comes to paint jobs, as spills, splatters, and drips are all but guaranteed. Start by removing any obstacles such as furniture or decorations from the area you will be working in.
Make sure you have ample room to maneuver, and protect any remaining furniture with plastic covers or drop cloths. Next, cover the floors with tarps or additional drop cloths, overlapping them to ensure complete coverage. Finally, use painter’s tape to protect windowsills, baseboards, and other trim from any potential paint splatters.
Taking the time to protect surfaces before starting your project may seem like an extra step, but it’s well worth it in the long run for a successful and stress-free renovation. Remember to use high-quality painter’s tape to ensure it doesn’t peel off or leave residue on any surfaces.
Prepare the Sprayer
Before you can start using your Wagner paint sprayer, it’s essential to prepare it properly. First, ensure that you have all the necessary equipment and materials, including the paint or stain that you’ll be using, protective gear, and cleaning supplies. Next, check the sprayer for any damages or clogs that may hinder the paint’s flow.
If there are any issues, clean the nozzle and filter, and make any necessary repairs. Be sure to familiarize yourself with the sprayer’s settings and adjust them accordingly for your particular project. You can also test the sprayer by spraying a small amount of paint onto a piece of cardboard or another surface to ensure that it is working correctly.
Once the sprayer is prepared, you can start painting with ease.
Choose the Right Tip
When preparing to use a paint sprayer, it’s important to choose the right tip for the job. The tip you use will determine the width of the spray pattern and the thickness of the paint being applied. A smaller tip will produce a thinner spray pattern, while a larger one will result in a wider pattern.
You also want to consider the viscosity of the paint you’re using, as thicker paints will require a larger tip to allow for adequate flow. It’s important to consult the manufacturer’s recommendations to ensure you’re using the correct tip for your specific paint sprayer. By choosing the right tip, you’ll achieve better results and avoid the frustration of having to redo the job due to inadequate coverage or an uneven finish.
Fill the Paint Container
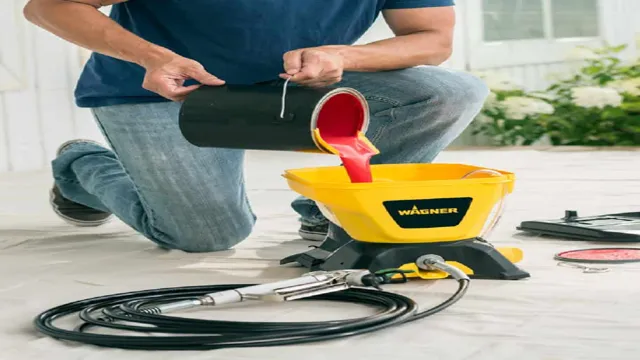
When it comes to painting, using a sprayer can save you time and hassle. However, before you start spraying, it’s important to prepare the sprayer properly. The first step in preparing your sprayer is to fill the paint container.
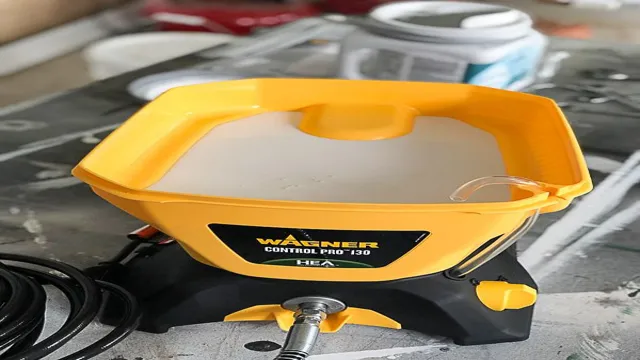
Make sure to use the exact type of paint that the sprayer requires. If the consistency is too thick, you may need to add a bit of water to thin it out. Once your paint is ready, pour it into the container and make sure it’s not overfilled as this can cause problems with the sprayer.
It’s also important to ensure that the container and the sprayer itself are clean and free of any debris. With these preparation steps complete, you’ll be ready to start spraying your paint. Remember, taking the time to properly prepare your sprayer will lead to a better end result and save you from any costly mistakes along the way.
Prime the Sprayer
Prime the sprayer before using it to ensure that it is ready to spray evenly and effectively. Start by checking the manufacturer’s instructions for the recommended cleaning solution or water to use when priming the sprayer. Make sure to add the correct amount of solution into the sprayer’s reservoir, and then connect the sprayer to a power source or an air compressor if required.
Next, turn on the sprayer and allow it to run until the solution or water comes out of the spray nozzle. This process aids to remove any debris or air trapped inside the sprayer, which can negatively affect the spray pattern, causing uneven coverage. Finally, adjust the spray nozzle to your preferred pattern and pressure to ensure a consistent spray.
Priming the sprayer saves time and help obtain a professional result, making it a crucial step in prepping for any spraying task.
Spraying Techniques
Learning how to use a paint sprayer Wagner is an excellent way to achieve a professional-looking finish on your DIY projects. Before you start spraying, make sure that you have properly prepared the surface. This includes sanding, cleaning, and taping off any areas that you don’t want to be painted.
When you are ready to start, begin by testing the sprayer on a small, inconspicuous area to get a feel for the flow of the paint. When you are comfortable, hold the sprayer at a distance of approximately 6-10 inches from the surface, and use smooth, even strokes. Keep the sprayer moving to prevent pooling, drips, and uneven application.
Don’t forget to overlap each pass slightly to ensure even coverage. By mastering these techniques, you’ll be able to achieve a smooth, professional-looking finish every time.
Use Horizontal Strokes
When it comes to using your HVLP spray gun, there are a few techniques that can make a big difference in the outcome of your project. One technique that is especially important is using horizontal strokes. This means that you should aim to spray in a side-to-side motion, moving across the surface of your project.
There are a few reasons why this is important. First of all, using horizontal strokes helps to ensure that you are applying an even coat of paint or finish. This is because it allows you to overlap each pass slightly, which helps to eliminate any thinner areas or areas with drips.
Additionally, using horizontal strokes can help to create a smooth, professional-looking finish. This is because it helps to eliminate any visible brush or roller marks, which can be especially important when working with larger surfaces. So, the next time you’re using your spray gun, be sure to focus on using horizontal strokes to achieve the best possible outcome!
Overlap Each Pass
When it comes to achieving a flawless finish on your spray painting projects, mastering the right techniques is crucial. One of the most important techniques to learn is overlapping each pass. This means that each spray pass should slightly overlap with the previous one to ensure complete coverage and avoid leaving any missed spots.
This technique is particularly important when spraying larger surfaces such as walls or cars, where a consistent finish is essential. By overlapping each pass, you will create a more even distribution of paint, resulting in a smoother and more professional finish. Just remember that it’s important not to overdo it with overlapping, as this can lead to drips and uneven coverage.
Practice makes perfect, so experiment with different spraying techniques until you find the right balance for your needs.
Maintain Consistent Speed and Distance
When using a sprayer, it’s crucial to maintain a consistent speed and distance to ensure even coverage. This is an essential technique that can make or break your spraying efforts. If you move too fast or too slow, you risk missing or overspraying areas, leading to uneven coverage.
Consequently, it’s crucial to practice and refine your spraying skills to maintain a steady hand and consistent speed. Additionally, it’s essential to consider the wind direction and adjust your spraying accordingly, ensuring that the spray doesn’t drift away from the target area. By mastering these techniques, you can achieve a consistent and uniform spray that will give you the best possible results.
Remember, steady and consistent is the key!
Clean up
When it comes to painting, a paint sprayer can be a real game-changer. Wagner is a brand that offers various types of paint sprayers that can help you achieve professional results in no time. However, before you start painting, it’s essential to understand how to use your Wagner paint sprayer correctly.
First, you need to make sure that the area you’re painting is free from any obstructions, debris, or dust. If there are any loose or chipped paint, scrape it off using a scraper or sandpaper. Secondly, ensure that you follow the manufacturer’s instructions on how to mix the paint and dilute it if necessary.
Also, test the spray pattern on a scrap material before starting on your project. Finally, when using the paint sprayer, keep the nozzle at a 12-18 inch distance from the surface and move it in a sweeping motion to avoid drips or streaks. By following these tips on how to use your Wagner paint sprayer, you can save time and hassle while achieving a clean and professional-looking finish.
Flush the Sprayer
When you’re finished spraying your garden or crops, it’s important to take the time to flush the sprayer. This step is crucial to keeping your equipment in top shape and ensuring that your next batch of spray is as effective as the first. To flush the sprayer, start by draining any remaining liquid from the tank.
Once empty, fill the tank with clean water and pump the sprayer until all the water has been expelled through the nozzle. This step helps to remove any leftover chemicals and prevent them from sticking to the sprayer’s internal parts. From there, you may need to disassemble the nozzle and clean any clogs or build-up with a soft brush.
By regularly flushing your sprayer, you’ll not only prolong its lifespan but also prevent the potential for crop damage or harmful chemical exposure. Make it a habit to flush your sprayer after each use, and your equipment will thank you in the long run.
Disassemble and Clean the Components
Once you’ve disassembled your components, it’s time to get cleaning! There are a few different methods and products you can use depending on what parts you’re working with, but the general idea is to remove any dust, debris, or grime that might be clinging to your gear. A can of compressed air is a good place to start, as it can blast out any stubborn particles from between the keyboard keys, cooling fins, or other tight spaces. For more extensive cleaning, you might try using a soft-bristle brush, microfiber cloth, or even a vacuum outfitted with a crevice tool to suck up any dirt or hair that’s accumulated over time.
Just be careful not to damage any delicate parts or connectors in the process! And if you’re working with something like a graphics card or CPU, you might need to use a specialized thermal paste remover to get rid of any old or dried-up thermal compound before you can apply new stuff. Whatever you do, make sure to avoid using any harsh chemicals or abrasive materials that could scratch or corrode your components. With a little time and elbow grease, your gear will be looking and running like new again!
Store the Sprayer Properly
When it comes to maintaining your sprayer, proper storage is key. Before putting it away, you need to make sure it is thoroughly cleaned. Begin by taking apart the sprayer and rinsing all the individual pieces with water.
Then, fill the tank with clean water and spray it until the water runs clear. Once everything is clean and dry, store your sprayer in a dry and cool place. Avoid exposing it to extreme temperatures, which can damage the internal components and reduce its lifespan.
To keep your sprayer in top condition, remember to store it properly after each use.
Conclusion
To sum it up, using the Wagner paint sprayer is like having a magic wand in your hand – with just a flick of the wrist, you can transform any surface into a work of art. It takes a bit of practice to get the hang of it, but once you do, you’ll wonder how you ever lived without it. So grab your Wagner paint sprayer, let your creativity flow, and prepare to be amazed by the beautiful results! “
FAQs
What is a Wagner paint sprayer?
A Wagner paint sprayer is a handheld device that enables you to apply paint or other coatings quickly and efficiently to various surfaces.
How does a Wagner paint sprayer work?
A Wagner paint sprayer works by using a high-pressure air stream to atomize the paint and propel it onto the surface you wish to coat. The paint is drawn into the sprayer and then sprayed out through a specialized nozzle.
What are the benefits of using a Wagner paint sprayer?
Using a Wagner paint sprayer has several advantages over traditional painting methods. It saves time, produces a smooth and even finish, and can be used on a variety of surfaces.
Can I use water-based paint with a Wagner paint sprayer?
Yes, Wagner paint sprayers can be used with both water-based and oil-based paints. You should always check the manufacturer’s recommendations for the specific model you are using.
How do I clean my Wagner paint sprayer after use?
Cleaning your Wagner paint sprayer after each use is essential to maintain optimal performance. Simply flush the sprayer with water and clean the nozzle, and other important components with a specialized cleaner.
Do I need to thin the paint before using a Wagner paint sprayer?
It depends on the type of paint you’re using. Some thicker paints may need to be thinned before using a Wagner paint sprayer. You should always read the manufacturer’s instructions for how to thin your particular type of paint.
Can I use a Wagner paint sprayer for outdoor projects?
Yes, Wagner paint sprayers are ideal for outdoor projects as they produce a smooth and even finish, which helps protect the surface from the elements. However, you should always ensure you follow the manufacturer’s recommendations for safe and effective use.


