How to Use Torque Settings on Cordless Drill: A Step-by-Step Guide
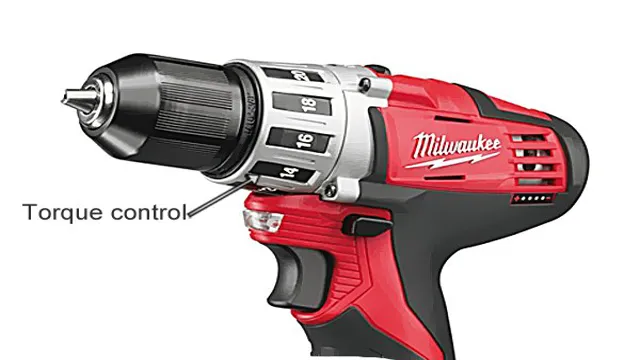
Are you in need of a cordless drill for your DIY projects but are unsure of how to use its torque settings? Fear not, as we’re here to guide you through the process! Firstly, let’s understand what torque is. Torque is the measure of the force that causes an object to rotate around an axis, in this instance, the drill bit revolving around the drill’s axis. When using a cordless drill, torque settings are essential for adjusting the rotational force applied to the drill bit.
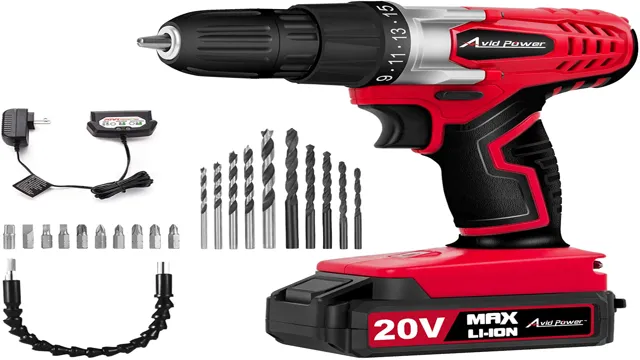
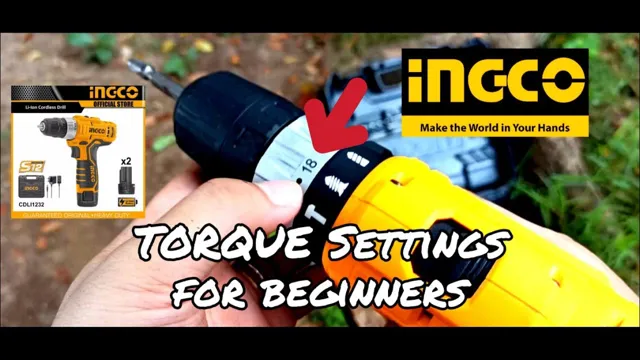
This feature is particularly helpful when working with different materials or screw sizes, as too much torque can cause the material to break or the screw to strip, while too little torque can leave the job incomplete. But how do you use the torque settings on your cordless drill? Typically, cordless drills come with a torque adjustment ring located towards the front of the drill body. The ring’s numbers indicate the torque settings, with lower numbers representing less torque and higher numbers injecting more torque into the bit.
Operating a cordless drill at full power for most materials is generally unnecessary. Therefore, it’s crucial to adjust the drill’s torque appropriately, enabling you to perform tasks with ease and precision. In conclusion, the torque settings on cordless drills are an essential component of DIY enthusiasts and professionals’ toolboxes alike.
Proper use of the torque setting on a cordless drill can enhance your projects’ performance and avoid any potential damage or injuries. So, be sure to understand your drill’s torque settings and take advantage of them the next time you embark on a DIY project.
What are Torque Settings?
If you’re looking to get more precise with your drilling and screwing, learning how to use torque settings on your cordless drill is a must. Torque settings are essentially the power settings that determine how much force your drill puts into the screw or drill bit, letting you control the depth and tightness of your work. Different materials and sizes of screws and drill bits will require different torque settings, so it’s important to consult your drill’s manual to find the appropriate setting.
In general, lower torque settings are better for delicate materials like drywall, while higher settings are best for heavy-duty tasks like drilling into wood or metal. By adjusting your drill’s torque settings, you’ll not only be able to work more precisely but also extend the life of your drill’s motor by not overworking it. So the next time you’re working on a project with your cordless drill, take a moment to experiment with your torque settings and discover the benefits of more precise drilling.
Definition and Importance of Torque Settings
Torque settings refer to the level of tightness or looseness required for a particular bolt or screw. In mechanical terms, torque is the rotational force used to tighten or loosen a nut or bolt. It’s important to follow the recommended torque settings for a specific project to ensure safety, efficiency, and reliability.
Using the wrong amount of torque can cause bolts to loosen or break, leading to dangerous situations and costly repairs. On the other hand, over-torquing can strip screws or damage parts, causing further issues down the line. Thus, understanding torque settings is crucial in any mechanical project.
By using a torque wrench or other torque-specific tools, a precise torque level can be achieved, ensuring optimal results for your project.
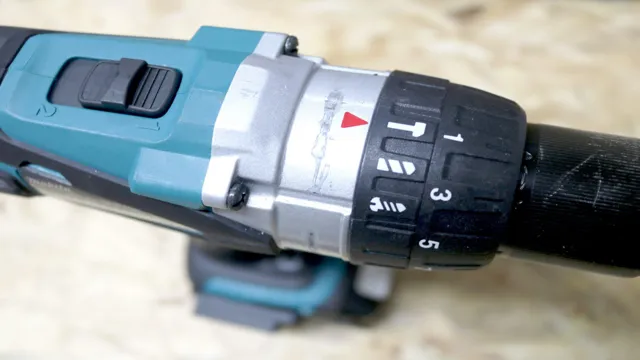
Step-by-Step Guide to Using Torque Settings
If you’re using a cordless drill, it’s important to know how to use torque settings. After all, these settings can help you achieve the right level of tightness on your screws without over-tightening or stripping them. First, consult your drill’s manual to find out what each torque setting means.
Typically, the higher the number, the tighter the screw will be. Once you’ve figured out which setting to use, it’s time to start drilling. Begin by screwing in the screw manually until it’s snug.
Then, switch the drill to the appropriate torque setting and start drilling. The drill will stop automatically once it reaches the desired torque, but if you notice the drill struggling, you may need to decrease the torque setting. Keep in mind that torque settings are not a one-size-fits-all solution, so you may need to adjust them depending on the size of your screw and the material you’re drilling into.
With a bit of trial and error, you’ll soon be a pro at using torque settings on your cordless drill.
Step 1: Determine the Desired Torque Setting
The first step in using torque settings is to determine the desired torque for your application. This is important because different tasks require different levels of torque, and using the wrong setting can cause damage or lead to an unsafe situation. To determine the correct torque setting, you’ll need to consult the specifications for your tool or the instructions for your task.
These will typically include a recommended torque range or setting based on the materials and components being used. Once you have this information, you can dial in the torque setting on your tool, making sure to set it accurately before beginning your task. Remember, using the correct torque is key to ensuring safe and effective work, so take the time to get it right.
You May Also Love:
Step 2: Adjust the Drill’s Torque Setting
When it comes to using torque settings on your drill, it’s important to know how to adjust it properly. After selecting the appropriate torque setting based on the type of material you’re working with, adjusting the torque setting can help prevent damage to both your drill and the material you’re drilling into. To adjust the torque setting, start by selecting the drill’s clutch.
Turn it to the desired torque level, which is usually indicated by a number or setting on the drill. If you’re unsure which setting to use, start with a low torque setting and gradually increase it until you reach the desired level of power. Remember, it’s important not to use too much torque, as this can cause the drill bit to break or damage the material you’re working with.
By adjusting the torque setting of your drill, you’ll be able to achieve precise and consistent results every time.
Step 3: Drill the Screw into Place
Using torque settings can be a bit intimidating for those who aren’t familiar with it, but it’s an important step in ensuring the proper installation and stability of screws. Once you’ve marked where you want the screw to go, and made a pilot hole, it’s time to actually drill it into place. But before you do, make sure to set your torque wrench to the appropriate level for your screw size and type.
If you’re not sure what level to use, consult the manufacturer’s instructions or do a quick search online. Once your wrench is properly set, securely attach it to the screw head, and slowly begin drilling. Make sure to keep the drill straight and steady, and stop once you feel the wrench tightening.
This will indicate that the screw has reached the appropriate torque level, and you can move on to the next one. By following these steps, you’ll not only install your screws correctly, but you’ll also prolong the lifespan of your drill and your tools.
Pro Tips for Using Torque Settings on Cordless Drills
Using torque settings on a cordless drill can greatly improve the efficiency and accuracy of your drilling tasks. Understanding how to use these settings can be a bit tricky at first, but it’s actually quite simple. Most cordless drills come with a variety of torque settings that can be adjusted to suit the needs of the job.
These settings allow you to control the amount of force applied by the drill, which is important when working with different types of materials. For example, drilling into wood requires less torque than drilling into metal. To use torque settings on your cordless drill, simply adjust the setting based on the material you are working with and the desired depth of the hole.
Remember to start with a low torque setting and gradually increase it as needed to avoid damaging the material or drill bit. With a little practice, you’ll be using torque settings like a pro in no time!
Tip 1: Use the Right Drill Bit for the Job
When it comes to using torque settings on cordless drills, there are a lot of things to consider if you want to get the job done right. One key tip is to use the right drill bit for the job at hand. This might seem like a no-brainer, but it’s easy to overlook in the heat of the moment.
Using the wrong drill bit can cause all sorts of problems, from damaging the material you’re drilling to injuring yourself or someone else. Before you start drilling, take the time to make sure you have the right bit for the job. Check the packaging or consult a drilling chart if you’re not sure.
When you’re ready to drill, make sure the bit is securely fastened and use a steady, even pressure to avoid damaging the material. By following these tips and paying attention to details like drill bit selection, you can help ensure that your cordless drill performs at its best and delivers the results you need every time. So, the next time you pick up your cordless drill, remember to choose the right bit, and take your time to get the job done right.
Tip 2: Use the Right Torque Setting for the Material
When it comes to using torque settings on your cordless drill, it is crucial to know the right setting for the material you are working with. Many people make the mistake of assuming that one size fits all, but this is far from the truth. The torque setting determines the amount of force your drill applies, and by using the wrong setting, you risk damaging your material or your drill, or both.
For example, if you are working with soft wood, you should use a lower torque setting to avoid overdriving the screws and splitting the wood. On the other hand, if you are working with hard wood, you will need to use a higher torque setting to ensure that the screws are driven in fully. By using the appropriate torque setting, you can ensure that you get the job done correctly and without any hiccups.
So, take the time to familiarize yourself with the torque settings on your drill to ensure that you are using the right one for the job at hand.
Conclusion
In summary, using torque settings on a cordless drill is like having a secret weapon in your toolbox. By adjusting the settings to match the task at hand, you can avoid stripping screws, damaging materials, and just generally frustrating the heck out of yourself. It’s like the drill knows exactly how much power to put behind each turn, and you get to sit back and watch the magic happen.
So, don’t be afraid to experiment with different settings and feel confident in your ability to handle any project that comes your way. With torque settings on your cordless drill, you’ll be a lean, mean, DIY machine.”
FAQs
What is torque setting on a cordless drill?
Torque setting on a cordless drill determines the amount of force the drill applies to the material being drilled. It helps to adjust the power and speed of the drill.
How do I set torque on my cordless drill?
To set torque on your cordless drill, locate the torque adjustment ring on the drill’s chuck. Twist the ring to adjust the torque settings. The higher the number, the more torque it will provide.
What is the right torque setting for drilling through wood?
The right torque setting for drilling through wood is between 10 to 15. It will prevent the drill from splitting or damaging the wood.
Can I use the same torque setting for all types of material when drilling?
No, it is not recommended to use the same torque setting for all types of material. Different materials require different torque settings. Always refer to the material’s specification or consult a professional.
How do I know if I have set the right torque for the material I am drilling?
You can tell if you have set the right torque for the material you are drilling by observing the drill’s performance. If the drill is struggling or the material is being damaged, you may need to adjust the torque setting.
What happens if I exceed the recommended torque setting?
If you exceed the recommended torque setting on your cordless drill, you risk damaging both the drill and the material being drilled.
How often should I adjust the torque setting on my cordless drill?
You should adjust the torque setting on your cordless drill every time you switch to a different material or if you encounter resistance while drilling.

