Why Sprinkler System Won’t Turn On and How to Fix It: A Comprehensive Guide
Sprinkler systems are a convenient investment for any homeowner. They create lush, healthy yards with minimal effort on your part. However, nothing is quite as frustrating as a sprinkler system that won’t turn on.
Maybe you have an event coming up, and your sprouts need watering, or perhaps it’s been weeks since you’ve had a break in the rain, and things are starting to look a little dry out there. Whatever the case may be, there are several reasons your sprinkler system may refuse to start up. Lucky for you, troubleshooting these issues and getting your system up and running again is generally simple (and often cheaper than calling in a professional).
In this article, we’ll walk you through the steps to get your sprinkler system working correctly and help you keep your yard picture-perfect.
Check Power Supply
If your sprinkler system won’t turn on, one of the first things you should check is the power supply. Ensure that the electrical outlet the system is connected to is working properly by plugging in another device. If the outlet seems fine, check the circuit breaker to make sure it hasn’t tripped.
Reset it if necessary. Also, check for any cuts or damage to the power cord. If there’s damage, replace the cord.
Sometimes, power surges or lightning strikes can also damage the system’s electrical components. In such cases, it’s best to call a professional to diagnose and fix the issue. With a properly functioning power supply, your sprinkler system should turn on with ease.
Ensure outlet is working and power source is on
When you’re trying to use an electrical device, there’s nothing more frustrating than plugging it in and finding out that it won’t turn on. Before you go out and buy a new device, though, make sure that the power supply is working. Check the outlet that you’re plugging into by plugging in a different device and seeing if it turns on.
If it doesn’t, there may be an issue with the outlet itself. Make sure that the circuit breaker for that outlet isn’t tripped, and if it is, reset it and try to plug in your device again. If the outlet seems to be working, check the power cord for your device to make sure that it’s plugged in all the way on both ends.
Double check that the device is turned on, too – it’s easy to forget the basics when you’re troubleshooting. By taking these steps, you can be sure that you’ve done everything you can to ensure that your device is actually receiving power and that the issue isn’t something else entirely.
Inspect Control Box
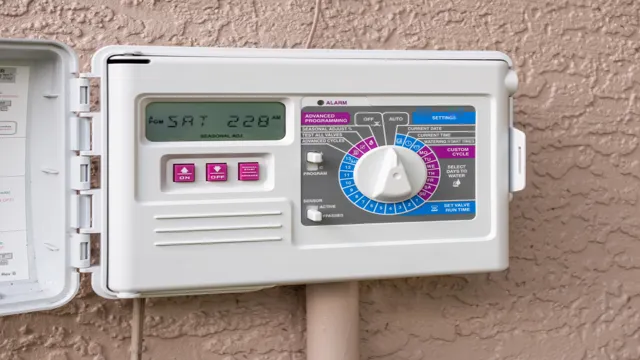
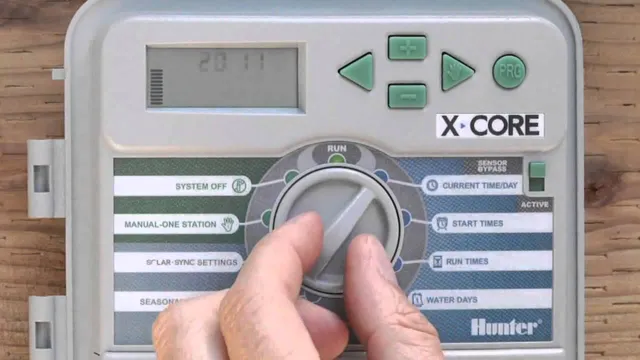
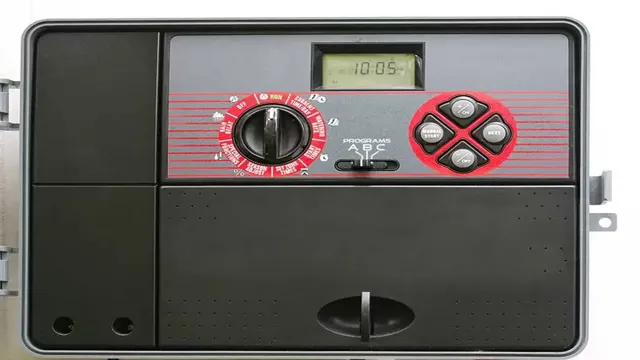
If you’re experiencing trouble with your sprinkler system not turning on, one area to inspect is the control box. Start by checking if it has power and the breaker hasn’t tripped. Next, inspect the wiring connections to ensure they’re tight and properly connected.
Loose connections can cause electrical shorts and the system won’t turn on. Additionally, check the fuse to make sure it hasn’t blown. If you find the fuse has blown, replace it and see if the system turns on.
The control box is a crucial component to the sprinkler system, so it’s essential to troubleshoot this area if you have issues.
Look for any blown fuses or tripped breakers
When it comes to troubleshooting your electrical system, looking for any blown fuses or tripped breakers should be your first step. These safety devices are installed to prevent damage to your electrical components, and they can be easily replaced. Begin by locating your control box, which is usually found near your electrical meter.
Open the panel and carefully inspect each fuse and breaker for any signs of damage or wear. A blown fuse will have a broken filament, while a tripped breaker will be in the “off” position. If you find any issues, replace the fuse or reset the breaker before testing your system again.
Always use the correct amperage fuse or breaker for your equipment to avoid overheating and possible electrical fires. By regularly inspecting your control box, you can ensure that your electrical system is functioning properly and safely.
Inspect Wiring
If your sprinkler system won’t turn on, one of the first things you should inspect is the wiring. Faulty or damaged wiring can prevent the system from receiving power and cause it to malfunction. Start by checking the power source and ensuring that the circuit breaker is not tripped.
If the power source is working correctly, inspect the wiring for any signs of damage, such as frayed or broken wires, loose connections, or corroded areas. You may also want to check the control panel and timer to ensure that they are properly programmed and functioning. By inspecting the wiring, you can identify and address any issues that may be preventing your sprinkler system from turning on and keep your lawn looking lush and healthy all season long.
Check for any damaged or disconnected wires
When it comes to troubleshooting electrical problems, one of the first things you should check is the wiring. Damaged or disconnected wires can cause a variety of issues, from minor glitches to serious safety hazards. So, it’s essential to inspect the wiring thoroughly.
Start by visually inspecting all visible wires, looking for any signs of fraying, melting, or other damage. If you notice any problems, you’ll need to replace the affected wires right away. Additionally, it’s crucial to inspect all connectors and terminals, ensuring that they are tight, clean, and secure.
Loose or corroded connections can cause electrical arcing, which can lead to fires or serious equipment damage. By carefully inspecting your wiring, you can identify and address any issues before they become major problems. So, always take the time to inspect your wiring carefully to ensure a safe and functional electrical system.
Inspect Solenoid Valve
If your sprinkler system won’t turn on, one potential culprit may be a malfunctioning solenoid valve. The solenoid valve controls the flow of water to the sprinkler heads and is often located near the manifold. To inspect the solenoid valve, first turn off the water to the system and remove the valve cover by unscrewing it counterclockwise.
Check for any visible damage or debris clogging the valve. If the valve appears to be in good condition, use a multimeter to test the solenoid for continuity. If there is no continuity, the solenoid may need to be replaced.
If the solenoid passes the continuity test, check the wiring connections to ensure they are secure and free of corrosion. If everything checks out with the solenoid valve, it may be time to consult a professional to diagnose and repair any other potential issues with your sprinkler system.
See if there is any debris obstructing the valve or if the valve needs to be replaced
When you notice that your solenoid valve is experiencing some issues, it’s essential to inspect it thoroughly to determine the root cause of the problem. One of the first things you can do to inspect the solenoid valve is to check if there is any debris obstructing it. Dirt and other particles can build up in the valve and affect its performance.
Using a high-pressure air blower or a soft brush, clean the valve’s surface and remove any obstructions carefully. If you cleaned out any obstructions and the valve is still not working correctly, it may be time to replace the valve entirely. Damaged or worn-out solenoid valves can cause significant problems and even lead to system failure.
Replacing the valve can seem like a daunting task, but it’s a simple fix that can save you from costly repairs down the line. Remember, regularly inspecting and cleaning your solenoid valves can help you avoid any potential issues and keep your system running smoothly.
Check Rain Sensor
If your sprinkler system won’t turn on, one possible culprit could be a malfunctioning rain sensor. A rain sensor helps prevent your sprinkler system from turning on during wet weather, conserving water and preventing overwatering. If the sensor is stuck or damaged, it might be triggering the sprinkler system to remain off even when it’s dry out.
You can check your rain sensor by turning off the power to your sprinkler system and looking for a small, round device with wires leading to it. Make sure it’s clean, undamaged, and doesn’t have any debris or spider webs blocking it. If it looks fine, you can test it by using a cup of water to simulate rain and see if the sprinkler system turns on or off accordingly.
If the sensor still seems to be causing issues, you might need to replace it or call in a professional to diagnose the problem.
Make sure the sensor is not active or damaged
When it comes to checking your rain sensor, you want to make sure it’s not active or damaged. A rain sensor is a device that detects precipitation and sends signals to your sprinkler controller to shut down the system when it’s raining. If you notice your sprinklers are still running during a rainstorm, it could mean that your rain sensor is not working properly.
To check the sensor, first, make sure it’s not activated. This can happen if someone accidentally pressed the manual override button or if the sensor is stuck in the on position due to debris or insects. Next, check for any physical damage or wear and tear.
Look for cracks or breaks in the plastic cover or any exposed wires. If you do notice damage, it’s best to replace the sensor as soon as possible to avoid further issues. Remember, a properly functioning rain sensor can save you time, money, and conserve water in the long run.
Call a Professional
If you’ve tried everything to get your sprinkler system to turn on but it just won’t budge, it may be time to call a professional. There are many potential reasons why your sprinkler system won’t turn on, and it’s important to have an expert diagnose the issue to avoid causing further damage. Some common causes of a malfunctioning sprinkler system include faulty wiring, broken valves, clogged water lines, or a damaged controller.
Attempting to fix any of these issues without the proper knowledge and experience could be dangerous and costly. A professional sprinkler technician can quickly identify the problem, provide a solution, and ensure your system is up and running efficiently once again. Don’t let a malfunctioning sprinkler system ruin your lawn, trust the experts to handle the job and ensure your system’s longevity.
If all else fails, it may be time to call in a professional sprinkler technician for assistance
If you’ve tried all of the DIY fixes for your sprinkler issues and you’re still having problems, it’s time to call in a professional. A qualified sprinkler technician has the knowledge and expertise to diagnose and repair complex issues that are beyond the scope of the average homeowner. They can assess the condition of your sprinkler system, identify the source of any problems, and recommend the best course of action to restore proper function.
Additionally, a professional technician can help you avoid potentially costly mistakes that may arise from attempting repairs on your own. Whether you’re dealing with faulty valves, leaks, clogs, or other issues, a sprinkler technician can provide you with the peace of mind and confidence you need to know that your system is operating at its best. So if you’re struggling with your sprinkler system, don’t hesitate – call a professional today and get your lawn looking lush and healthy once again.
Conclusion
It seems that your sprinkler system is feeling a bit shy and just doesn’t want to come out and play. Perhaps it’s afraid of getting wet, or maybe it’s just waiting for the right moment to make a grand entrance. Whatever the reason may be, with a little bit of troubleshooting and some TLC, your sprinkler system will be up and running in no time.
“
FAQs
How do I troubleshoot a sprinkler system that won’t turn on?
First, check to make sure the water supply to the sprinkler system is turned on. Then, check for any clogged nozzles or damaged sprinkler heads that may be preventing the system from turning on. If those solutions don’t work, it may be an issue with the control panel or wiring of the system.
Can weather conditions affect the ability of a sprinkler system to turn on?
Yes, extreme heat or cold can cause issues with the valves and pressure regulators in a sprinkler system, which can prevent it from turning on.
How often should I check my sprinkler system to prevent issues with it turning on?
It’s recommended to check your sprinkler system at least once a month to ensure everything is functioning properly and to catch any potential issues before they become major problems.
What are some common causes of a sprinkler system not turning on?
Common causes can include faulty wiring, a blown fuse, a damaged control panel, low water pressure, or clogged nozzles.
How do I check the wiring of my sprinkler system if it won’t turn on?
If you suspect an issue with the wiring, use a voltmeter to check for any broken or loose connections between the control panel and the valves of the system.
Can a power outage affect the ability of a sprinkler system to turn on?
Yes, a power outage can prevent a sprinkler system from turning on if it runs on electricity. However, some systems have battery backups to prevent this issue.
How do I know if my sprinkler system needs to be replaced if it won’t turn on?
If you’ve tried all troubleshooting methods and the system still won’t turn on, it may be time for a replacement. Additionally, if your system is more than 10 years old, it may be nearing the end of its lifespan.

